Get Started with Decision Tables
Learning Objectives
After completing this unit, you’ll be able to:
- Describe decision tables.
- Create a decision table.
- Test the decision table using Salesforce flow.
- Group a business rule and sort the output.
Meet Decision Tables
Decision tables are advanced lookup tables that can use multiple inputs and return multiple outputs for records in your Salesforce org to create complex business rules. You can create decision tables in Business Rules Engine and use them in flows or expression sets. A decision table can read up to 1 million rows. It uses standard objects, custom objects, or custom metadata types to create business rules and provide outcomes based on these rules. The object or the custom metadata type contains fields that are used as inputs and outputs in the decision table.
Find the Flight
Consider an example of a flight aggregator website where you want to check the price and air-miles points for all the flights between China and Australia. To get this information, you provide the required input parameters such as Source and Destination. You can additionally use any of these parameters that the aggregator provides on its web page.
- Airline Name
- Class
- Airline Manufacturer
- AirMile Points
- Price
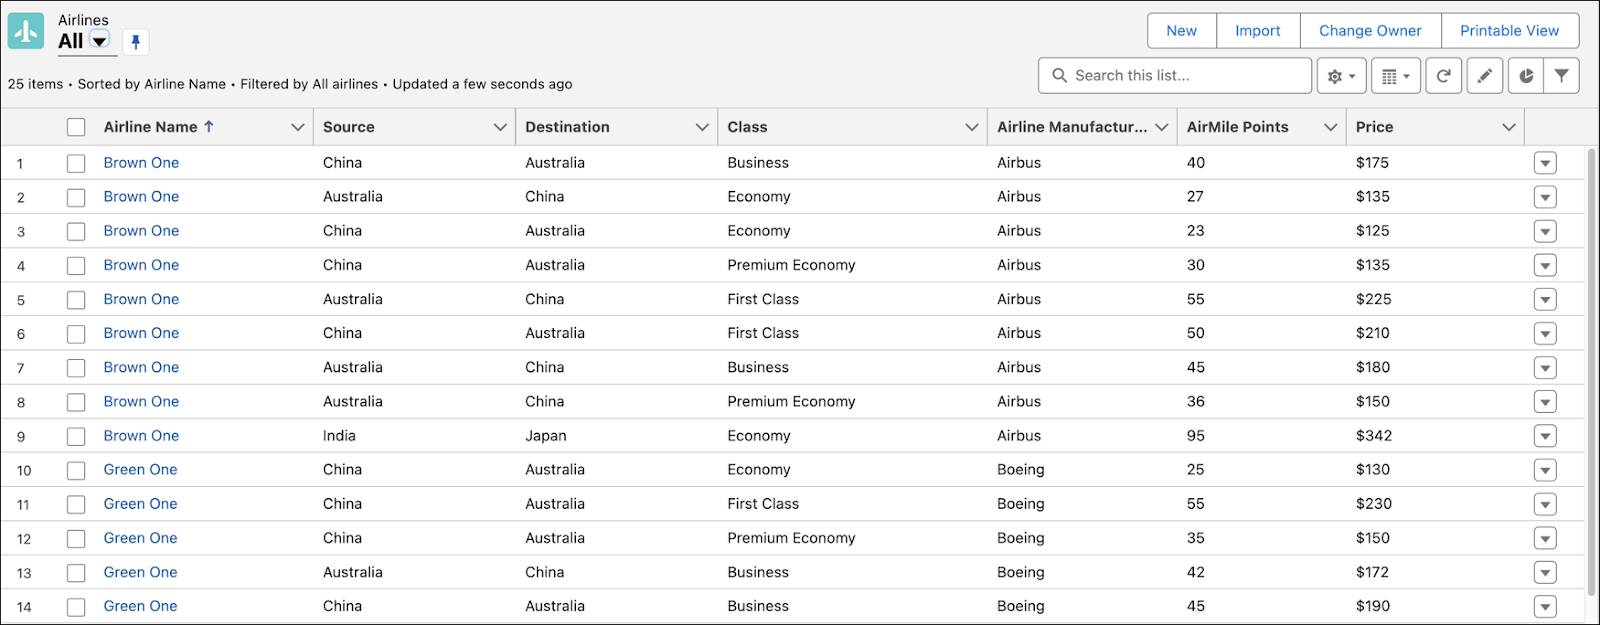
We’ve created an object called Airlines with these fields in your Developer Edition org. We’ve also added some sample data that you can use to create decision tables and test them.
Create a Decision Table
Now that you’ve captured the requirements, it’s time to create the decision table. Here’s how you do it.
- Click
 , then find and select Business Rules Engine.
- Click
 and then select Lookup Tables.
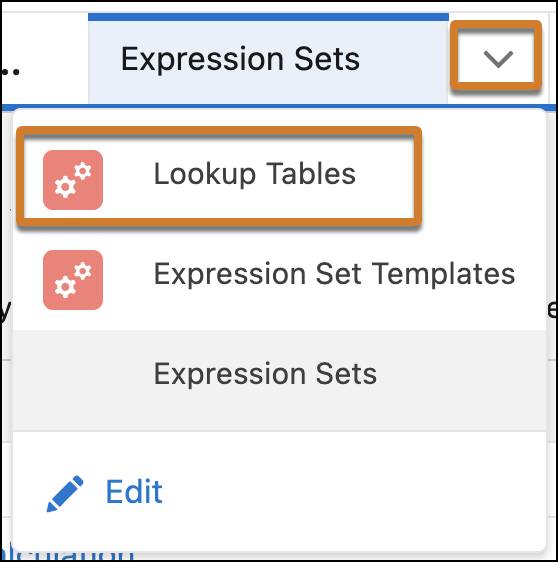
- Click New.
- Select Decision Table and then click Next.
- On the New Decision Table page, specify these details.
- Name:
Flight Details
- API Name: This field auto-populates with
Flight_Details
- Application Usage: Default
- Decision Table Type: Medium Volume

- Name:
- Click Save & Next.
Add Conditions and Results
Next, choose the source object and source object fields as conditions. For this example, select Source and Destination fields as required Conditions. For Results, select Airline Name, Class, AirMile Points, and Price.
- On the Condition & Results step, for Source Object, find and select Airline.
- In the Conditions section, specify these details.
- Source Object Field: Source__c
- Click + Add Condition
- Source Object Field: Destination__c
- Source Object Field: Source__c
- In the Results section, click + Add Results thrice and specify these values for the four source object fields..
-
AirMile_Points__c
-
Class__c
-
Name
-
Price__c
-
AirMile_Points__c
- Click Save & Next.
- On the Behaviours step, click Save & Next.
- On the Preview & Save step, click Finish.
- Click Activate.

If you want to learn more about the operators and their functions, refer to Supported Data Type and Operators.
Get the Output
Your decision table with the selected conditions and results is ready. You can now use the decision table in a Salesforce Flow to get the flight details based on the input criteria. We’ve created sample data and configured a Salesforce flow with custom screens for you. Here’s how you get the flight details.
- From Setup, in the Quick Find box, enter
Flows, and then select Flows.
- Find and select Get Flight.
- Click Run.
- For Source, select China.
- For Destination, select Australia.
- Click Next.
All the flights between China and Australia are listed. Check out the Airline Name, Class, AirMile Points, and Price details that you selected for these fields, as output in the Flight Details decision table.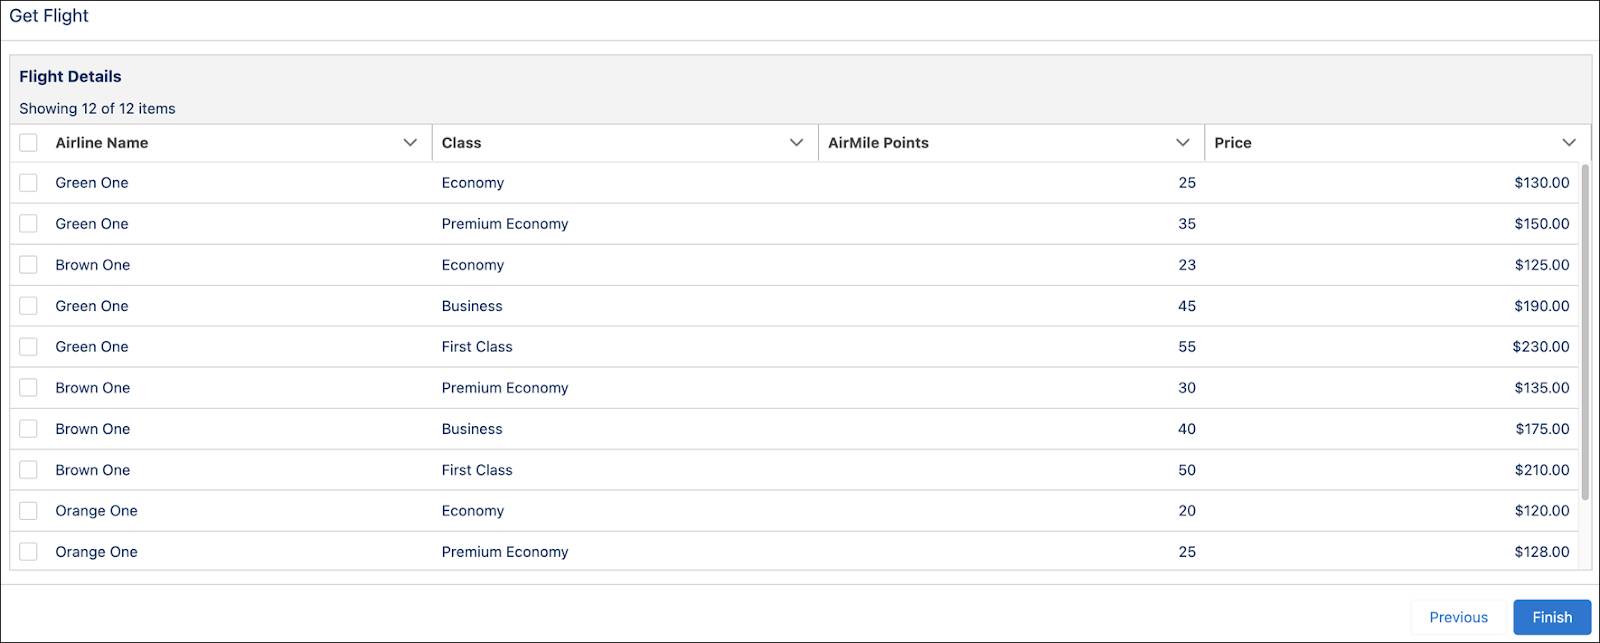
Group a Business Rule and Sort the Output
If you have a frequently used condition source object field, you can group your business rules using a group key to reduce the number of rows to process. In the flights example, you create a decision table and group it using the Class condition field. As a result, the decision table splits the table into multiple groups based on the Class field values, such as Economy, Premium Economy, Business, and First Class. Now, when you perform a lookup by specifying a class such as Economy, the lookup considers only the table group associated with that class. When you specify a group key and save your decision table, the grouping process happens in design time and isn’t visible in the decision table UI.
You can also specify a sort order for the outcomes based on the values of either a condition or a result field. With sort order, you can display the results in ascending or descending order based on the sort order field. In this example, you sort the flight results in ascending order using the Price field.
- Create a decision table using these details.
- Name:
Flight Group
- API Name: This field auto-populates with
Flight_Group
- Application Usage: Default
- Decision Table Type: Low Volume
- Name:
- Click Save & Next.
- On the Condition & Results step, for Source Object, select Airline.
- In the Conditions section, specify these details.
- Source Object Field: Name
- Click + Add Condition
- Source Object Field: Class__c
- Source Object Field: Name
- To group your business rules, click View Group Condition Settings.
- On the Group Condition Settings panel, click Add Group Key.
- For Group Key, select Class__c.
- Click Done and close the Group Condition Settings panel.
- In the Results section, click + Add Results twice, and then specify these values for the three Source Object Fields.
-
Destination__c
-
Price__c
-
Source__c
-
Destination__c
- Click Save & Next.
- On the Behaviours step, for Sort By, select Price__c.
- Click Save & Next.
- On the Preview & Save step, click Finish.
- Click Activate.
Now, use the Flight Group decision table in a Salesforce flow to see if the results are sorted as expected. We’ve already configured a flow in your Developer Edition org with Airline Name as Green One and Class as Economy.
Here’s how you check the outcome of the flow.
- From Setup, in the Quick Find box, enter
Flows, and then select Flows.
- Find and select Get Flight Group.
- Click Run.
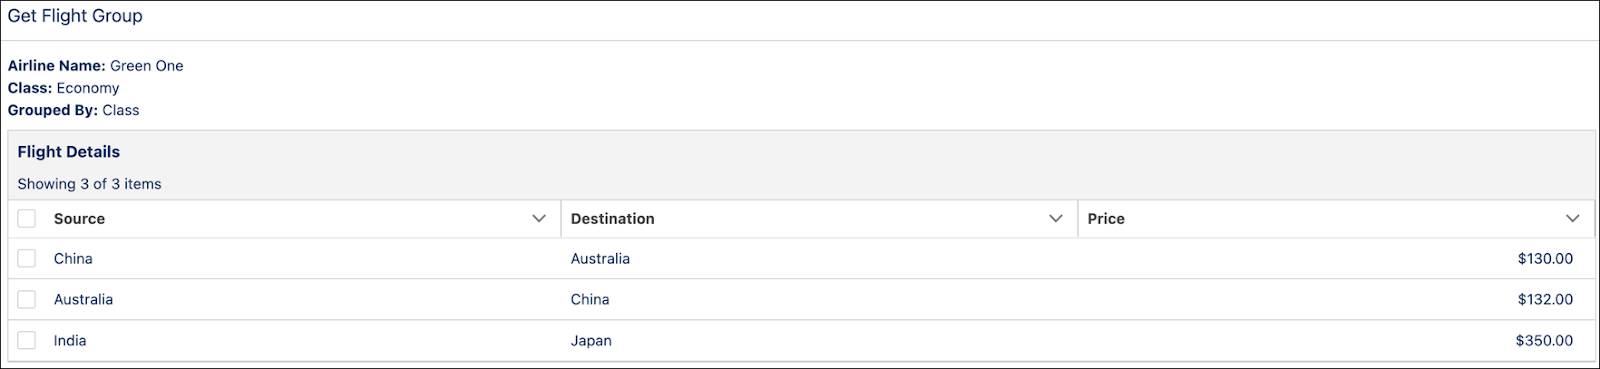
Notice that the table lists the flights by Green One airline with the class as Economy. Also, the results are listed in ascending order, from lowest to highest, based on the price.
In this unit, you learned how to create a decision table and test it using Salesforce flow. You also learned how to group a business rule and sort the decision table output. In the next unit, you learn how to aggregate condition input fields and transform results in decision tables. You also learn how to create a decision table using multiple objects as data sources.