Create a Decomposition Relationship
Learning Objectives
After completing this unit, you’ll be able to:
- Describe the end-to-end flow of a decomposition relationship.
- Create a decomposition relationship.
Explore the Decomposition Relationship Process Flow
Greg Cappelli, the fulfillment designer at Infiwave, wants the SKIP resources to get firsthand experience working on order decomposition. Follow along as they do the design-time configuration, and then create a decomposition relationship.
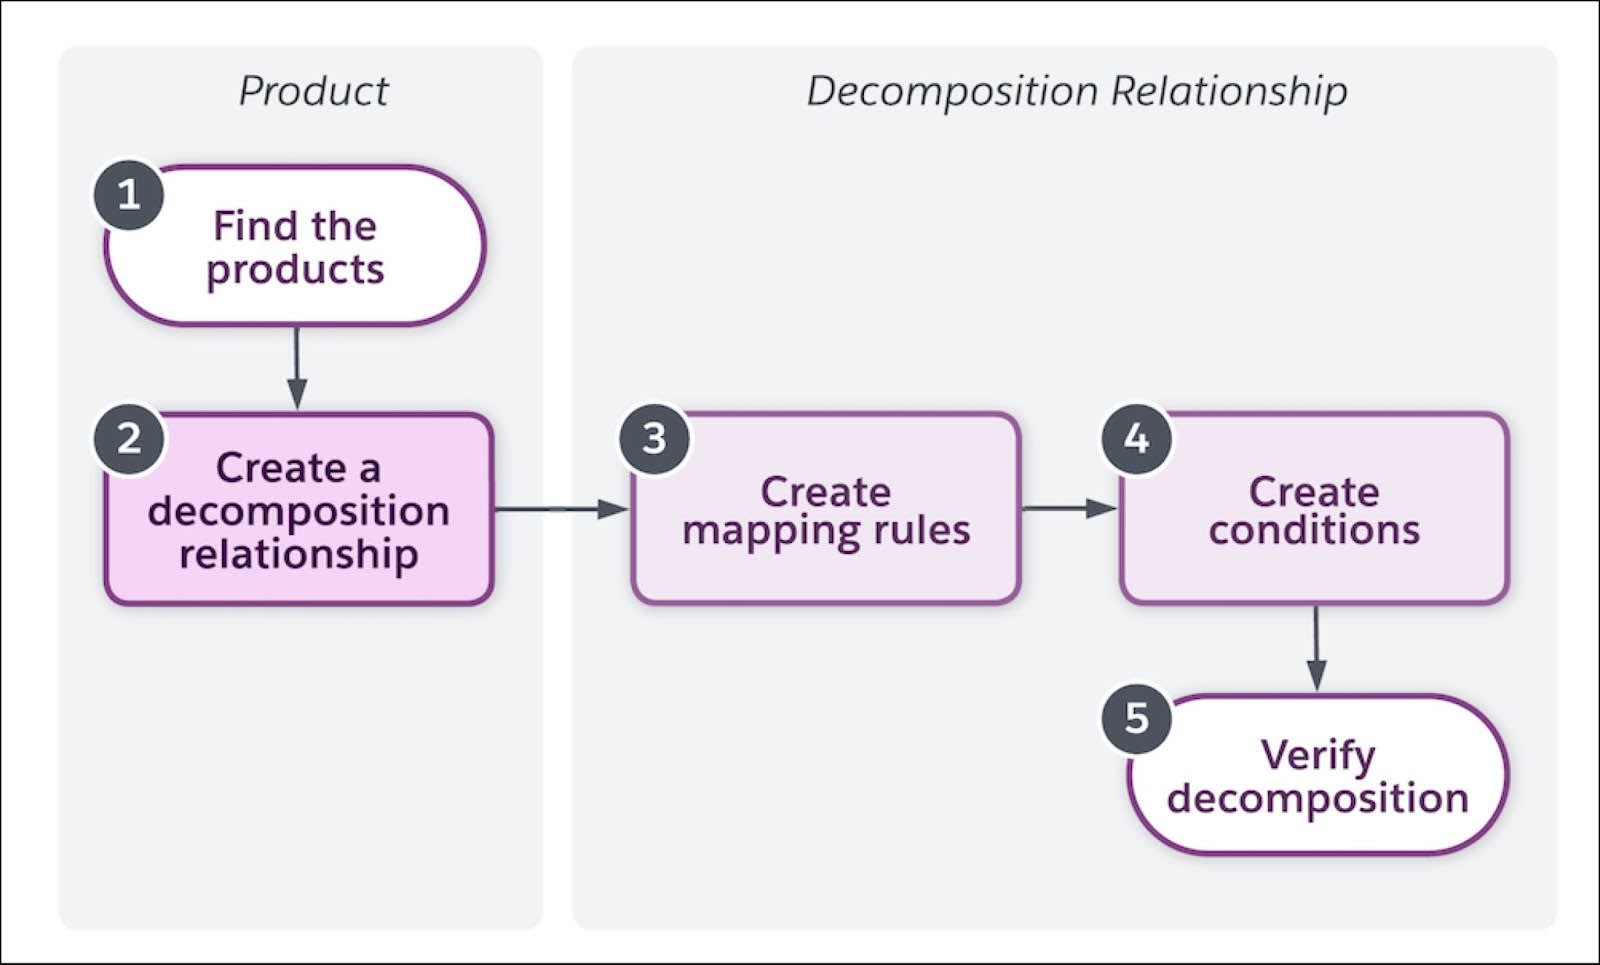
This diagram outlines the steps the SKIP resources follow to create and configure a decomposition relationship.

-
Find a commercial or technical product: Find the correct product in the Industries Shared Catalog. You can find a commercial product and create a decomposition relationship with its corresponding technical product, or find a technical product and create a relationship with its corresponding commercial product. Either approach is fine, but the perspectives differ. While the source product data can be a field or an attribute, the destination technical product data must be an attribute.
-
Create a decomposition relationship: Create a new decomposition relationship in the product configurations itself. Depending on your decomposition model, you can have multiple decomposition relationships for a source or destination product in the Industries Shared Catalog.
-
Create mapping rules: Create mapping rules in the decomposition relationship. Mapping rules define the information passed from the source product to the destination product and then to the downstream systems. The source product data can be a field or an attribute, but the destination product data must be stored as an attribute.
-
Create conditions for the relationship: This is an optional step. Configure the condition rule in the decomposition relationship, and the rule determines if the relationship triggers or not.
Conditions are optional, and if omitted, the decomposition relationship triggers every time. Conditions can be simple, such as if the phone color is black or if the broadband speed exceeds 200Mbps. Conditions can also be complex, such as including boolean logic to perform logical AND or logical OR operations. For example, if the home broadband package is Silver OR Gold, AND self-installation is False. The possibilities are nearly endless.
-
Verify the decomposition: Now you are all set to verify the decomposition. Here’s how the flow progresses.
- In Industries CPQ:
- Create a test order.
- Select a price list.
- Use the CPQ Cart to add the commercial product to the order. The commercial product is the source product of the decomposition relationship you just configured.
- Submit the order. This step submits the order from Industries CPQ to Industries OM.
- Create a test order.
- In Industries OM:
- Decompose the order.
- View the decomposition results.
- Decompose the order.
- In Industries CPQ:
Create a Decomposition Relationship
The SKIP resources now have a clear understanding of the decomposition process flow. Next, Greg wants them to understand how to create a decomposition relationship. At this stage, refresh your memory of the various Decomposition Relationship Types you can configure using Industries OM.
At Infiwave, Greg defines a one-to-one decomposition relationship between the commercial product, Home Hub Modem, and its corresponding technical product, Home Hub 2000 CFS.
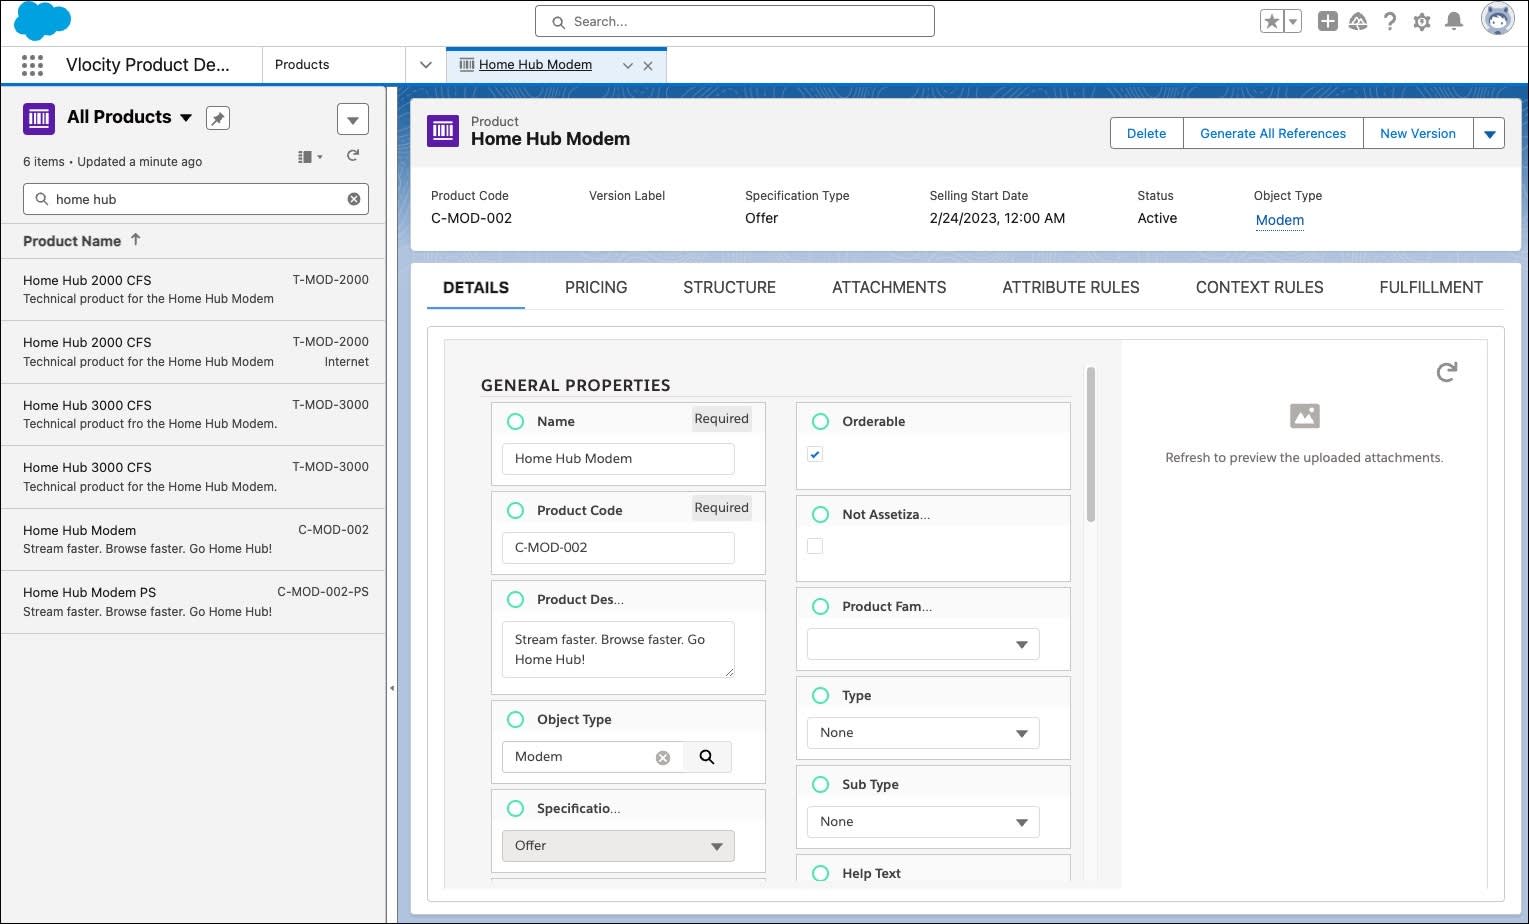
- From the App Launcher, find and select Vlocity Product Designer.
- Under All Products, find and select Home Hub Modem.

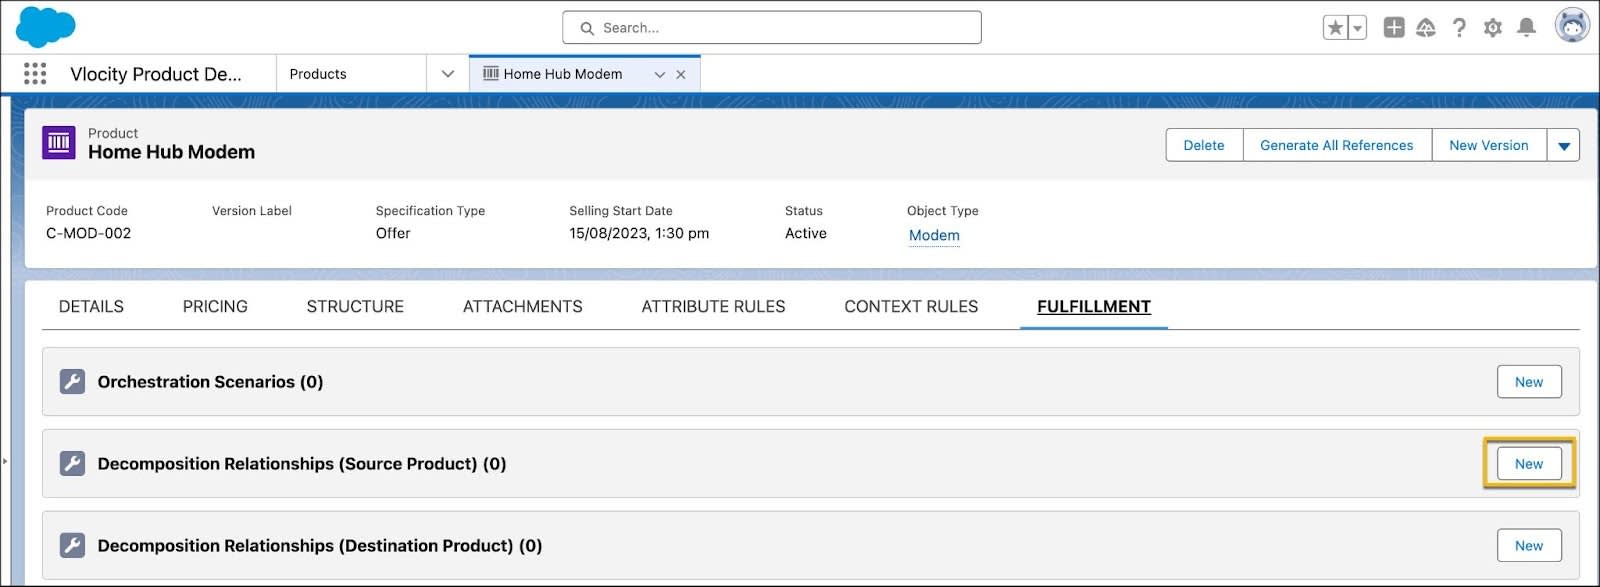
- On the Home Hub Modem product page, click the Fulfillment tab.
- In the Decomposition Relationships (Source Product) section, click New.

- In the New Decomposition Relationship page, provide these details.
- Decomposition Relation Name:
Home Hub Modem > Home Hub 2000 CFS - Destination (Product): Home Hub 2000 CFS
- Decomposition Relation Name:
- Save your changes.
Success! You’ve created the decomposition relationship. Review its details on the Home Hub Modem product page.
Looking Ahead
In this unit, you got familiar with the process flow to create a decomposition relationship. You also learned how to create a decomposition relationship. In the next unit, follow along as Greg configures conditions and mapping rules for the decomposition relationship he’s just created.
