Share and Publish Your Data
Lesson Objectives
After completing this unit, you'll be able to:
- Describe the file types in Tableau that you can share with others.
- Publish data to Tableau Server or Tableau Cloud.
- Share your data using Tableau Public.
You’ve done great work to learn that Burlington, NC, needs some love. With Tableau, you can take the next step and share your work easily.
Learn Tableau File Types
When it’s time to share, the first decision for you to make is which file type to use. You can share data using the following file types.
Tableau file type |
Description |
|---|---|
Data Source (.tds) |
Tableau data source files have the .tds file extension. Data source files are shortcuts for quickly connecting to the original data that you use often. Data source files do not contain the actual data but rather the information necessary to connect to the actual data as well as any modifications you've made on top of the actual data such as changing default properties, creating calculated fields, adding groups, and so on. |
Packaged Data Source (.tdsx) |
Tableau packaged data source files have the .tdsx file extension. A packaged data source is a zip file that contains the data source file (.tds) described above as well as any local file data such as extract files (.hyper or .tde), text files, Excel files, Access files, and local cube files. Use this format to create a single file that you can then share with others who may not have access to the original data stored locally on your computer. |
Workbooks (.twb) |
Tableau workbook files have the .twb file extension. Workbooks hold one or more worksheets, plus zero or more dashboards and stories. |
Packaged workbooks (.twbx) |
Tableau packaged workbook files are single zip files that contain a workbook along with any supporting local file data and background images. This format is the best way to package your work for sharing with others who don’t have access to the original data. |
Extract (.hyper or .tde) |
Depending on the version the extract was created in, Tableau extract files can have either the .hyper or .tde file extension. Extract files are a local copy of a subset or entire data set that you can use to share data with others, when you need to work offline, and improve performance. |
Let’s review what you just learned. You won’t be tested on this at the end, but it’s a great way to ensure you understand the essentials of file types in Tableau.
Share Your Data
Now that you have determined what to share with your teammates, you are ready to share your findings. You have two options.
- If you or your company uses Tableau Server, and you are familiar with what permissions are assigned to you, use Tableau Server/Tableau Cloud.
- If you or your company does not use Tableau Server, or if you want a free, alternative sharing option, use Tableau Public.
Publish to Tableau Server/Tableau Cloud
Your story was a hit. You're going to publish it to Tableau Server/Tableau Cloud so that your team can view it online.
- Launch the Trailhead Simulator.
- Click Publish to Tableau Server/Tableau Cloud.
- Click Begin.
- The story you want to publish is open. Click the Server menu, and select Publish Workbook.
- Here, you can specify the server name or URL in the Server box. Notice that for Tableau Cloud, you have a shortcut. Click the Tableau Cloud link to go directly to the sign-in prompt.
- Here in the Email address and Password fields, you specify your credentials. Your sign-in credentials have already been entered. Click the Sign In button.
- Now select the site where you want to publish your work. Demo Data is already selected. Click OK to continue.
- In the Name field, enter
Improve Profits in the South - Then press enter (PC) or return (Mac).
- In the Description field, enter
Take a look at the story I built in Tableau Desktop!and then press enter (PC) or return (Mac).
- Under Sheets, click Edit to see all sheets. You can choose to publish all sheets or specific sheets by selecting or deselecting them.
- Click anywhere to continue.
- You only want to publish Improve Profits in the South. All the other sheets are deselected for you. Click anywhere to continue.
- Click Publish. Your work is now published to Tableau Cloud.
- Click Next Exercise to continue to the next exercise.
Send a Link to Your Work
It’s time to alert at least your teammates so that they can interact with your story online.
- Ensure you’re in the Send a Link to Your Work simulation. If not, launch the Trailhead Simulator and click Send a Link to Your Work.
- Click Begin.
- In Tableau Cloud, when you navigate to the Improve Profits in the South story that you published, you will see it on the home page.
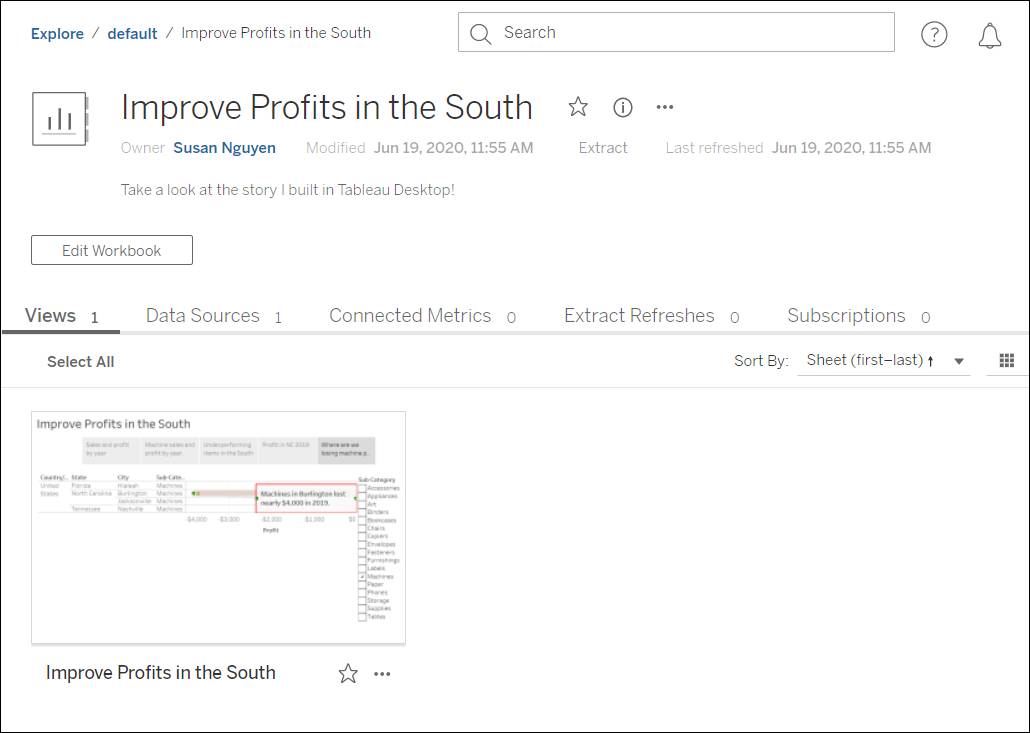
- If you had published additional sheets from your workbook, they would be listed alongside Improve Profits in the South. Click Improve Profits in the South.
 Awesome! This is your interactive, embedded story.
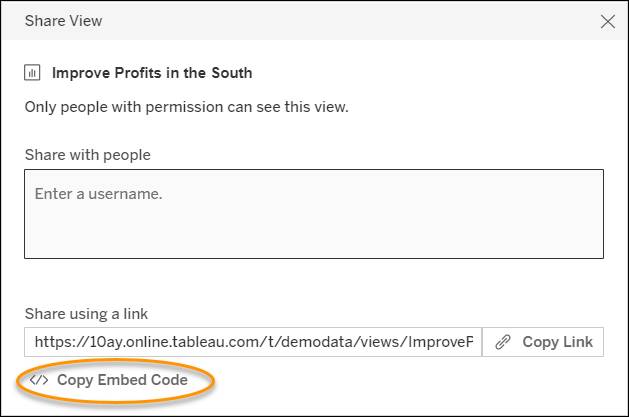
- From the menu, select Share.

- You've finished this part of the simulation by navigating to the share link screen. But notice that there are several ways to share your story.
-
Embed on your website: Copy the embed code and paste it in your web page HTML.
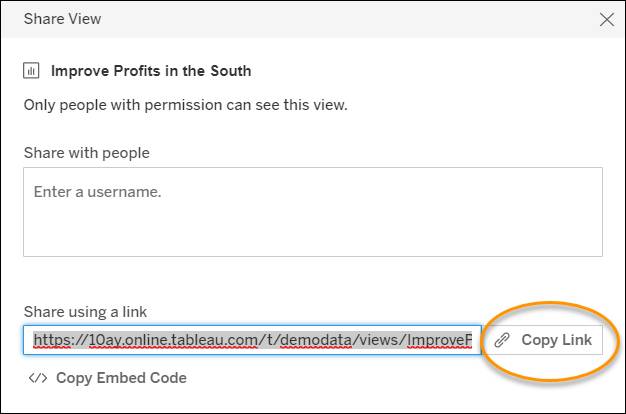
-
Send a link: Copy the URL ink and send to your colleagues.
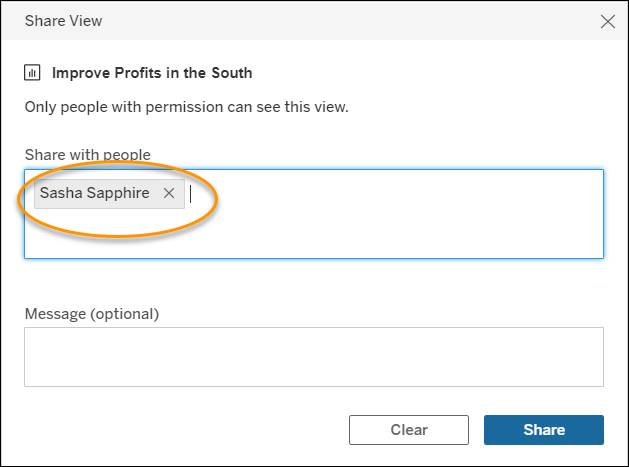
-
Send an email using your default email client: Click the email icon.
- Click Next Exercise to continue to the next exercise.
Publish to Tableau Public
Your story was a hit. You’re going to publish it to Tableau Public so that your team can view it online.
When you publish to Tableau Public, as the name suggests, these views are publicly accessible. This means that you share your views and your underlying data with anyone with access to the internet. When sharing confidential information, always use Tableau Server or Tableau Cloud.
Tableau Public does not support live data connections, which is why you must create a data extract before publishing. This has already been done for you. To learn how to create an extract, see the Extract Your Data article in the Resources section.
- Ensure you’re in the Publish to Tableau Public simulation. If not, launch the Trailhead Simulator and click Publish to Tableau Public.
- Click Begin.
- In the view, click the Server menu, and then select Tableau Public.
- Next select Save to Tableau Public As.
- You need to specify your Tableau Public credentials in the dialog box. Click anywhere to continue.
Note: If you don't have a Tableau Public profile, you create one through the Sign In popup.
- Tableau Public credentials have been entered for you. Click the Sign In button.
- Now select the site where you want to publish your work. For this exercise, Demo Data is already selected. Click OK to continue.
- In the Workbook Title box, enter the name of the workbook as
Improve Profits in the South - Then press enter (PC) or return (Mac).
- Click Save. Your browser now opens with your embedded story.
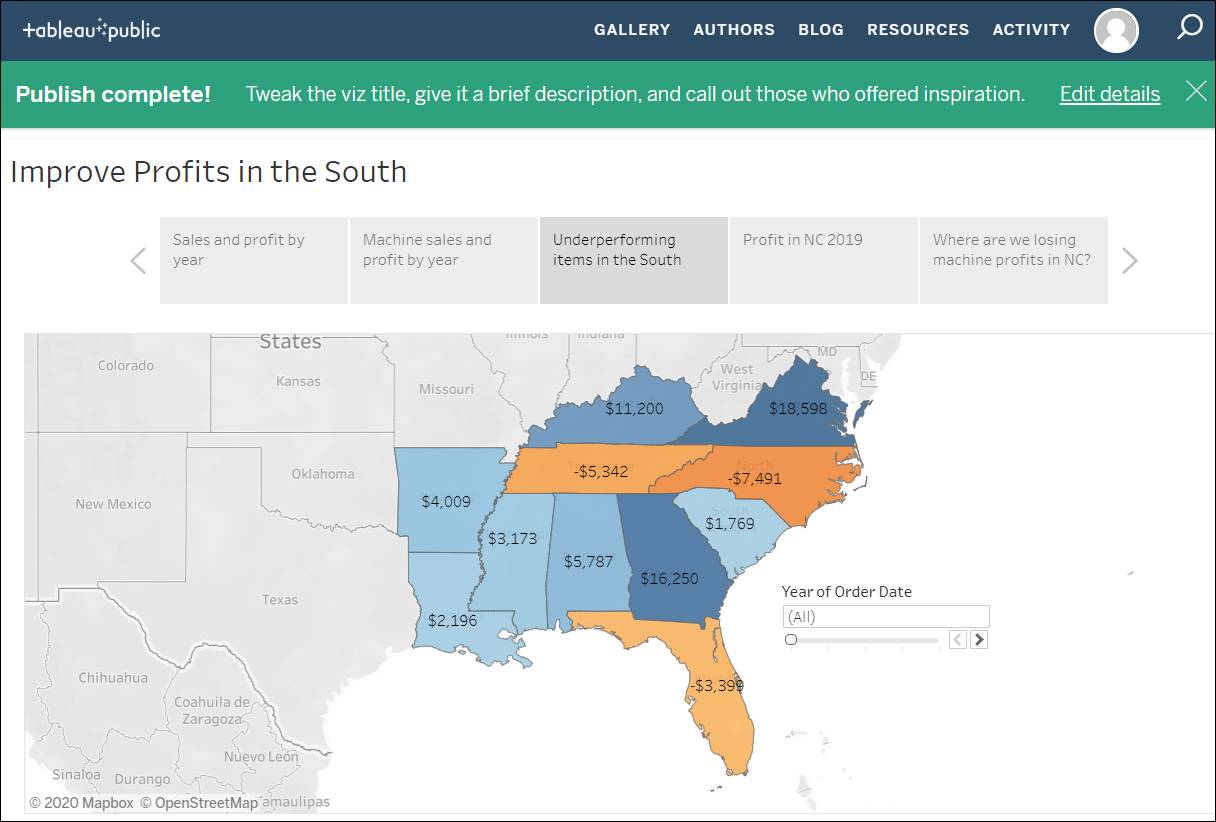
- Click Home to restart the activity or Exit to continue.
Congratulations! In this module, you built a dashboard around your findings, created a story to present your analysis, and shared your findings on the web so that remote team members can take a look.
You have successfully started your journey to become a data rockstar! In this process, you discover opportunities you didn’t even know existed when you first looked at your data.
Tableau Desktop provides many more advanced features for data analysis. We hope that you continue your journey and explore more of Tableau Desktop features!
Resources