Modify PMM Reports and Dashboards
Learning Objectives
After completing this unit, you’ll be able to:
- Customize a provided Program Management Module (PMM) report.
- Add a report to an existing dashboard.
- Share a report.
Modify Included PMM Reports
The reports included in PMM are a great starting point. You may have to only pick up one of those reports and modify it slightly to find the data you need.
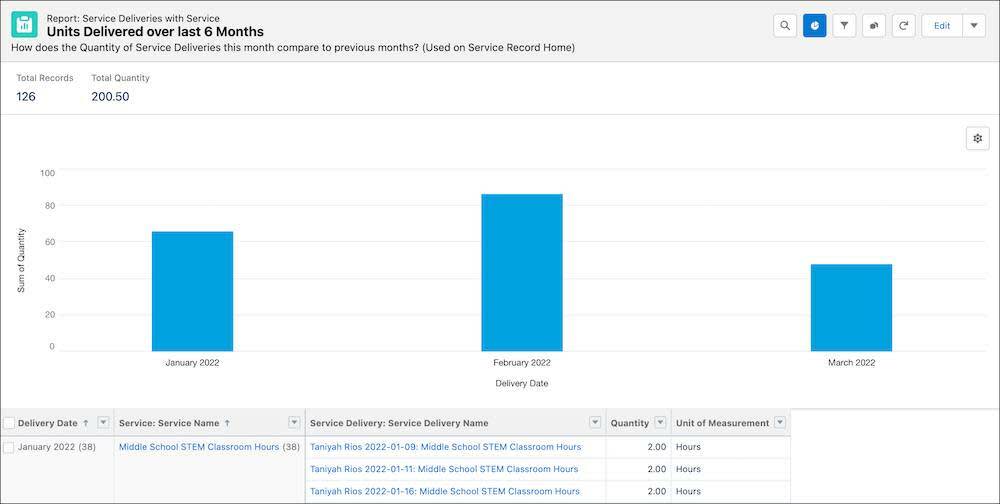
For example, imagine you manage a program and want to report on how many services in only that program were delivered in the past 6 months. The Program Management dashboard already includes a report that shows that information for all programs, so you can modify that report to show only your program.
Here, we teach you how.

- Click Reports in navigation or find and select it through the App Launcher (
 ).
).
- Click All Folders.
- Select Program Management Embedded Reports. The report we want to use as a starting point already appears on the Program Management homepage.

- Click Units Delivered Over the Last 6 Months and the report will appear on the page.
Before we change anything we want to save a copy of the original report. This is very important! The next six steps should become a habit you develop any time you modify any existing report on which your colleagues may rely.
- On the report, click the More Actions dropdown arrow (
 ) next to the Edit button.
- Click Save As.
- The Save Report As interface will appear. Click Select Folder.
- Click All Folders then click Private Reports and Select Folder. This saves it in a folder only you have access to. You could also select a public folder if you prefer, but we recommend drafting your report in your Private Reports folder and sharing it later.
- Give your new report a descriptive Report Name and Report Description. You can delete the prepopulated Report Unique Name to automatically generate a new one from your Report Name.
- Click Save.

Now that we’re working on a copy of the original report, let’s modify it.
- Click Edit to display filtering and grouping options.
- In the Group Rows area, find and select Service: Program and drag-and-drop it to the second position in the list.
- Click Refresh along the top ribbon (or toggle on the option to update the preview automatically).
- The report still includes all programs. To focus on just one program, click Filters.
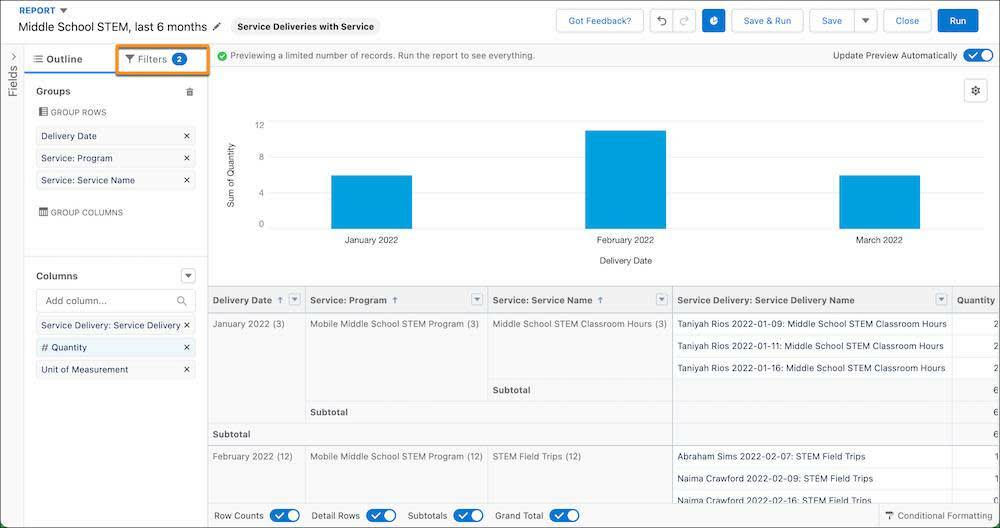
- In the Filters section, find and select Service: Program.
- In the Filter by Service: Program interface that appears, select an Operator—probably equals or contains—and enter the name of your program in the text field.
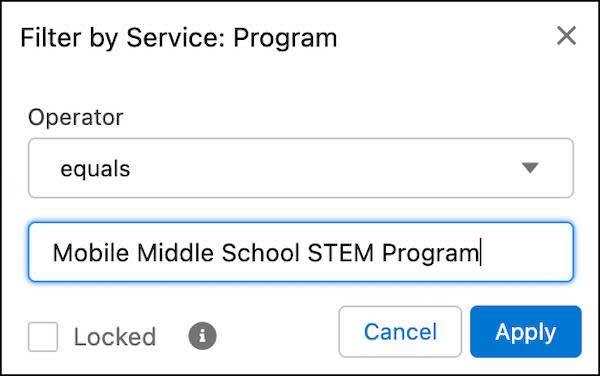
- Click Apply.
- If you want to add other filters or modify existing filters, you can do that now. If you don’t see any data in your report, you may need to change one of the Delivery Date filters to a longer span of time.
- When you’re done, click Save & Run.
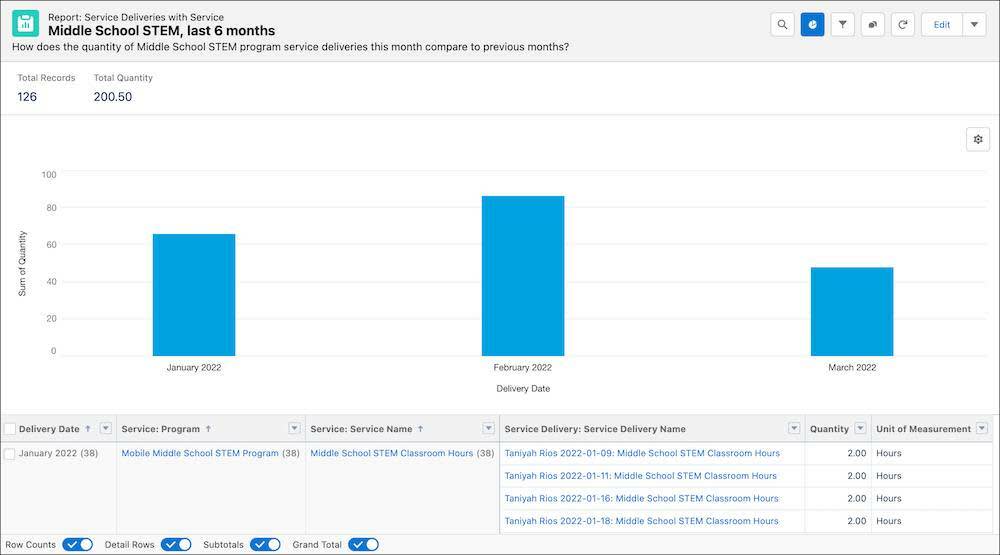
Check out your new report! The chart shows bars that tally only service deliveries in our selected program, and the table below shows details of the included deliveries.
This was a simple example, and so much more is possible. You can dive much deeper into Salesforce reports using the information included in the Resources section.
Add Your Report to a Dashboard
If a report is helpful and something you want to monitor frequently—and share with others in your organization—you may want to add it to the Program Management homepage. The reports on the homepage are all included in a dashboard object in Salesforce, and that’s what we have to modify.
Let’s go step-by-step through how you can add a report to the homepage, using steps that apply to adding a report to any existing dashboard.
- In the navigation bar in the Program Management app, select Dashboards. It may be under More or you can find and select it through the App Launcher (
 ).
).
- Click All Dashboards.
- Click Program Management Home Page. You may want to use the search bar to help find it.
- Click Edit.
- Click + Component.
- In the Select Report interface, find and select the report you want to add to the dashboard. If you’re following along, the report we just created should be at the top of the Recent list.

- On the Add Component settings page you can change how your chart is displayed and labeled, or, if you’re happy with how it’s formatted on the report page, select Use chart settings from report.
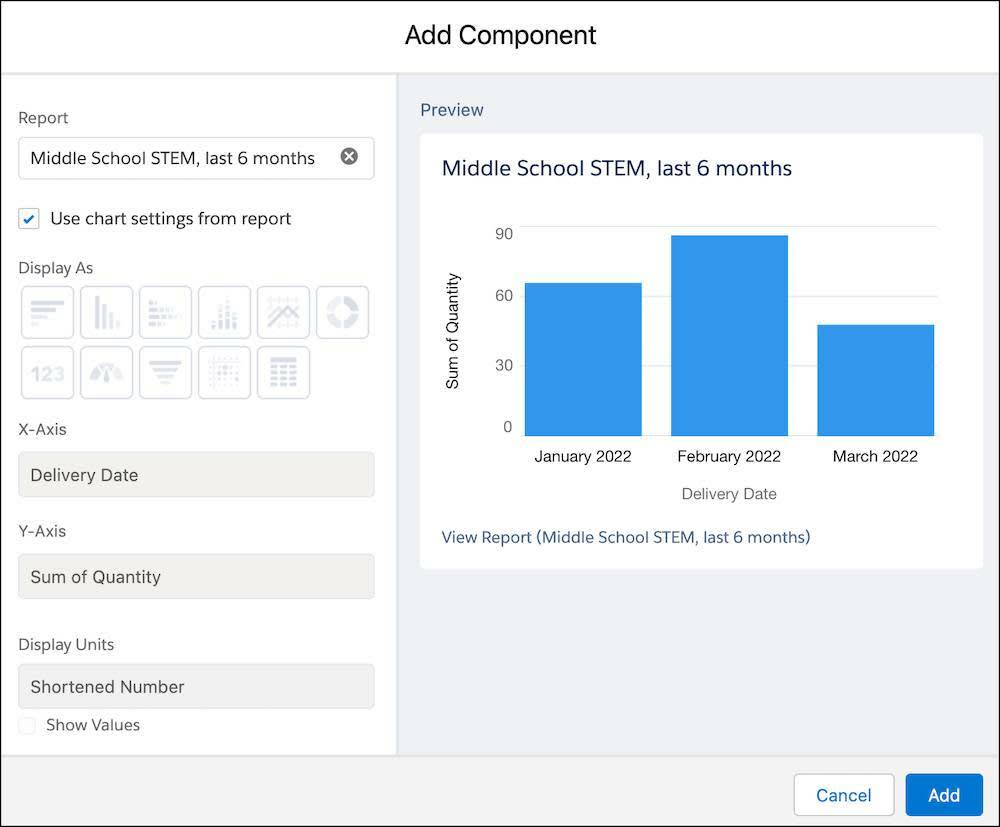
- Click Add.
Now that the component is on the page, you can move it wherever you want on the dashboard and resize it on the grid.
One thing to note while we’re editing the dashboard is the + Filter button. Earlier we modified a report to filter it to just one program, but adding a dashboard filter can enable you to filter every report on a dashboard on the same criteria.

Click Save when you’re done making changes to your dashboard.
Share Reports with Colleagues and Others
If a dashboard isn’t the best way to share a PMM report, you have three other options for how to share and collaborate.
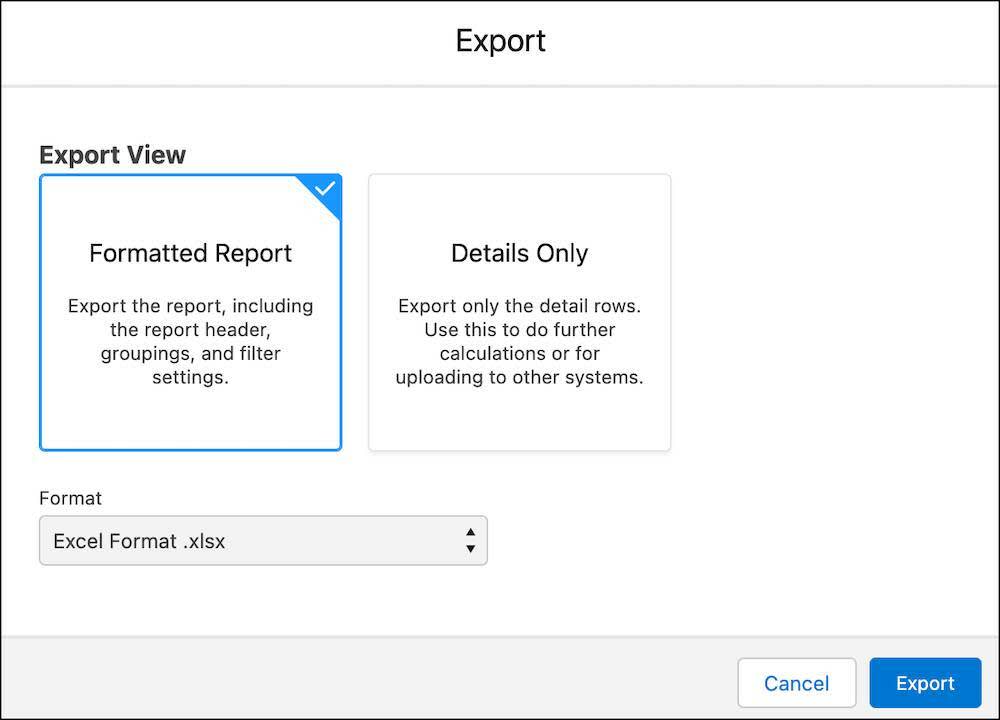
- You can export report data to a file and share it via email or another messaging service like Slack. Be careful exporting sensitive client data if you plan to share it as a file—while you have control over data access in Salesforce, once you share a file it can be shared again by the recipient.
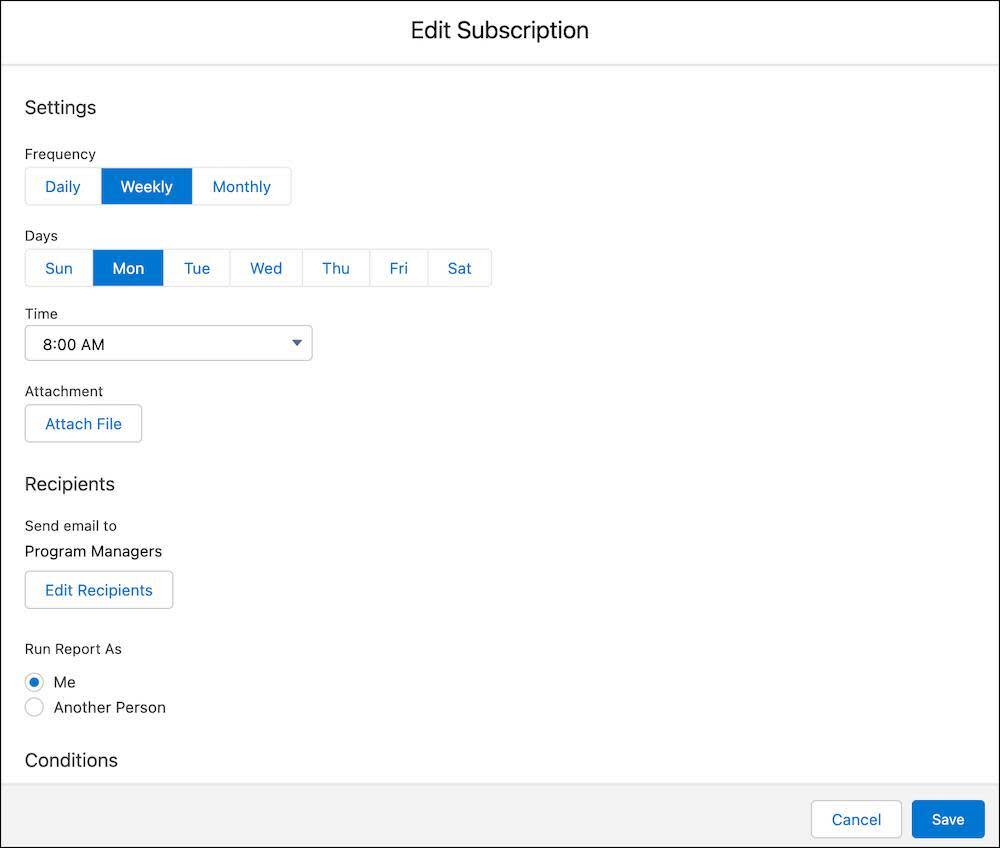
- You can subscribe a user, group, or role to a report so they receive it by email on a regular basis or when certain criteria are met. A user must have access to the report in Salesforce to be subscribed. So if you want to subscribe other users to a report, it can’t be stored in your Private Reports folder.
- You can collaborate on a report using Chatter, if it’s enabled on reports in your Salesforce org. Click the Collaborate button (
 ) to start, or talk to your Salesforce admin if you’d like to add it to reports.
Details on all three options are included in the Salesforce Help links in Resources.
Now that you understand PMM reporting in Salesforce, in the next unit we cover how to analyze your data in Tableau, an analytics platform that helps people see and understand data.
Resources
- Salesforce Help: PMM Reports and Dashboards
- Salesforce Help: Reports
- Salesforce Help: Dashboards
- Trailhead: Reports and Dashboards with Nonprofit Success Pack