Test a Flow
Learning Objectives
After completing this unit, you’ll be able to:
- Prepare to test a flow.
- Test your flow to ensure it syncs new customers in NetSuite with accounts in Salesforce as expected.
Prepare to Test a Flow
After you’ve designed your flow, you must test it from end to end to ensure it syncs data as expected.
As a best practice, test your flows using your test systems and data. After you’re done with testing, run the flows using your production systems and data. For Salesforce, this means using a sandbox org to test your flows and a production org to run your flows.
Also, as a best practice, test every possible path of your flow. For example, if your flow has an If branch and an Else branch in an If/Else block, ensure to test both branches.
In general, you have up to 10 minutes to complete a test. When the test completes or 10 minutes have passed, the test stops. As a best practice, you should get all required applications and data ready for the test before starting it.
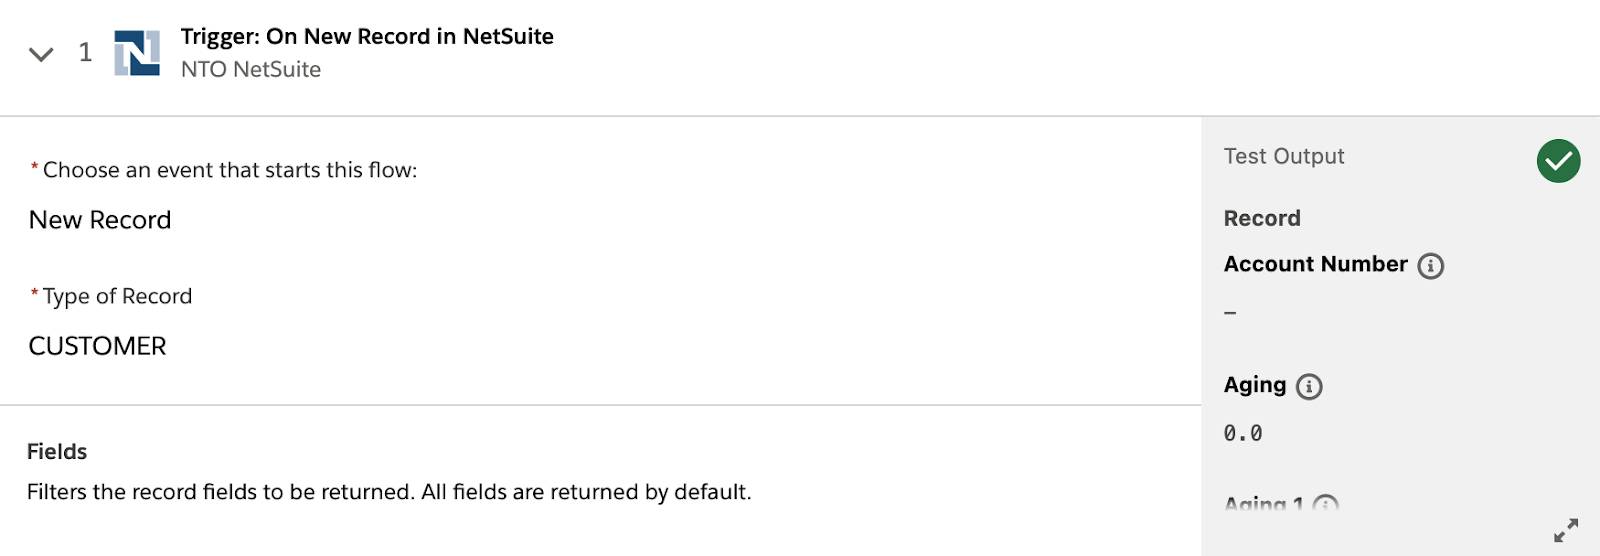
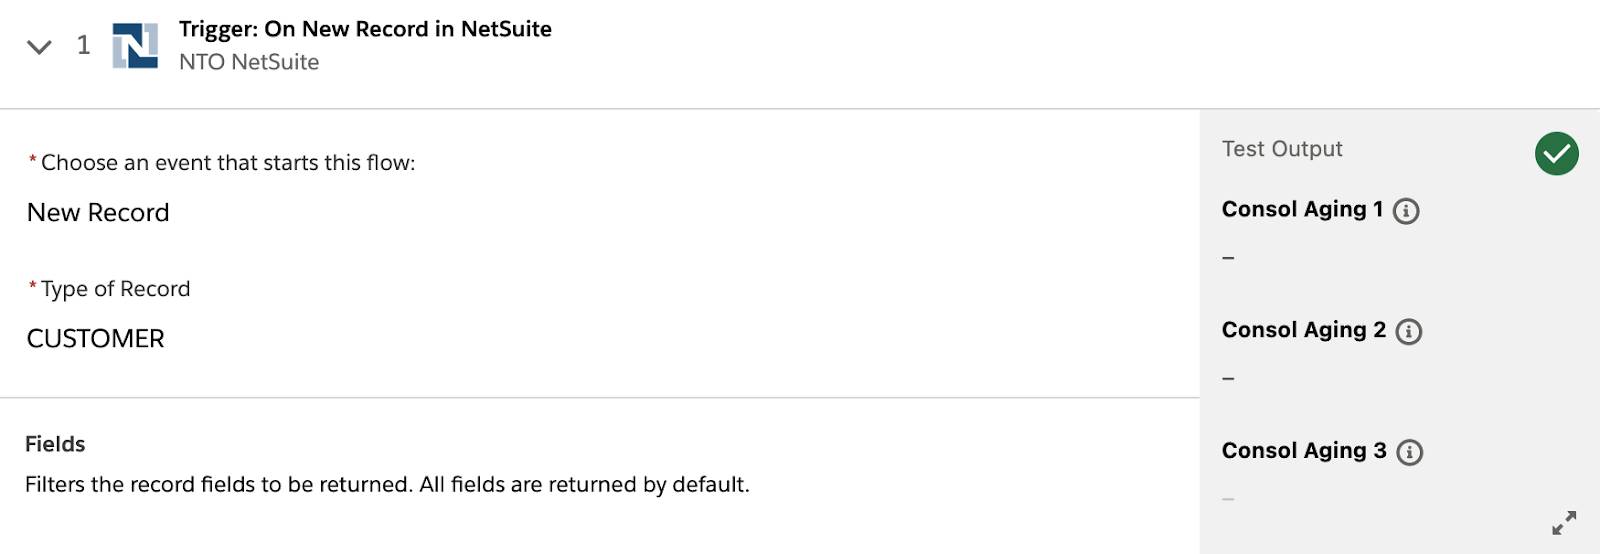
In this use case, when a customer is created in NetSuite, it triggers the flow. First, be prepared to create a new customer in NetSuite with multiple addresses. Prepare to specify the billing and shipping addresses for the customer.
Remember your flow is designed to use one billing address and one shipping address from each NetSuite customer to populate the corresponding Salesforce account’s billing and shipping addresses. It doesn’t use any additional addresses from NetSuite customers to populate Salesforce accounts.
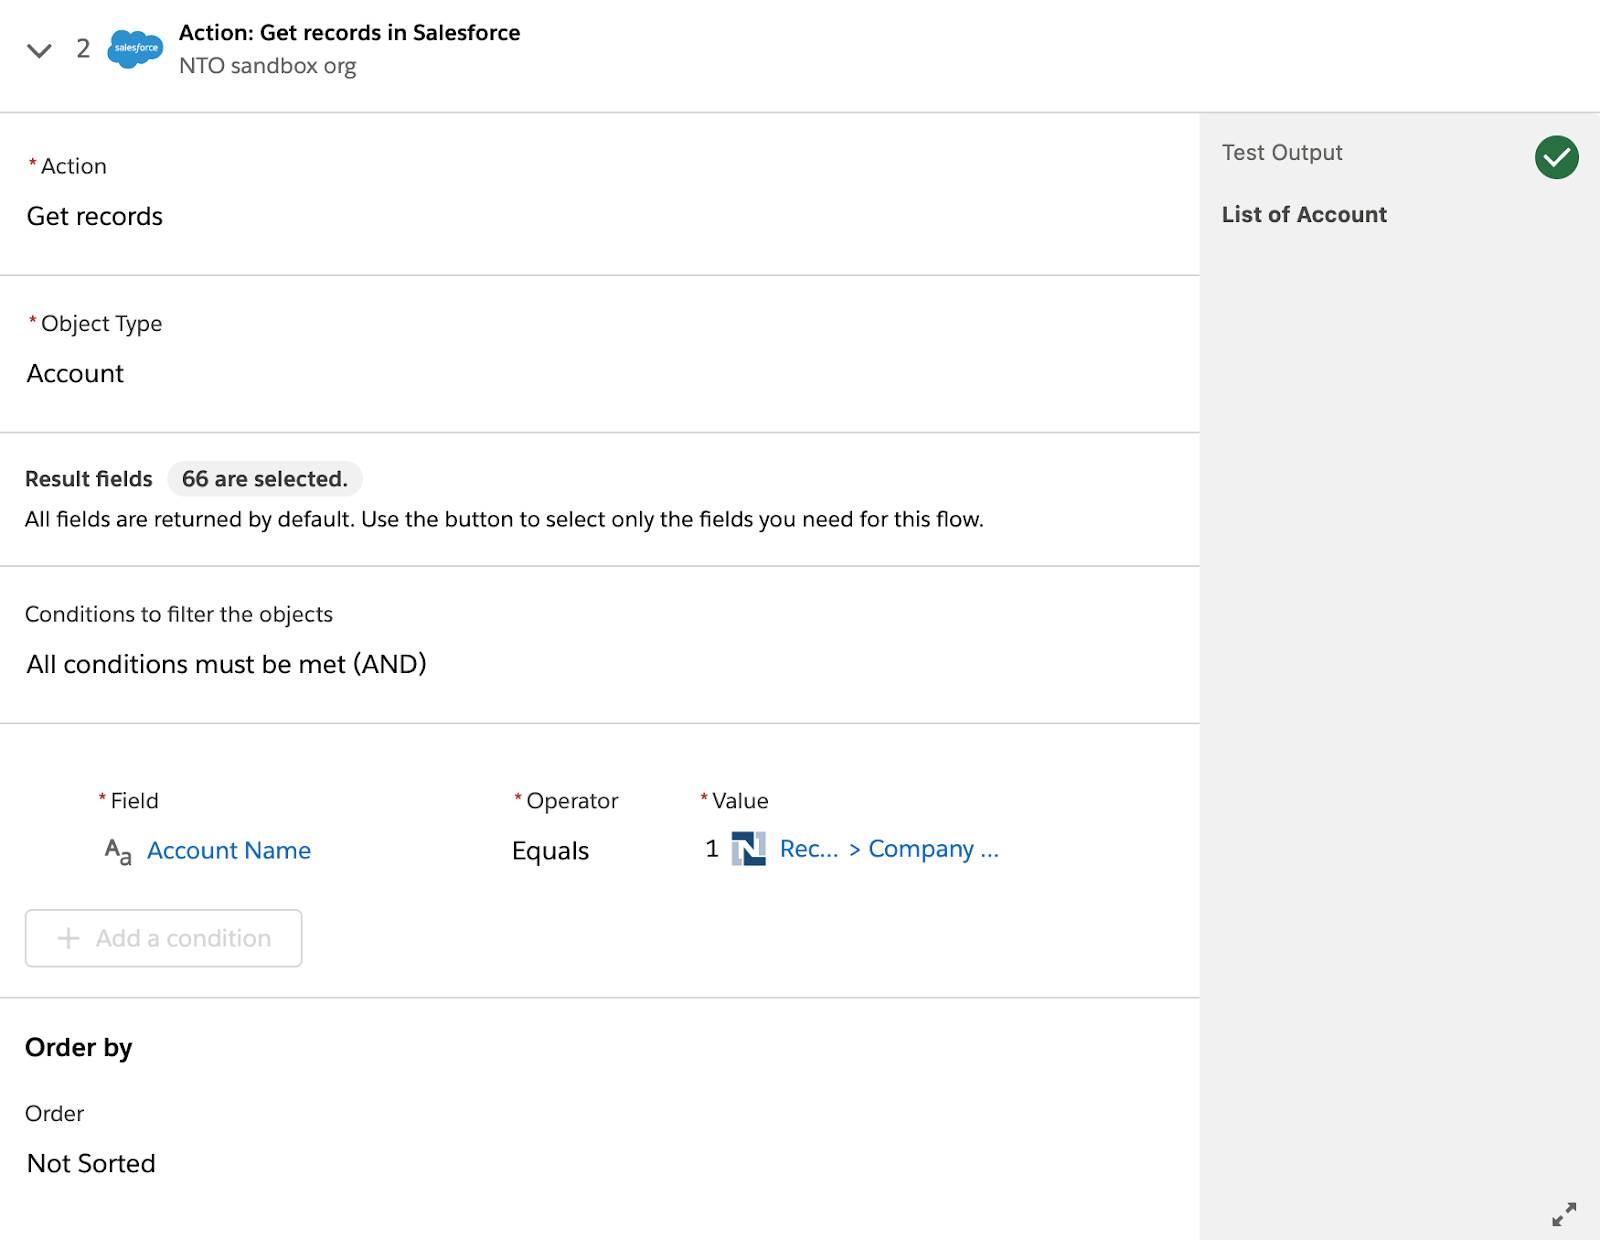
Next, if a corresponding account doesn’t exist in Sales Cloud, prepare to verify the following.
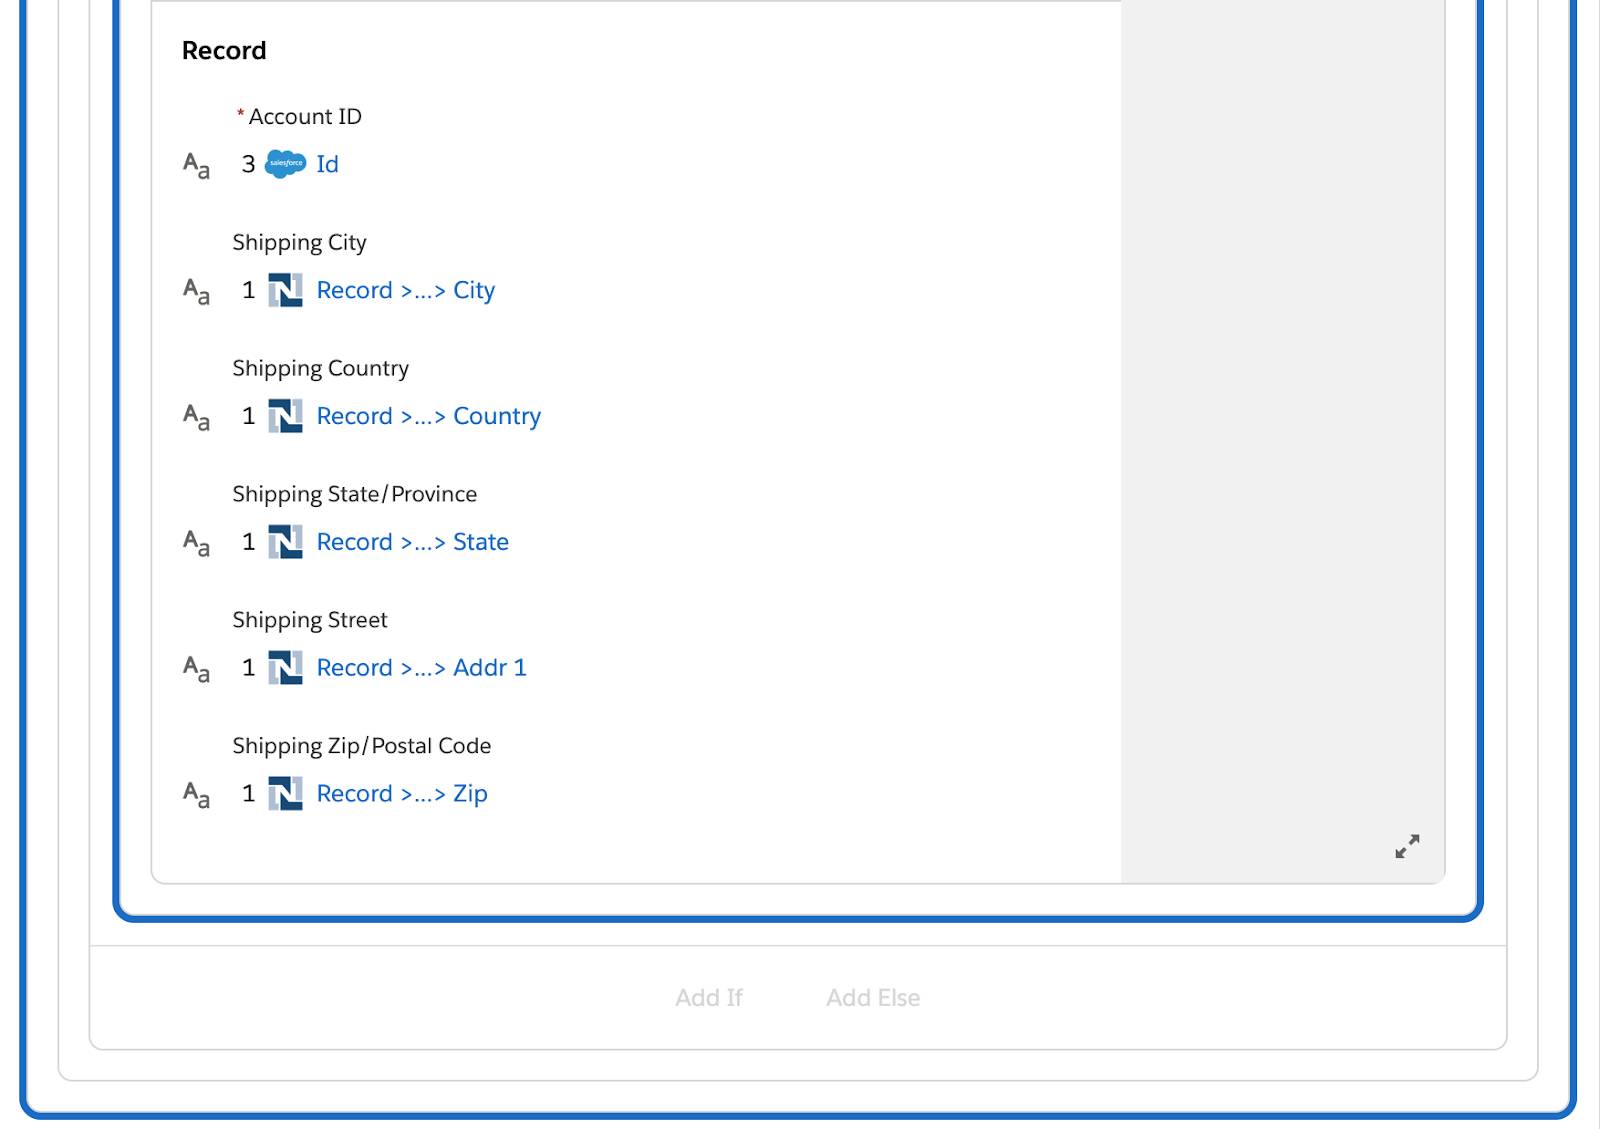
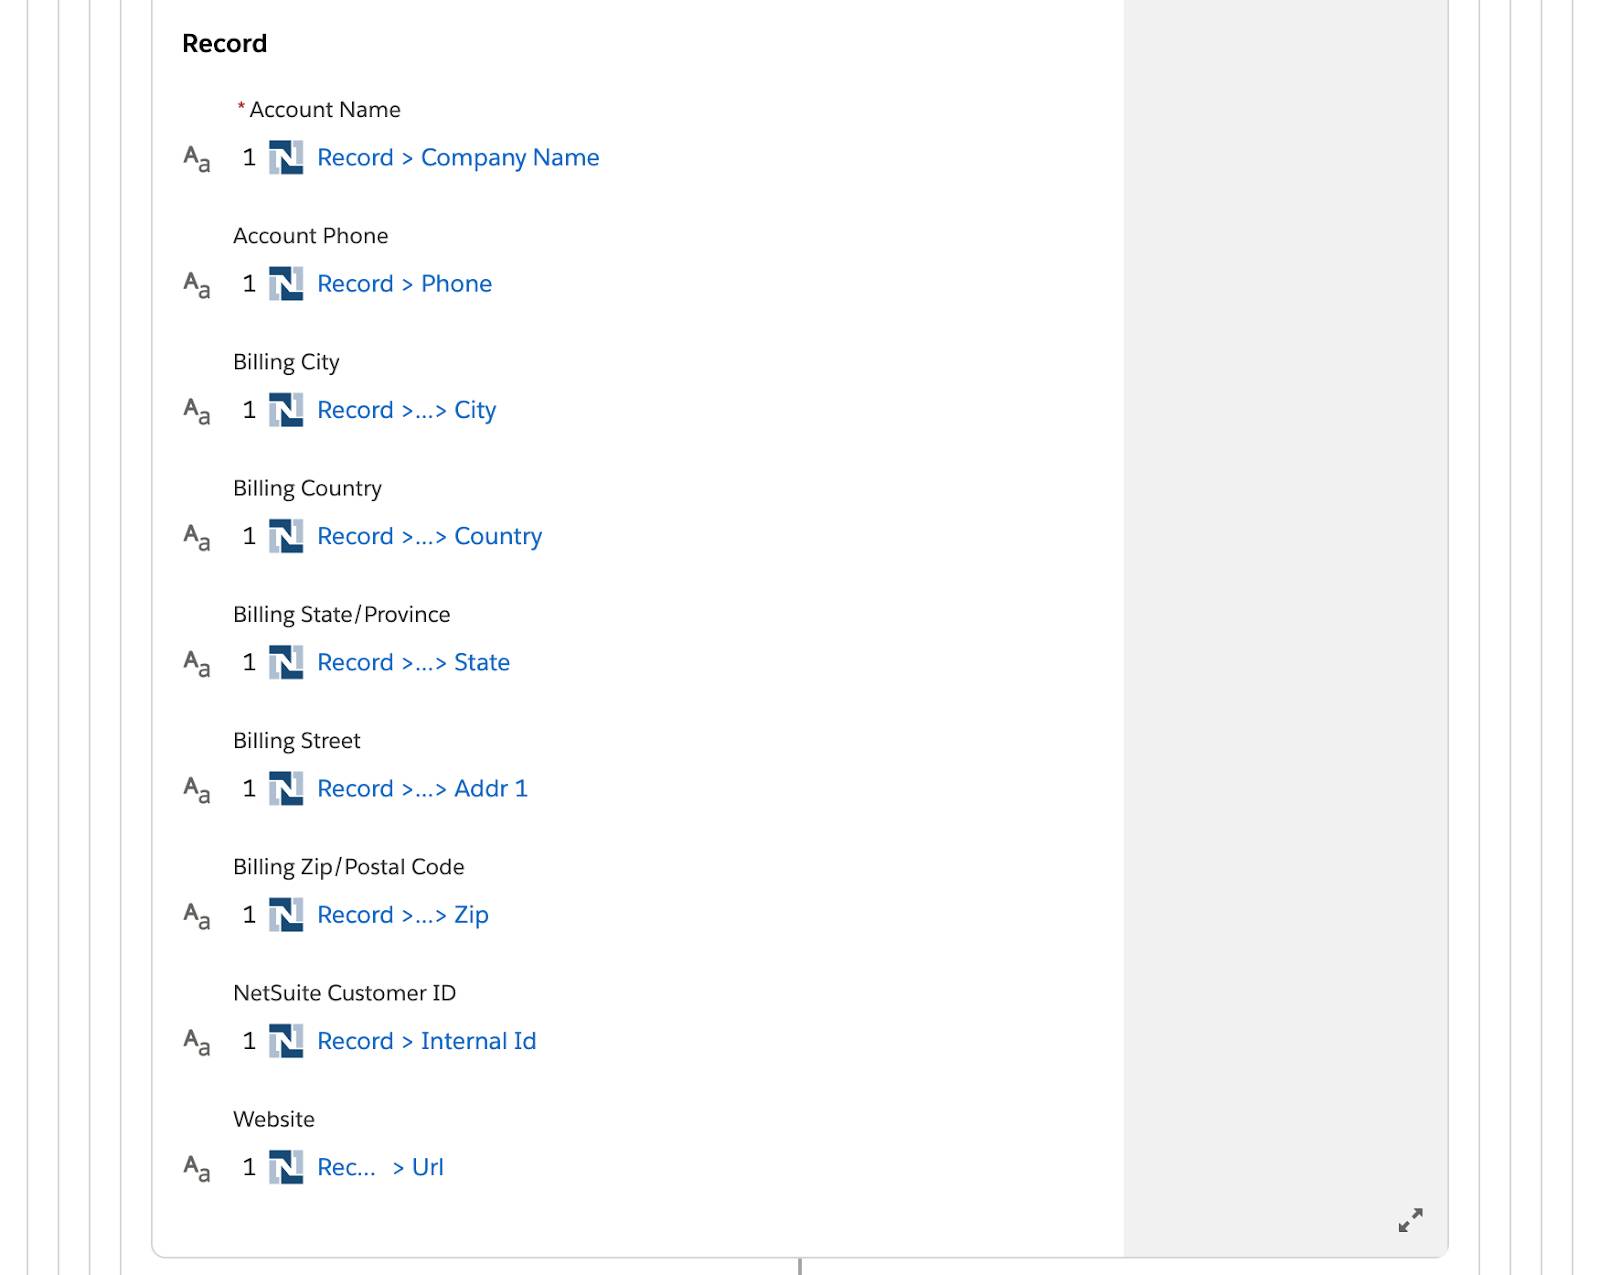
- A new account containing relevant customer details, including the customer’s billing and shipping addresses and internal ID, is created in Sales Cloud.
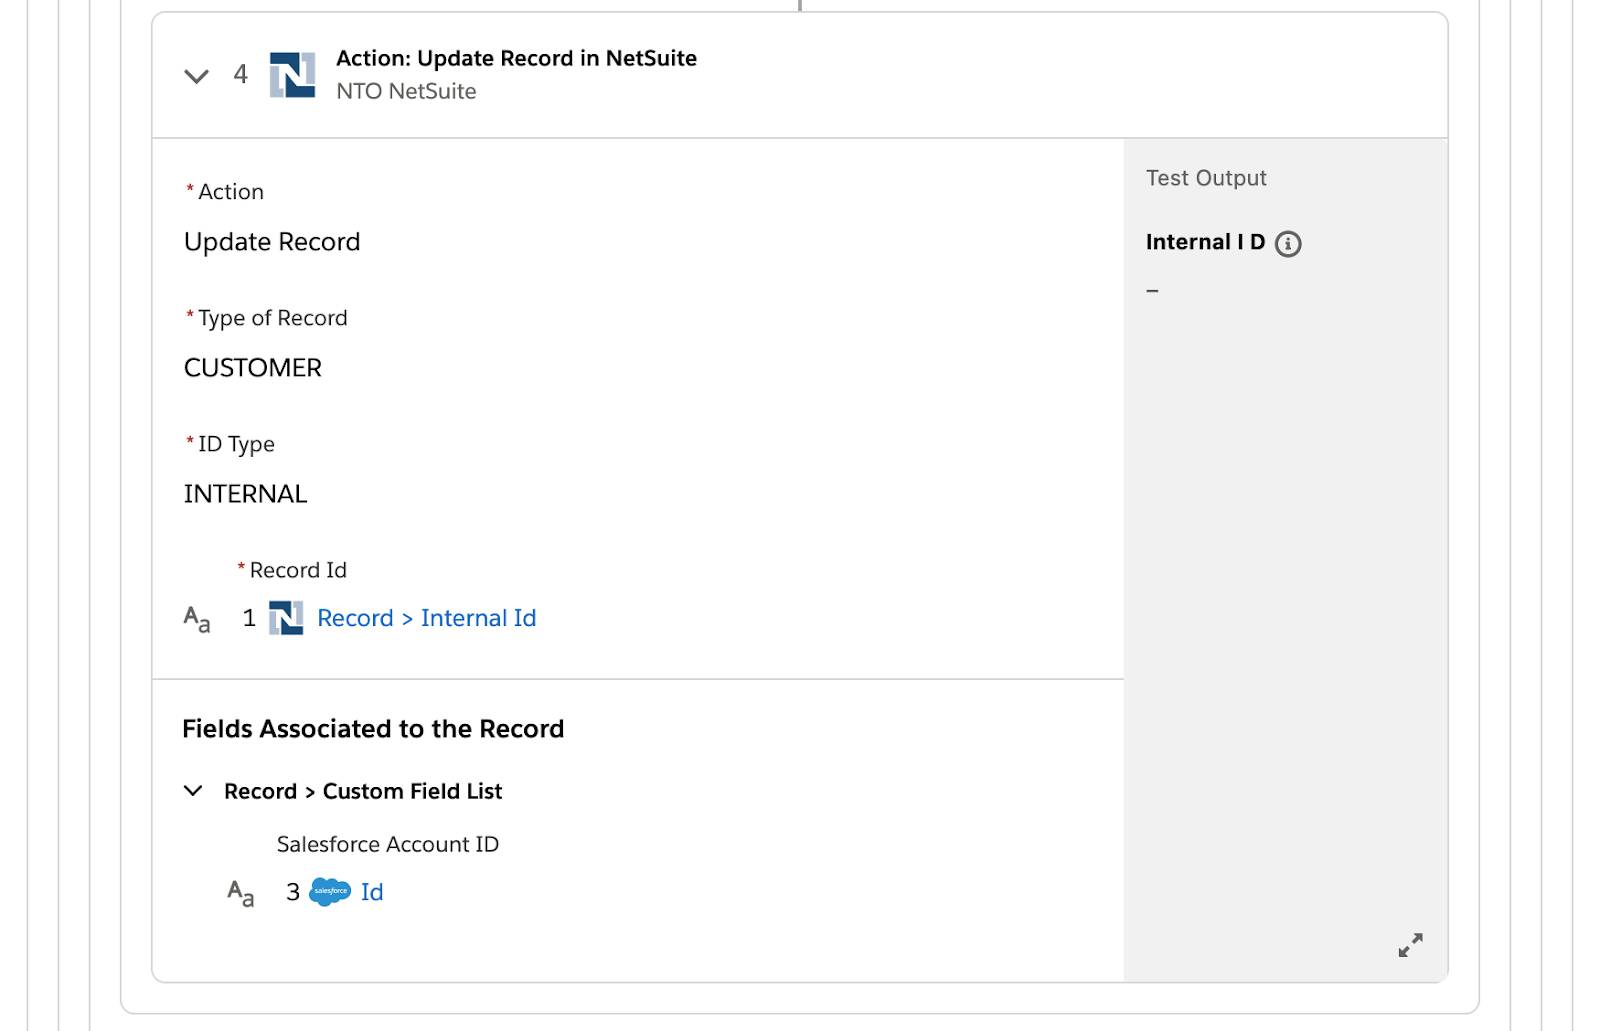
- The customer is updated with its associated account ID in NetSuite.
Finally, when a new customer is created in NetSuite and a corresponding account exists in Sales Cloud, prepare to verify the following.
- A corresponding account isn’t created in Sales Cloud.
- The customer isn’t updated with any account ID in NetSuite.
Test a Flow
Follow these steps to test a flow.
- In the Sync New NetSuite Customers to Salesforce Accounts flow, click Test. The flow goes into a read-only mode.
Note: While the test is running, if for some reason you want to stop it, click Stop Test. - Log in to NetSuite using your username and password.
- Click Lists | Relationships | Customers | New.
- Populate the new customer with the following values.
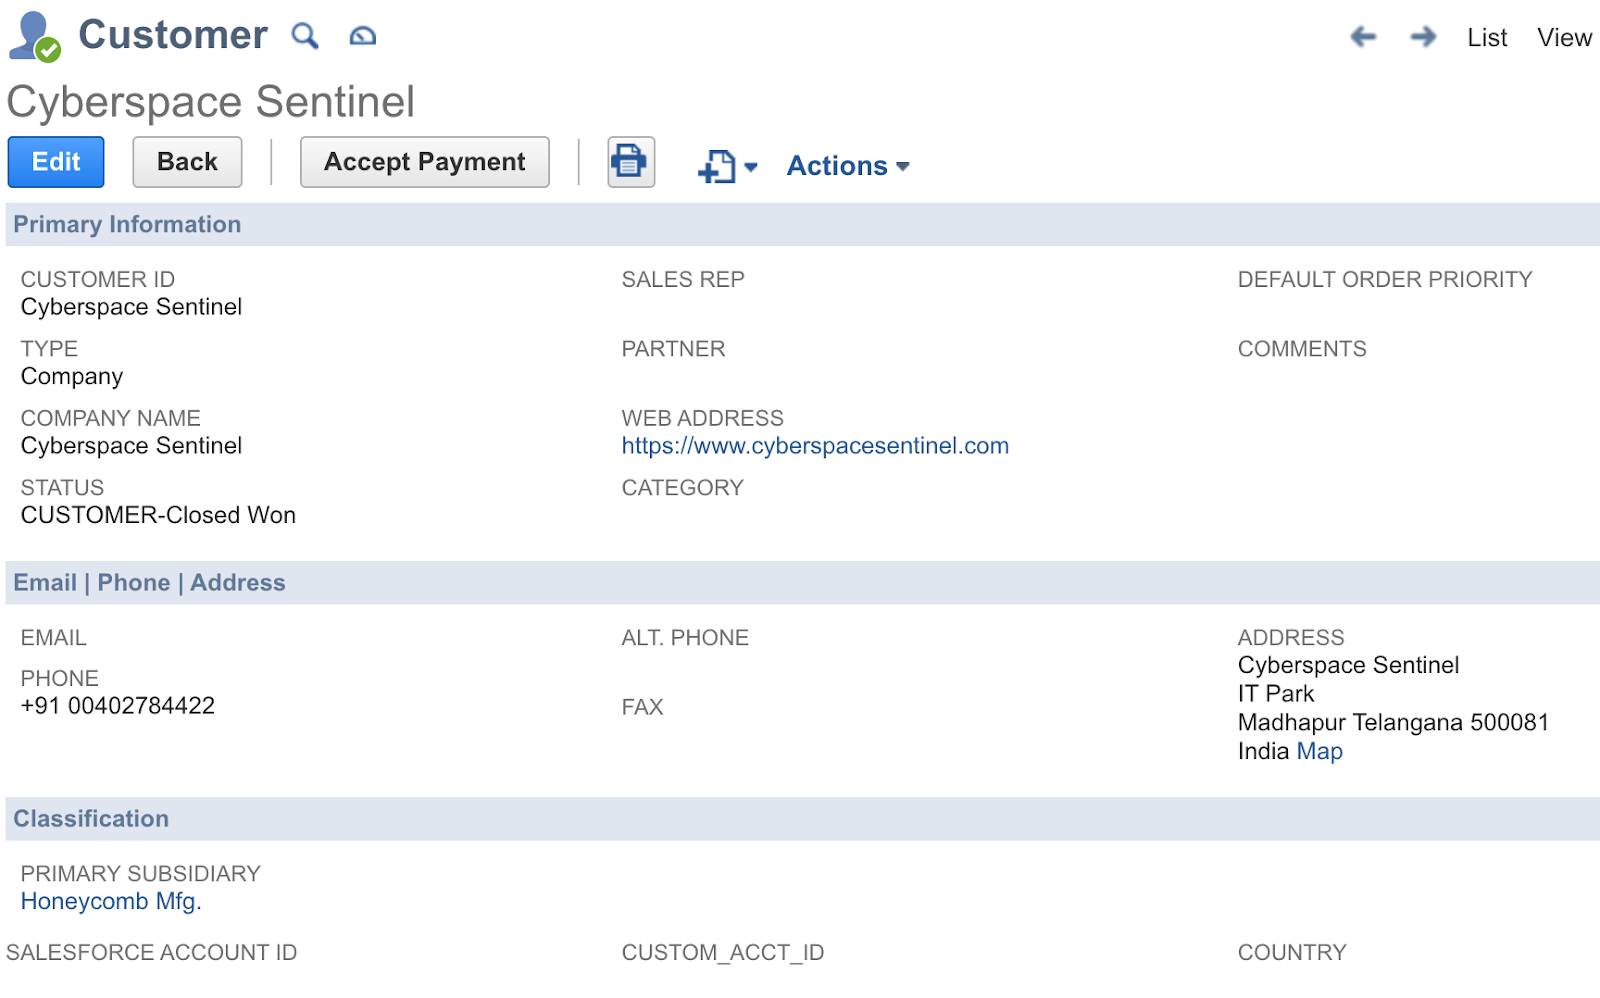
- Company Name:
Cyberspace Sentinel - Web Address:
https://www.cyberspacesentinel.com - Phone:
+91 00402784422 - Primary Subsidiary: first available value
- Company Name:
- Scroll down and select the Address submenu, click Edit, enter the following values, and then click OK.
- Address 1:
IT Park - City:
Madhapur - State:
Telangana - Zip:
500081 - Country:
India
- Address 1:
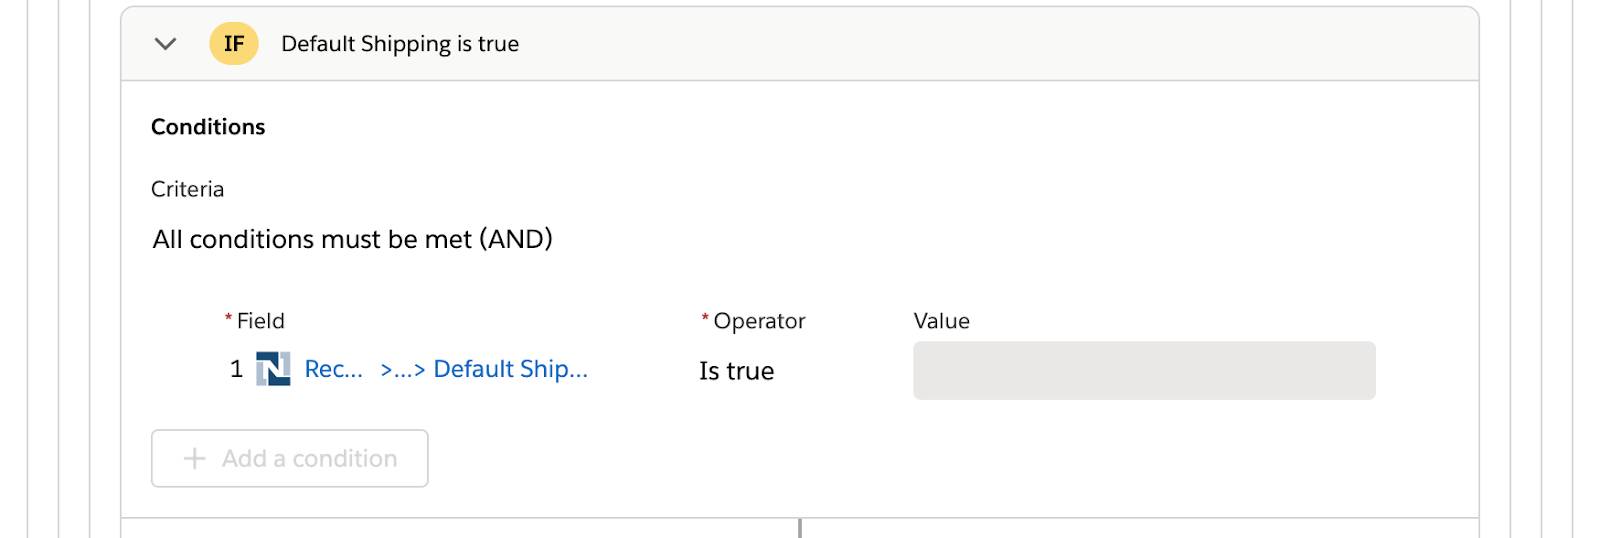
- Leave the Default Billing checkbox on this address selected, deselect the Default Shipping checkbox, and then click OK.
- Add another address with the following values, and then click OK. The Default Shipping check box is automatically selected.
- Address 1:
7184 Tanna Salai - City:
Bengaluru - State:
Karnataka - Zip:
600002 - Country:
India
- Address 1:
- Add another address of your choice.
- Click Save to create the customer.
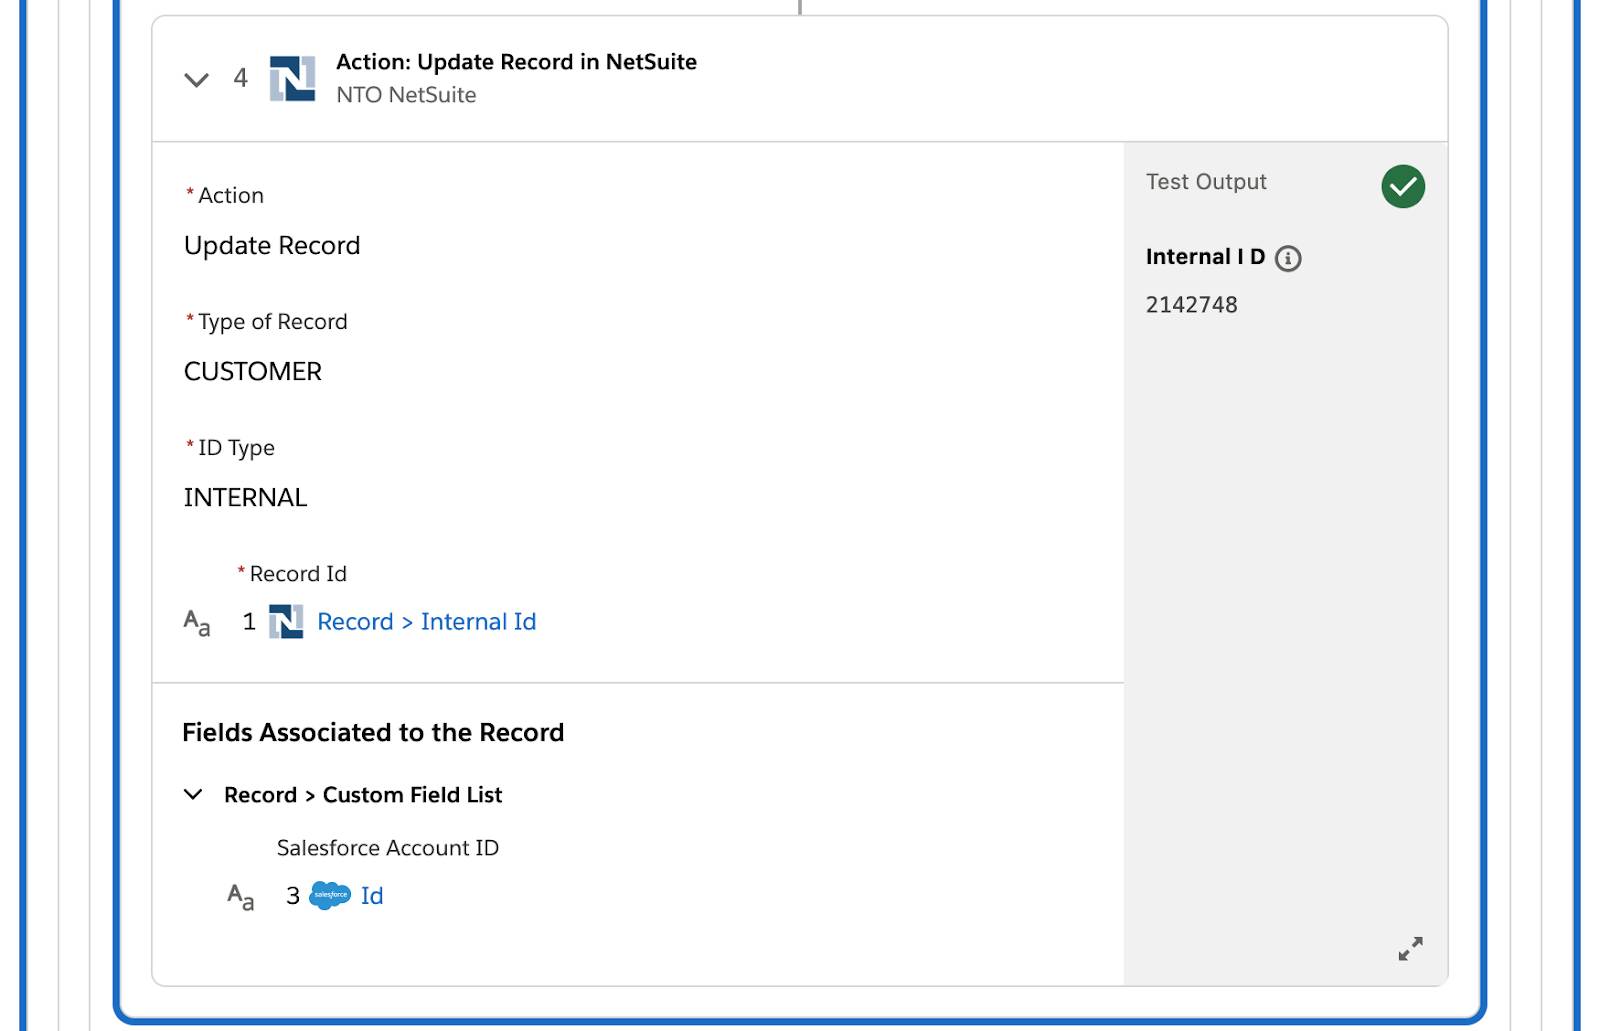
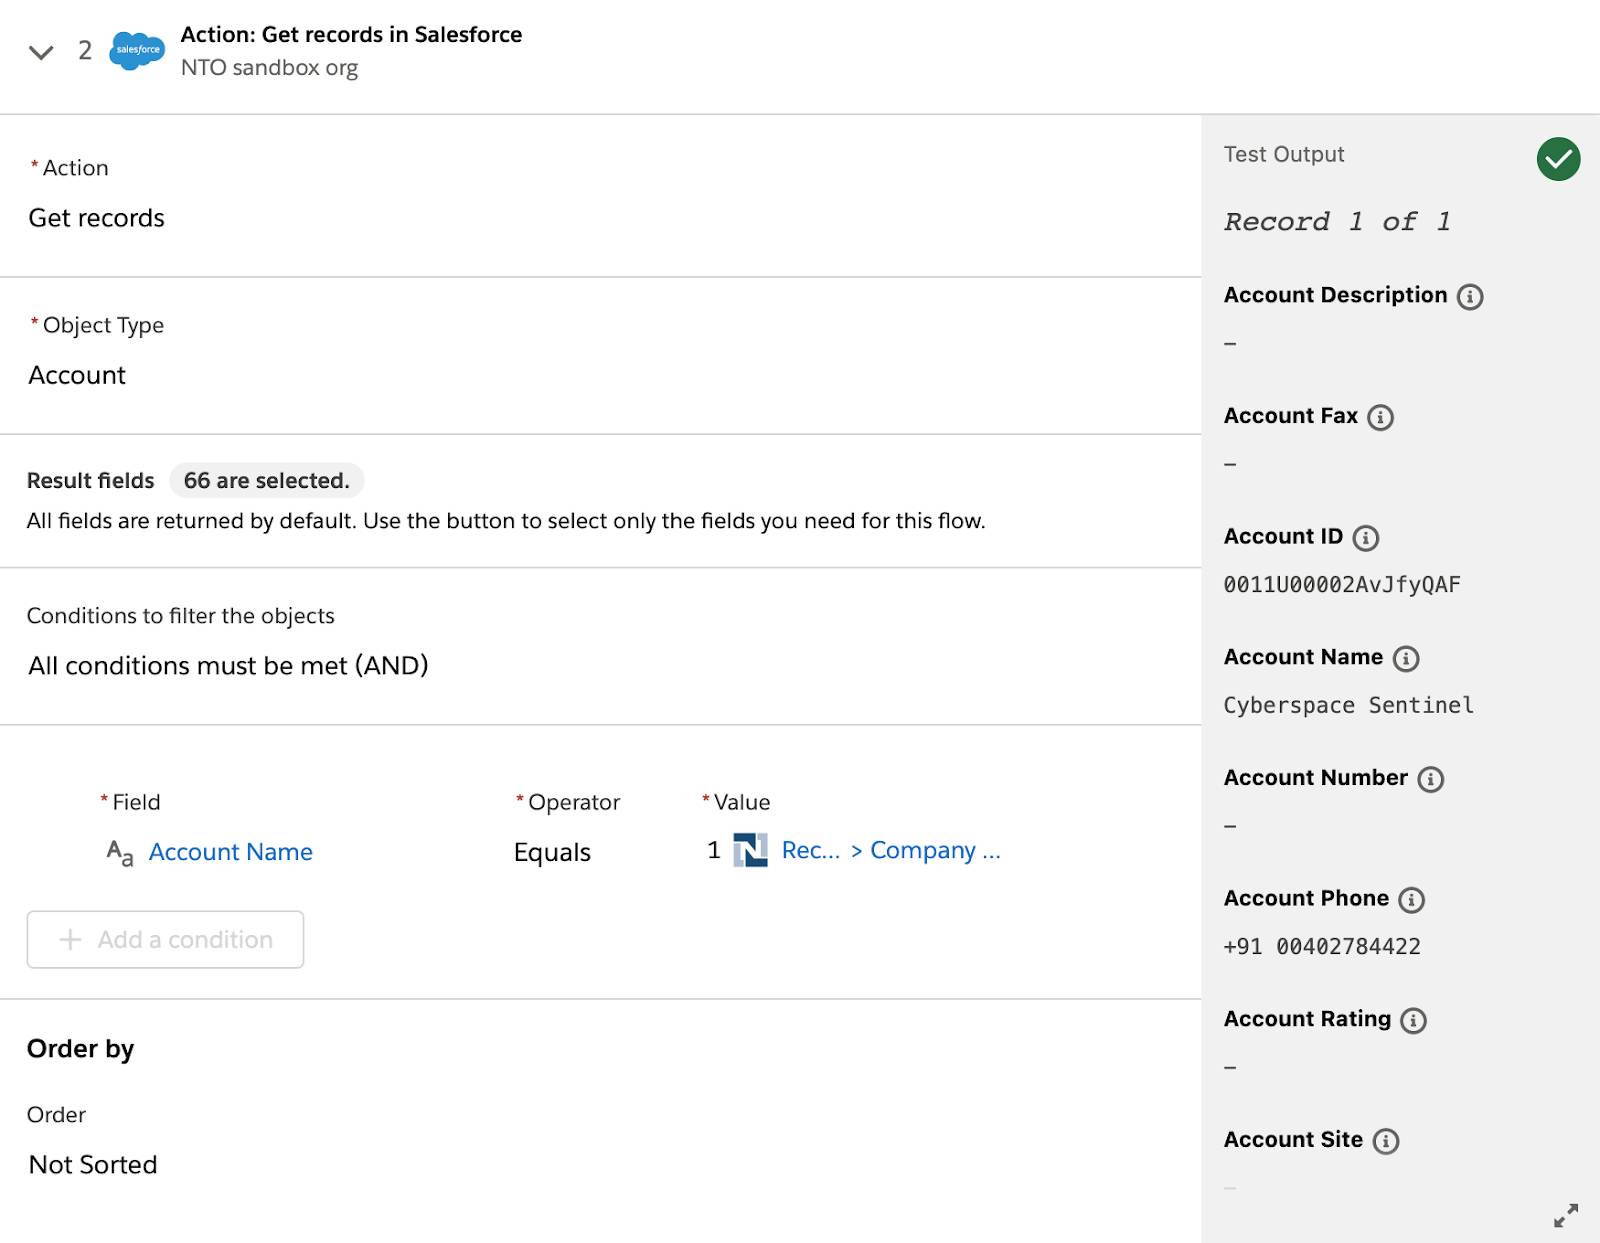
- Go back to your flow and wait for the test to complete. If steps 1 through 4 for the first iteration of the flow show a green check mark, this indicates the flow ran successfully for the default billing address. Take a look at the Test Output section and see the record values you entered for the test.
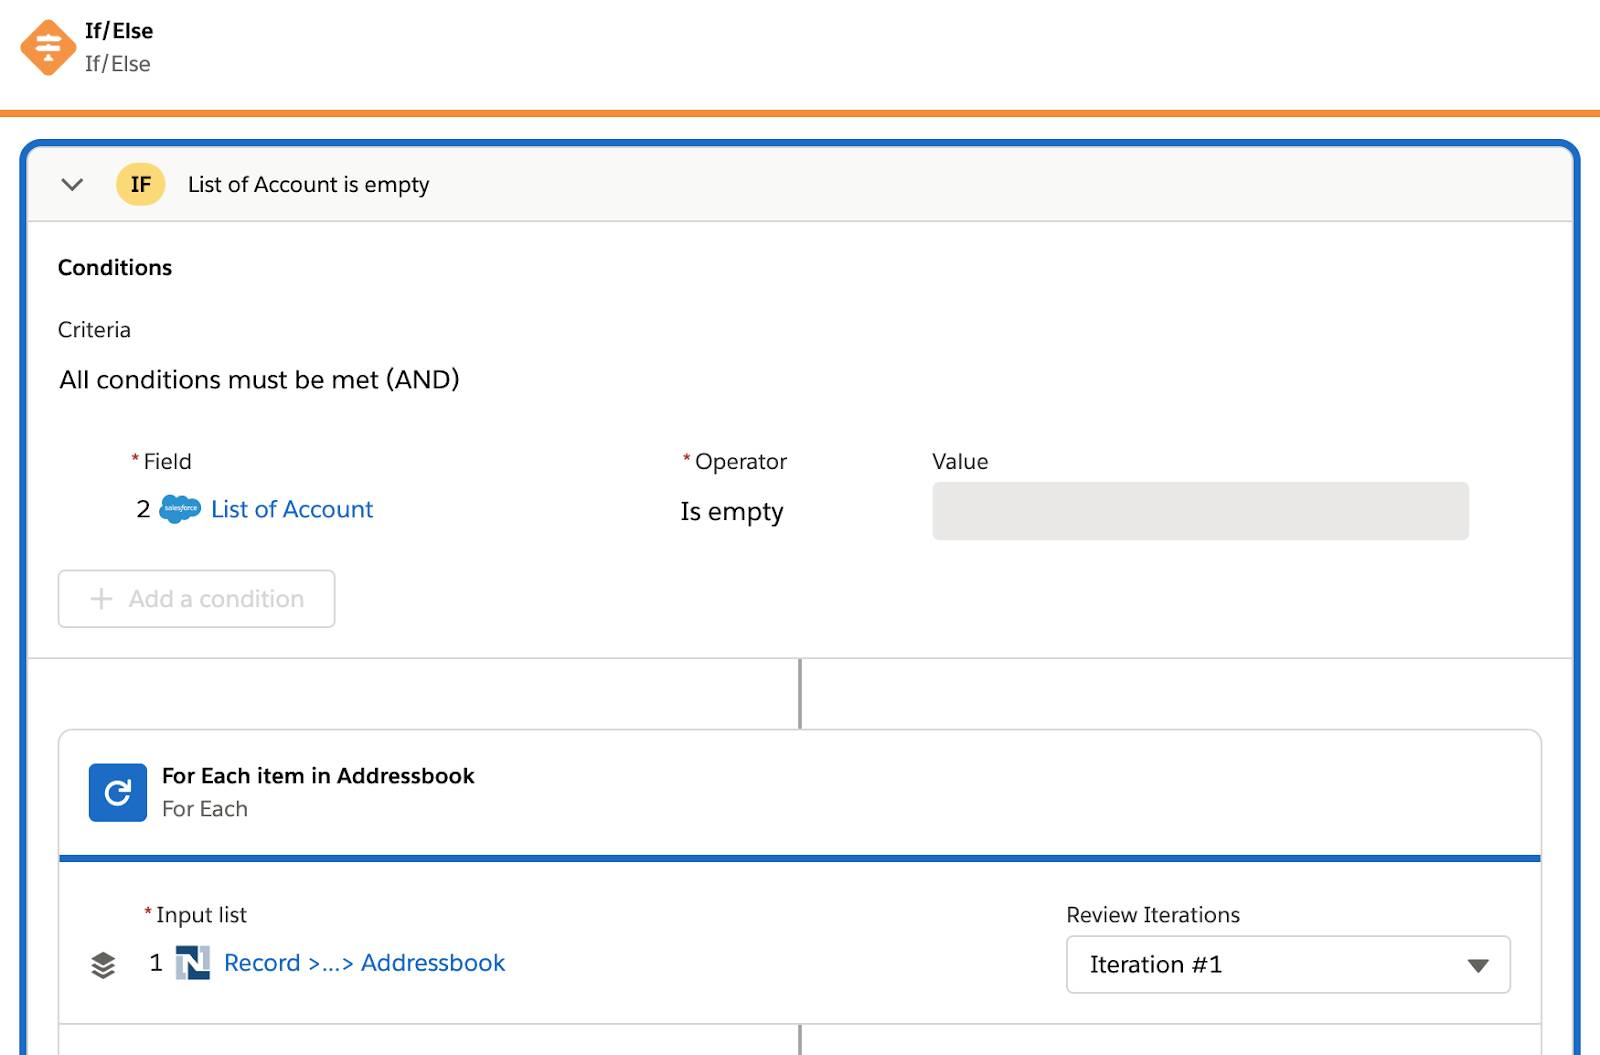

- Go to the For Each block on the tested flow and select Iteration #2 from the Review Iterations picklist.
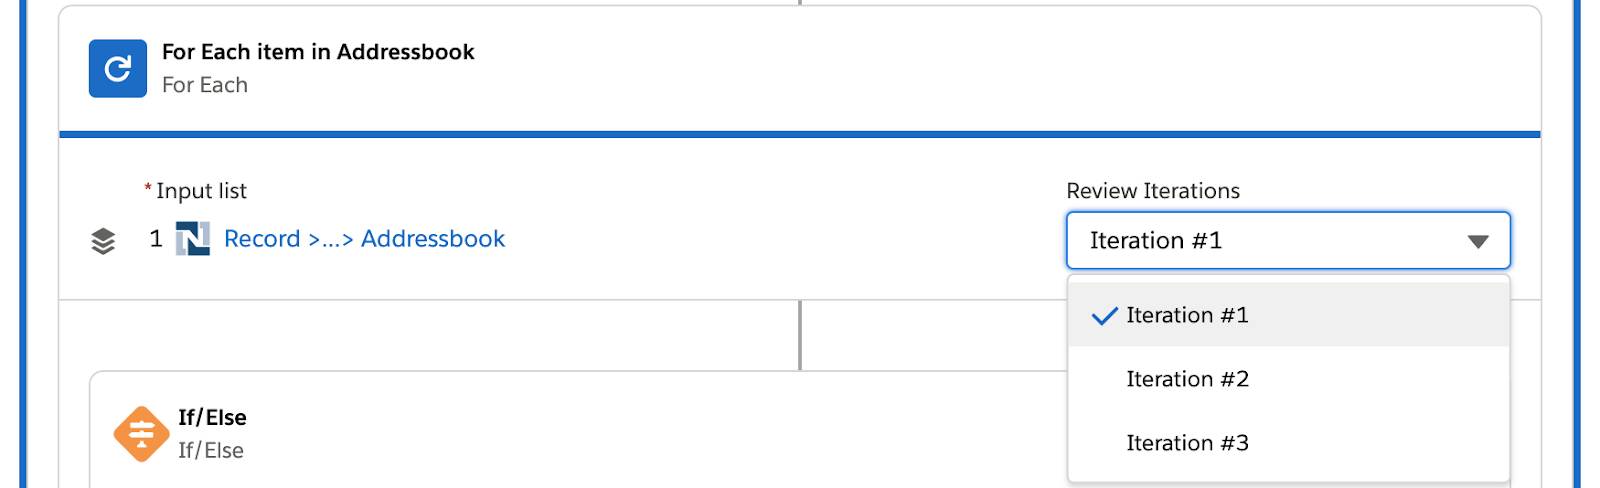
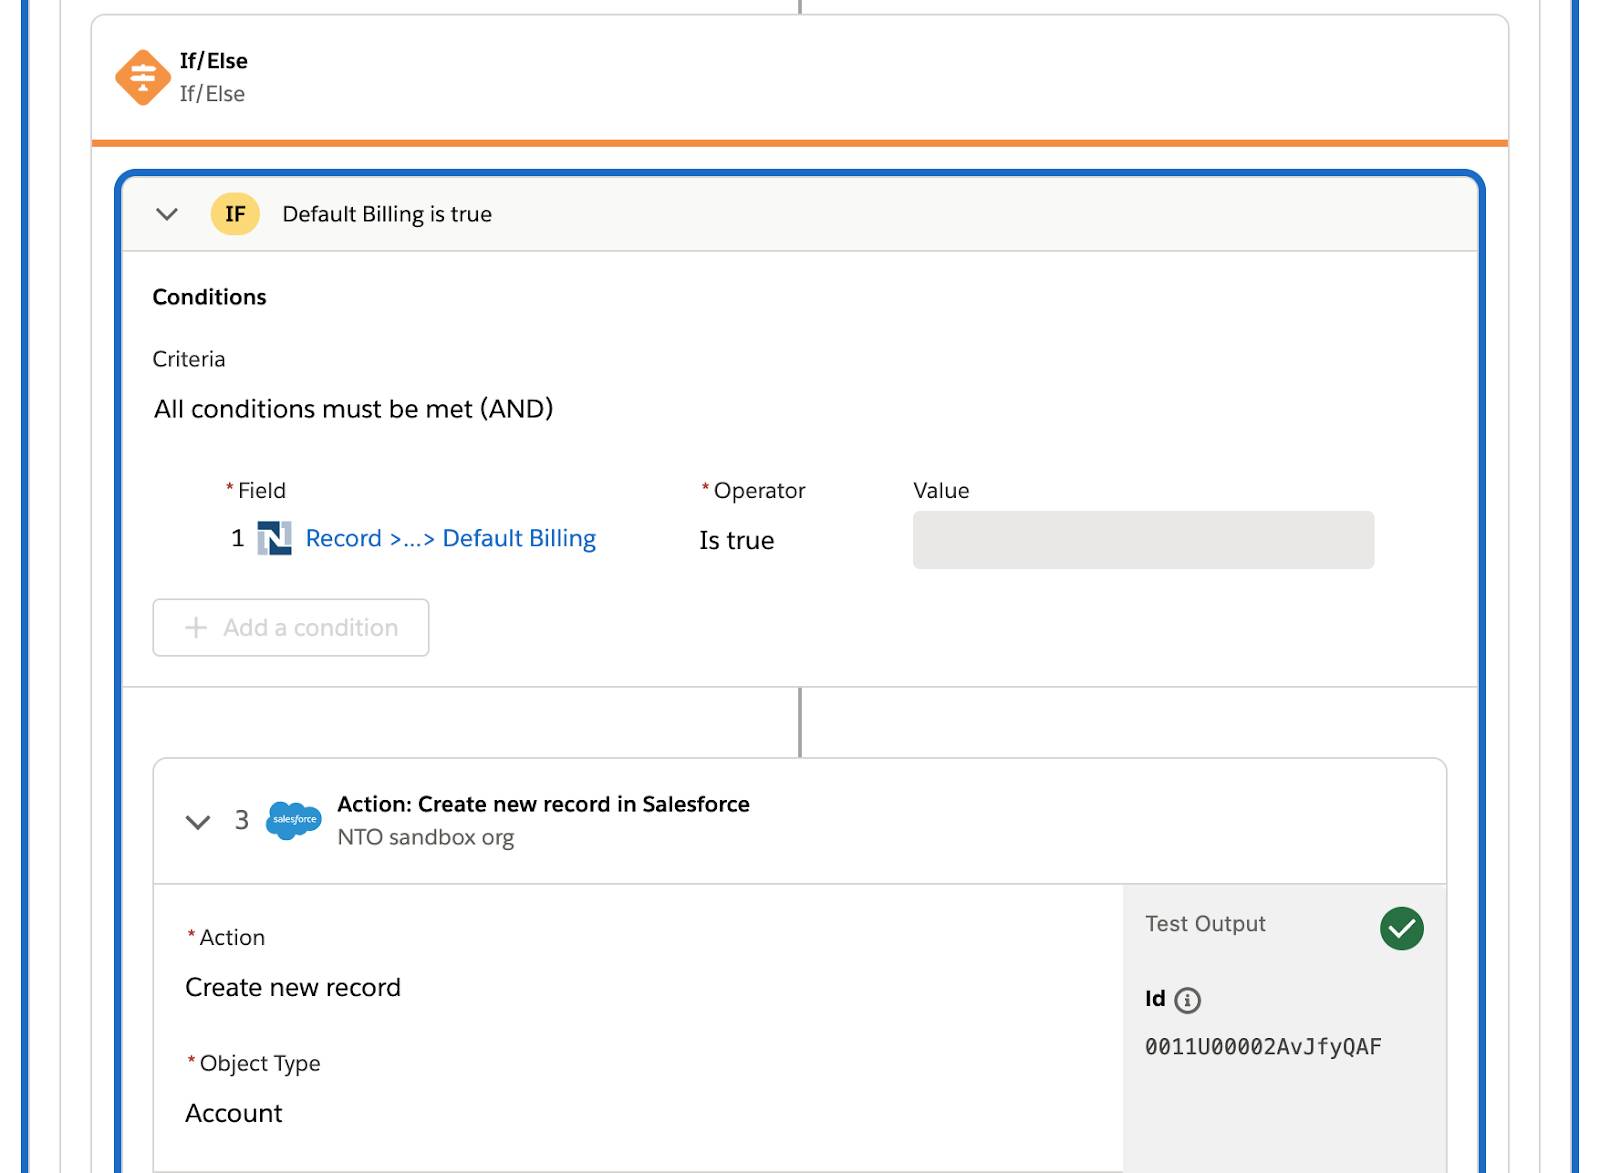
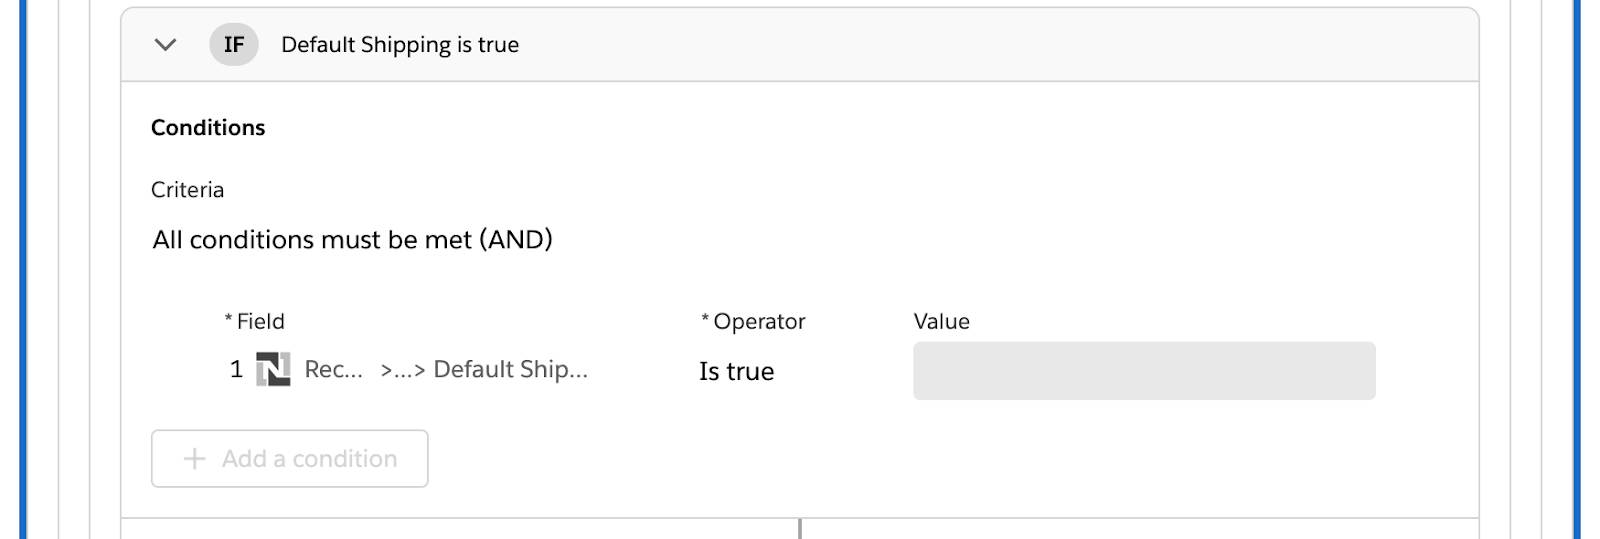
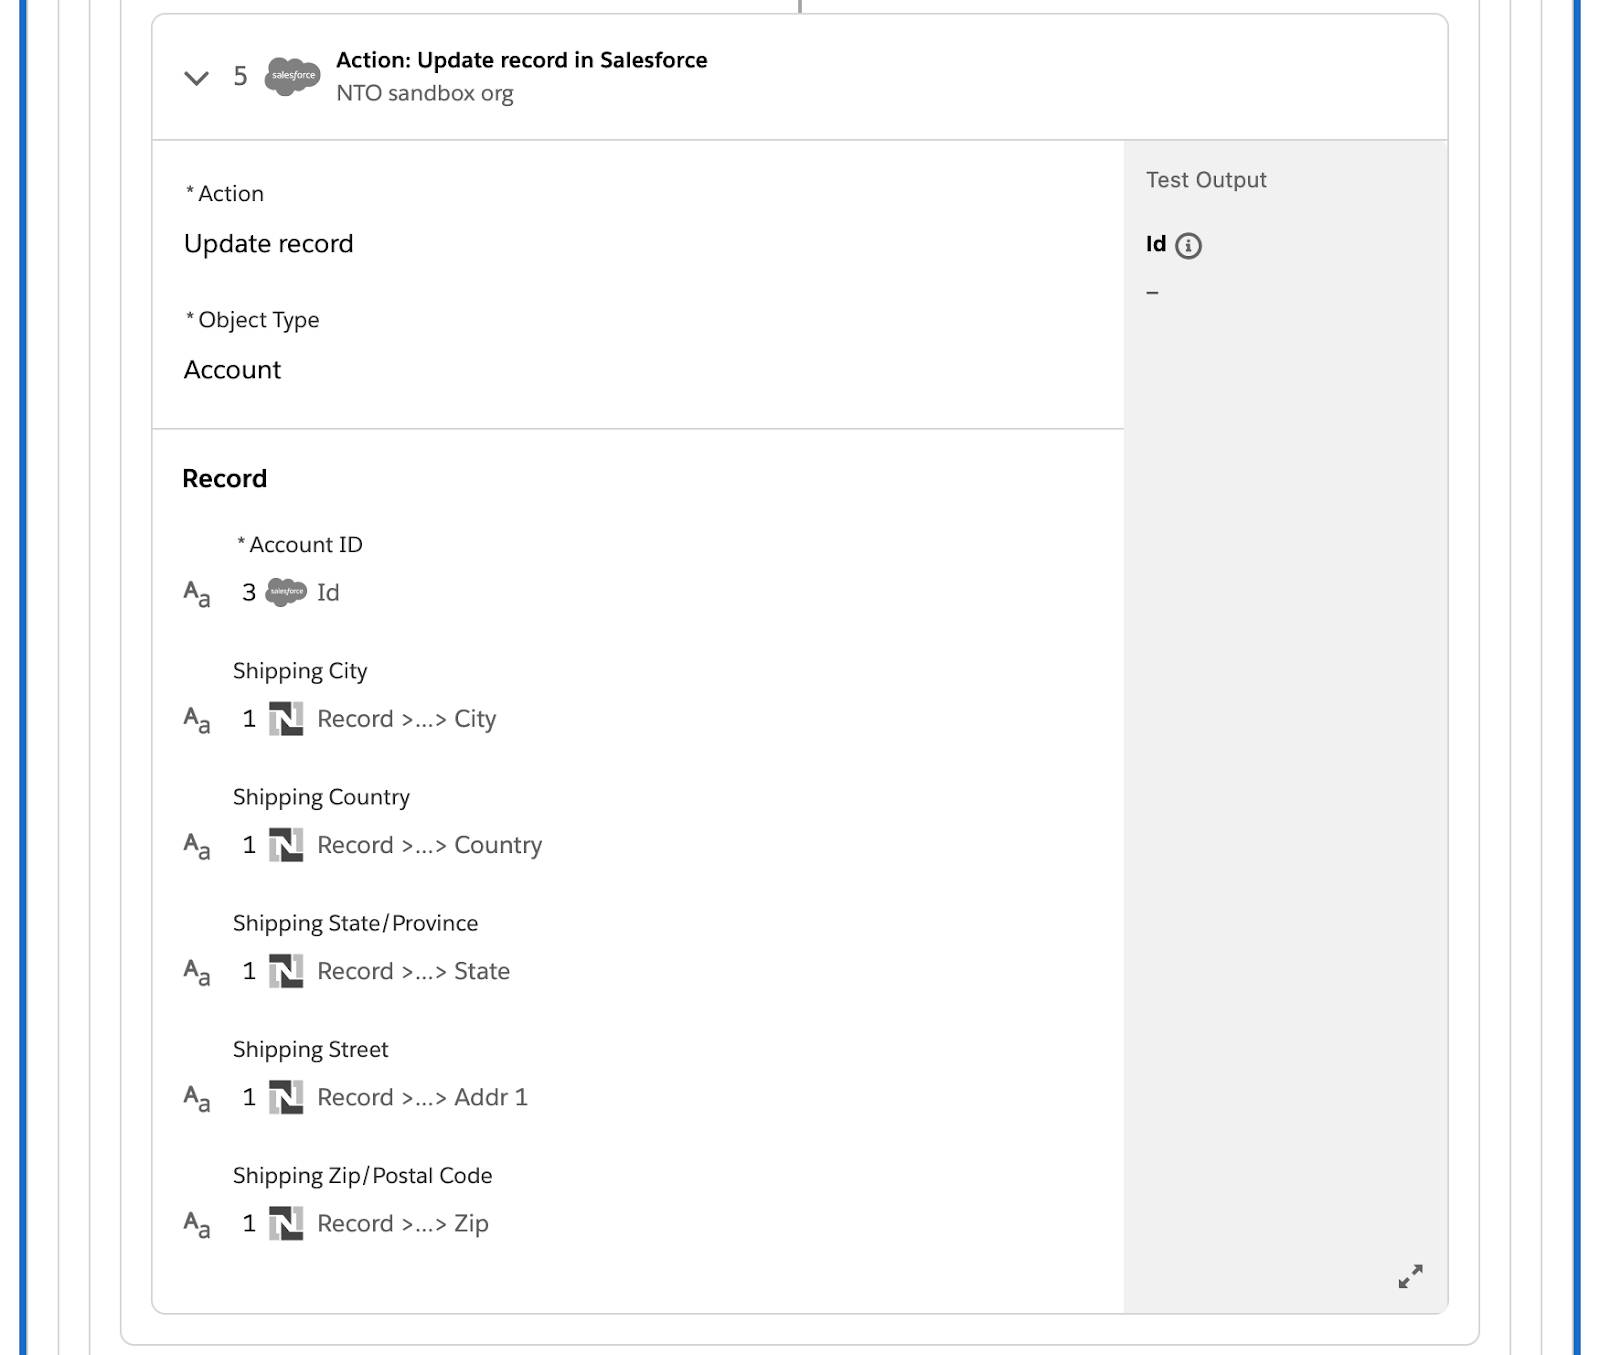
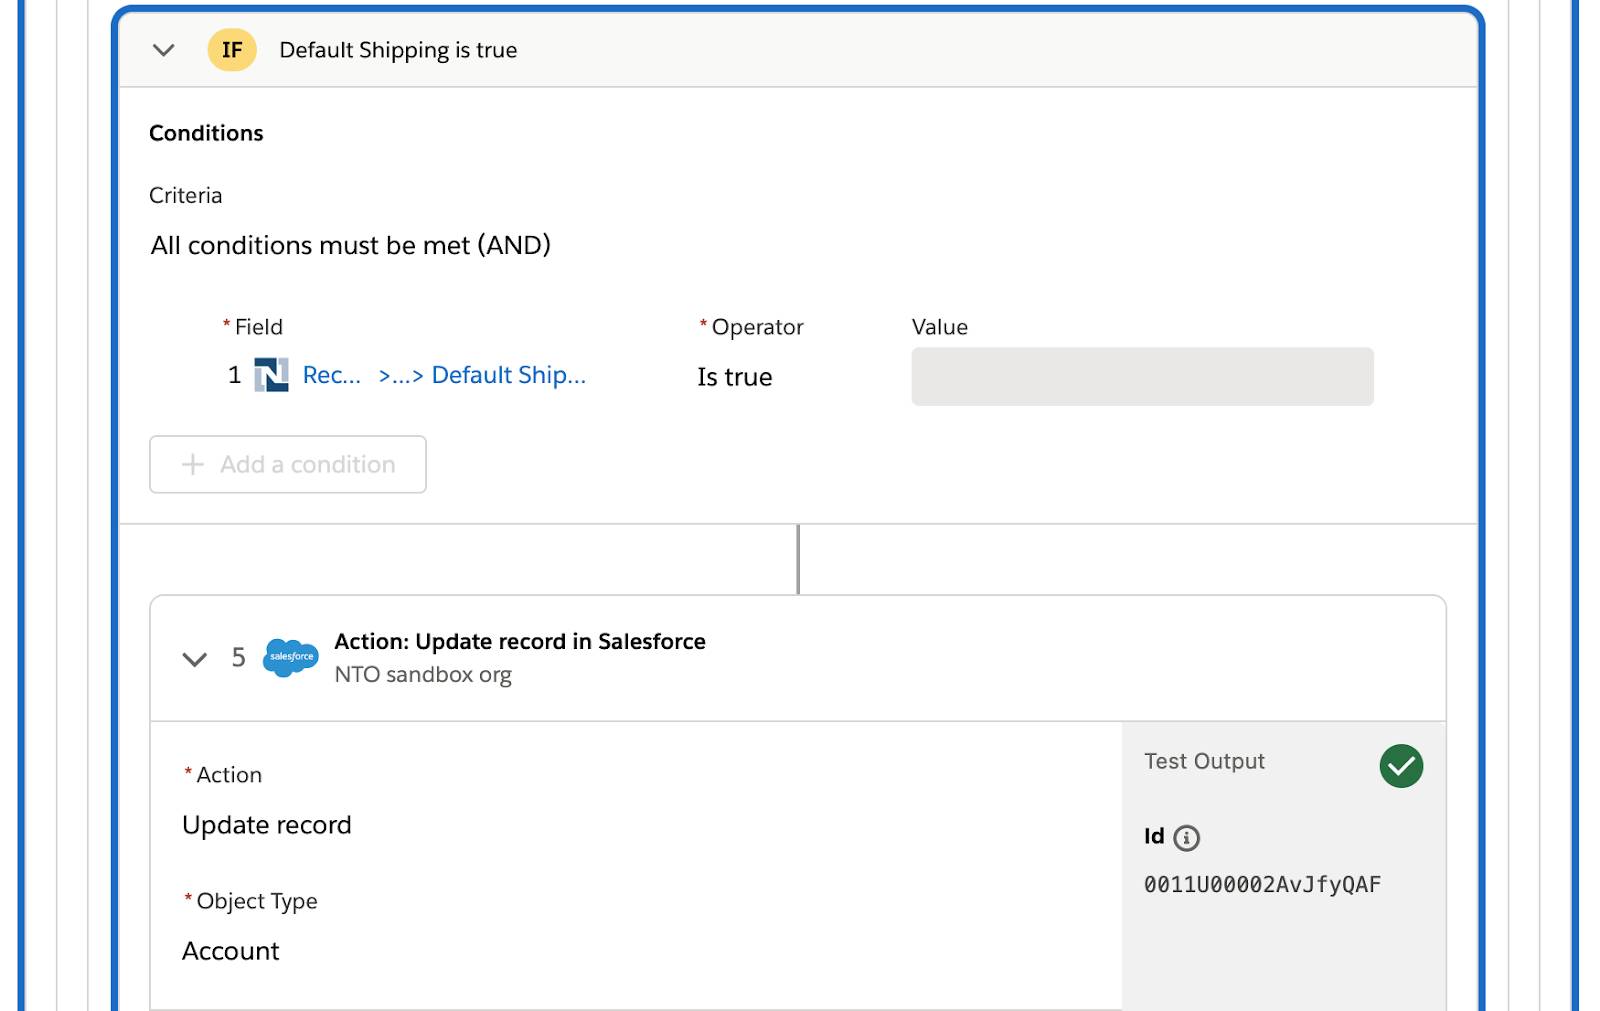
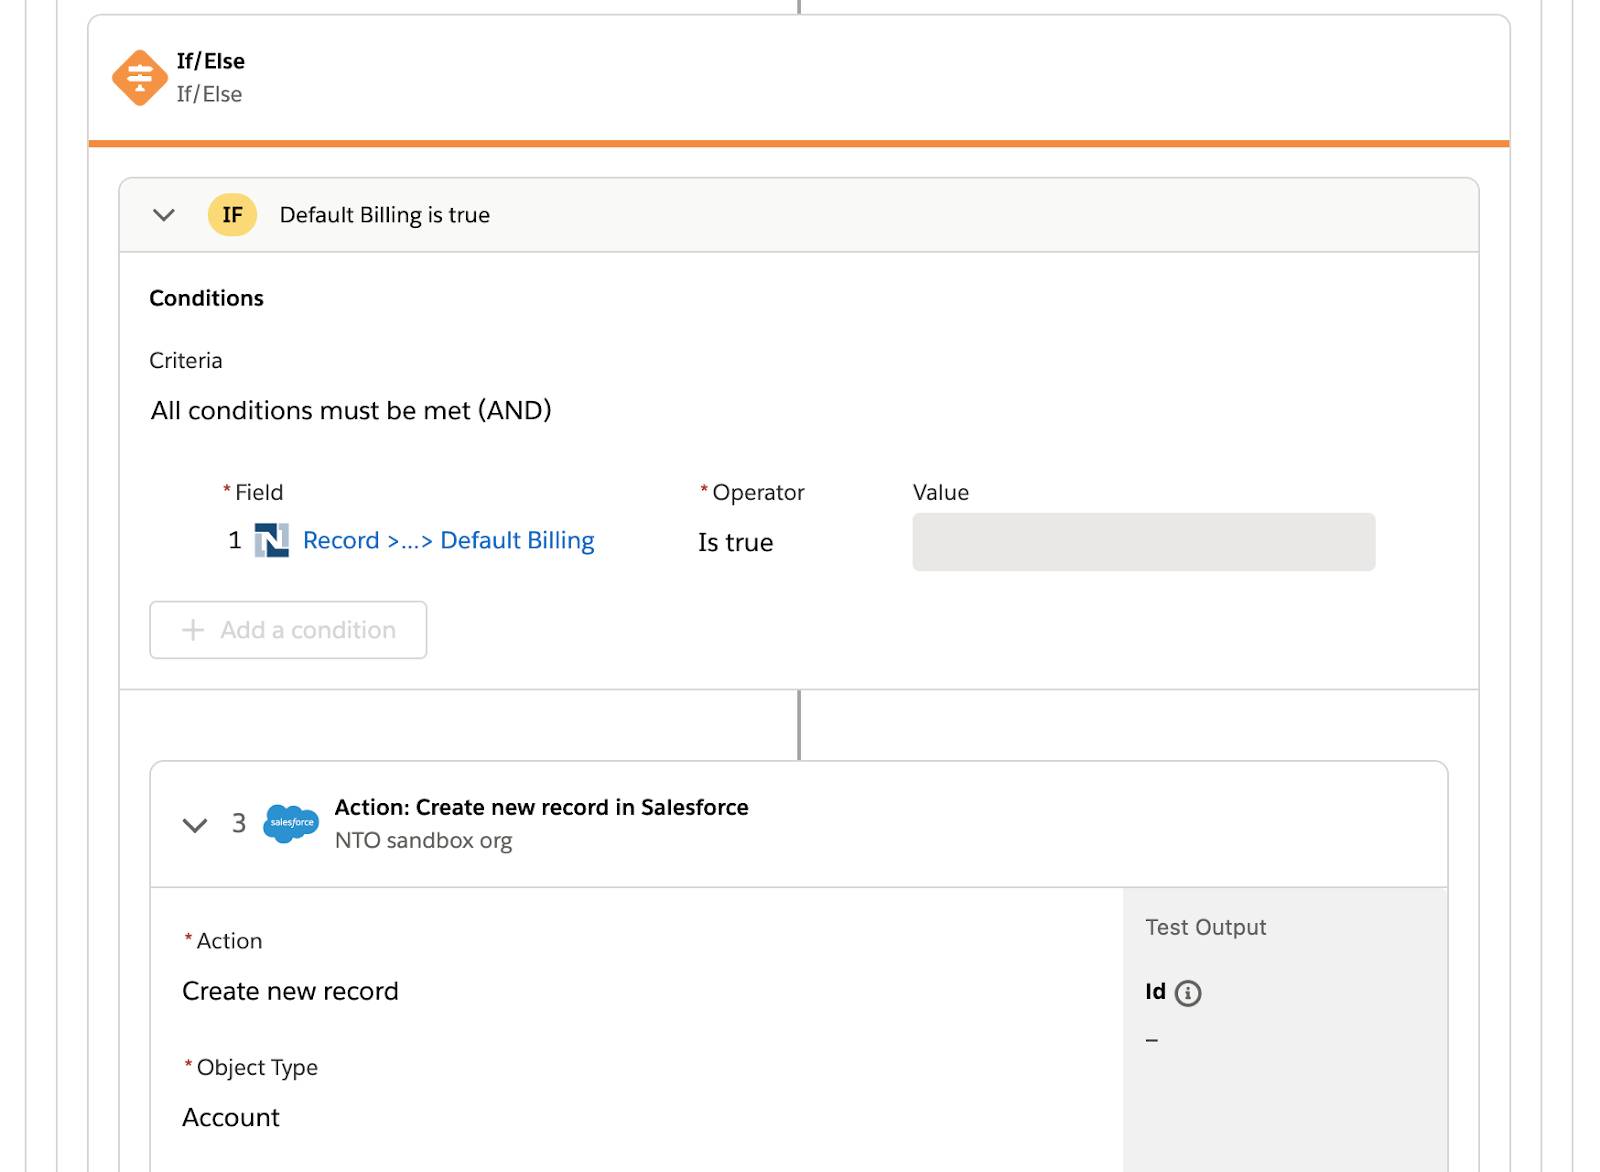
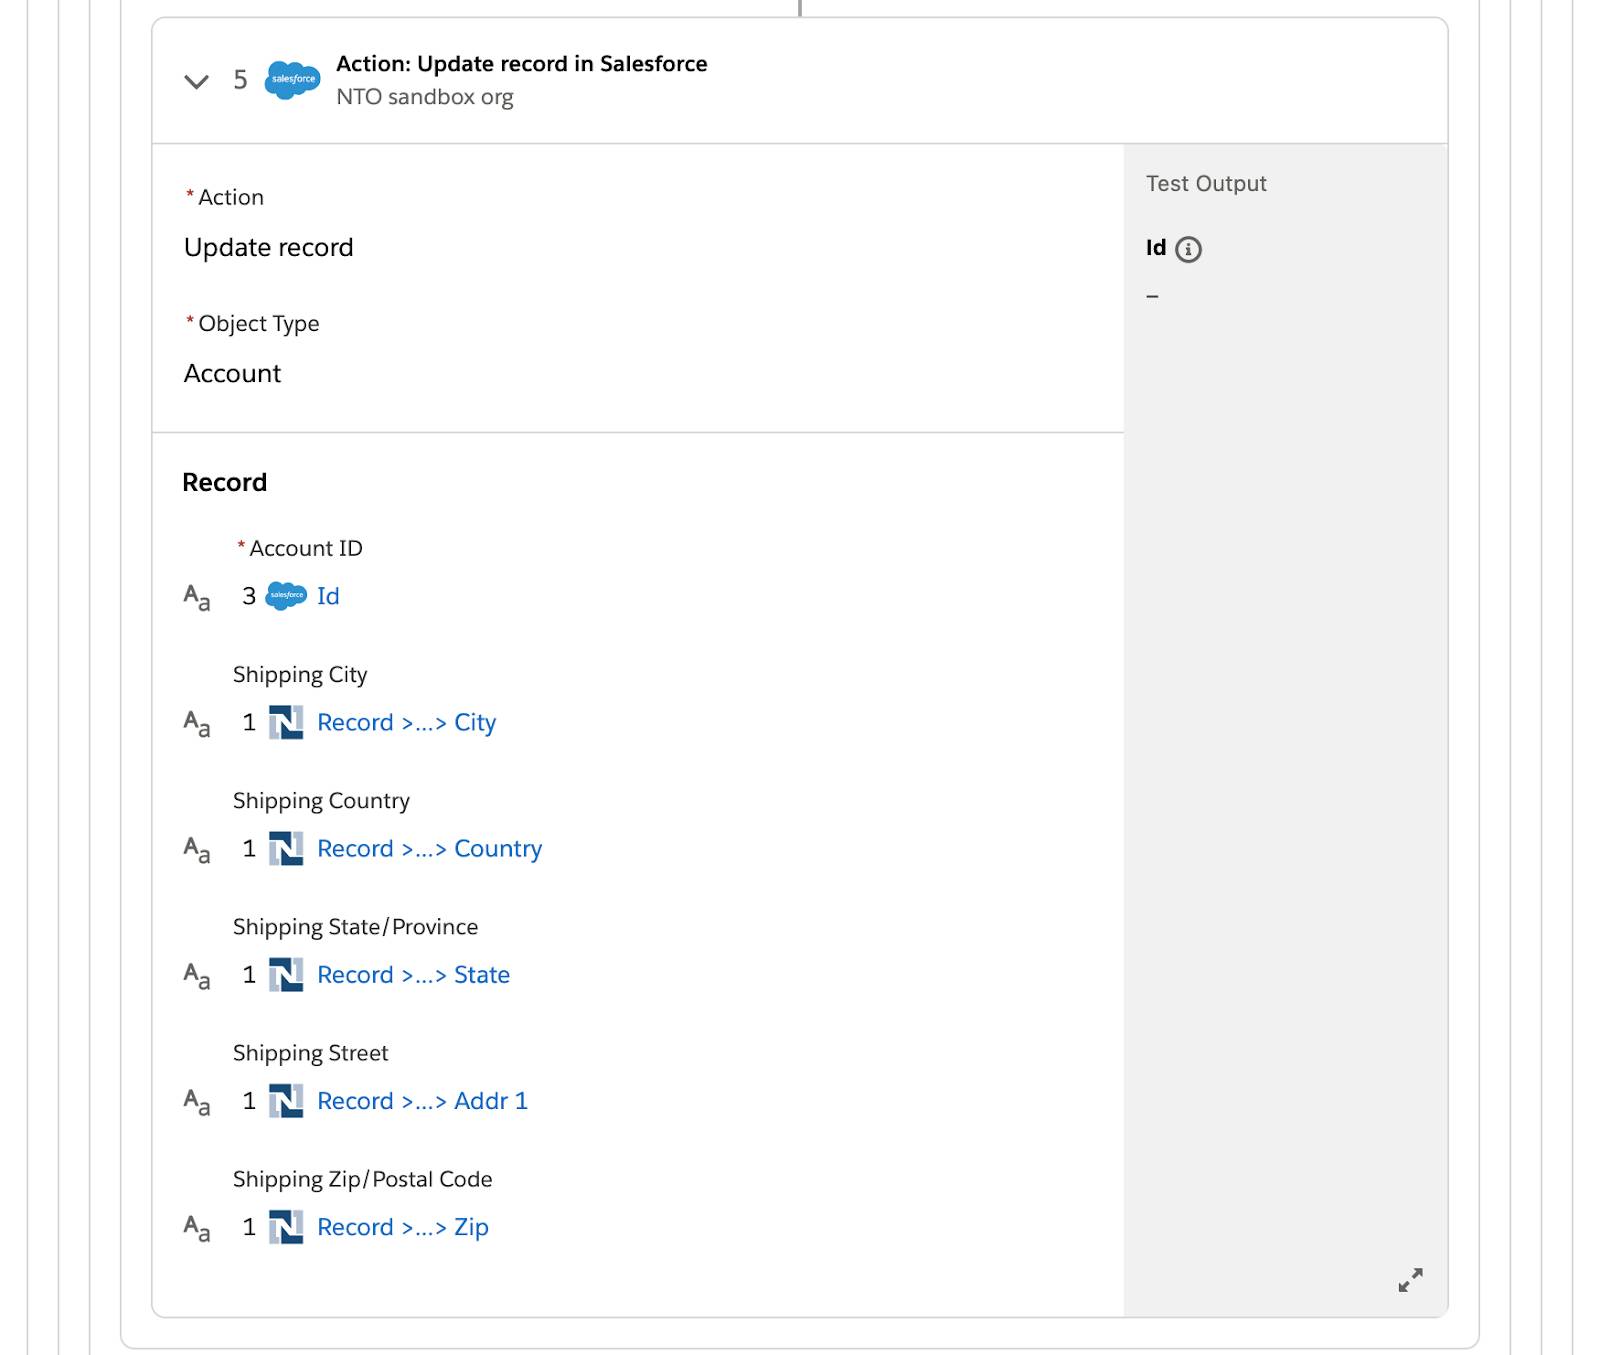
- Scroll down and note that step 5 of the flow was also executed successfully. This indicates that a Salesforce account was created with the default billing address during the first iteration through the NetSuite customer’s addresses. Then the account was updated with the default shipping address during the second iteration through the addresses. Because the third address is neither billing nor shipping, it’s ignored during the third iteration.
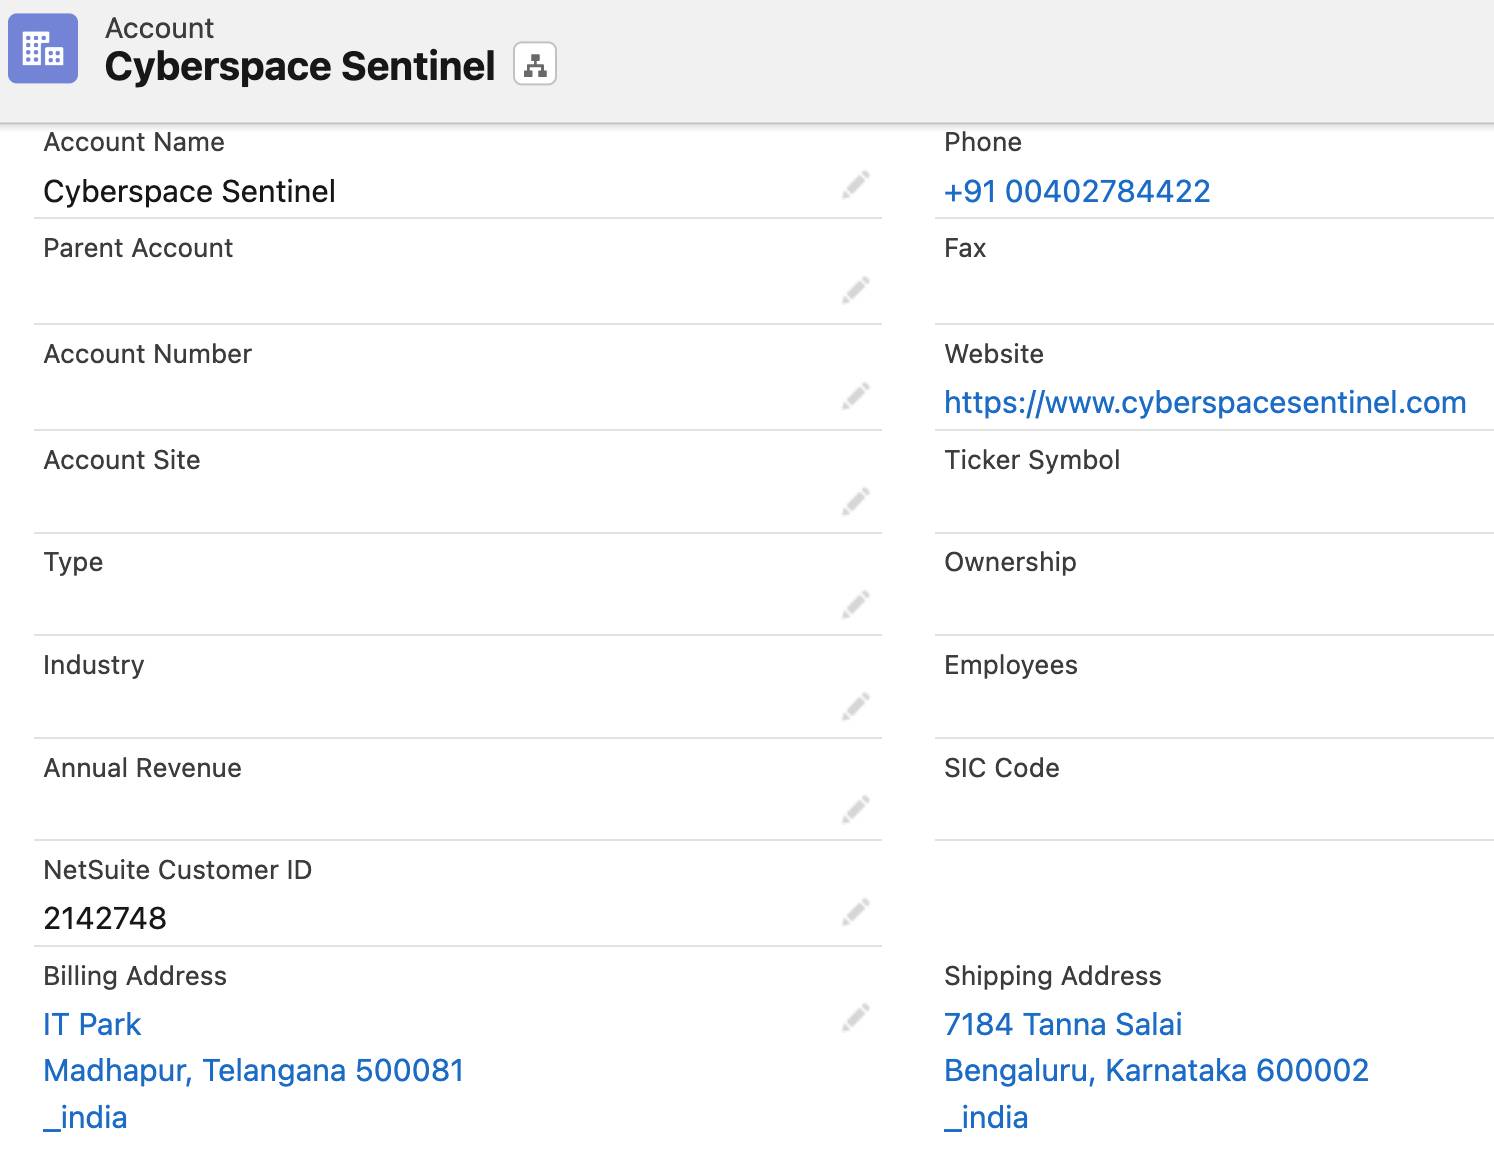
- Log in to the NTO org’s Sales Cloud, navigate to the Accounts tab, and view all accounts. Verify that a new account matching the NetSuite customer has been created. Notice that in the Billing Country field, India appears as _india. This is a NetSuite convention for its country data.

- Click Cyberspace Sentinel and then click Details. Verify that the account also has a shipping address and NetSuite customer ID. In this example, the NetSuite customer ID is 2142748, which is the internal ID of the NetSuite customer.
- Access your customer in NetSuite and verify that the customer has been updated with a Salesforce account ID. In this example, it’s 0011U00002AvJfyQAF, which is the ID of the Sales Cloud account.

- In the Sync New NetSuite Customers to Salesforce Accounts flow, click Test again.
- In NetSuite, click Edit on the Cyberspace Sentinel customer, click Actions | Delete, and then click OK to delete the customer.
- Repeat steps 3 through 9 to recreate the same customer.
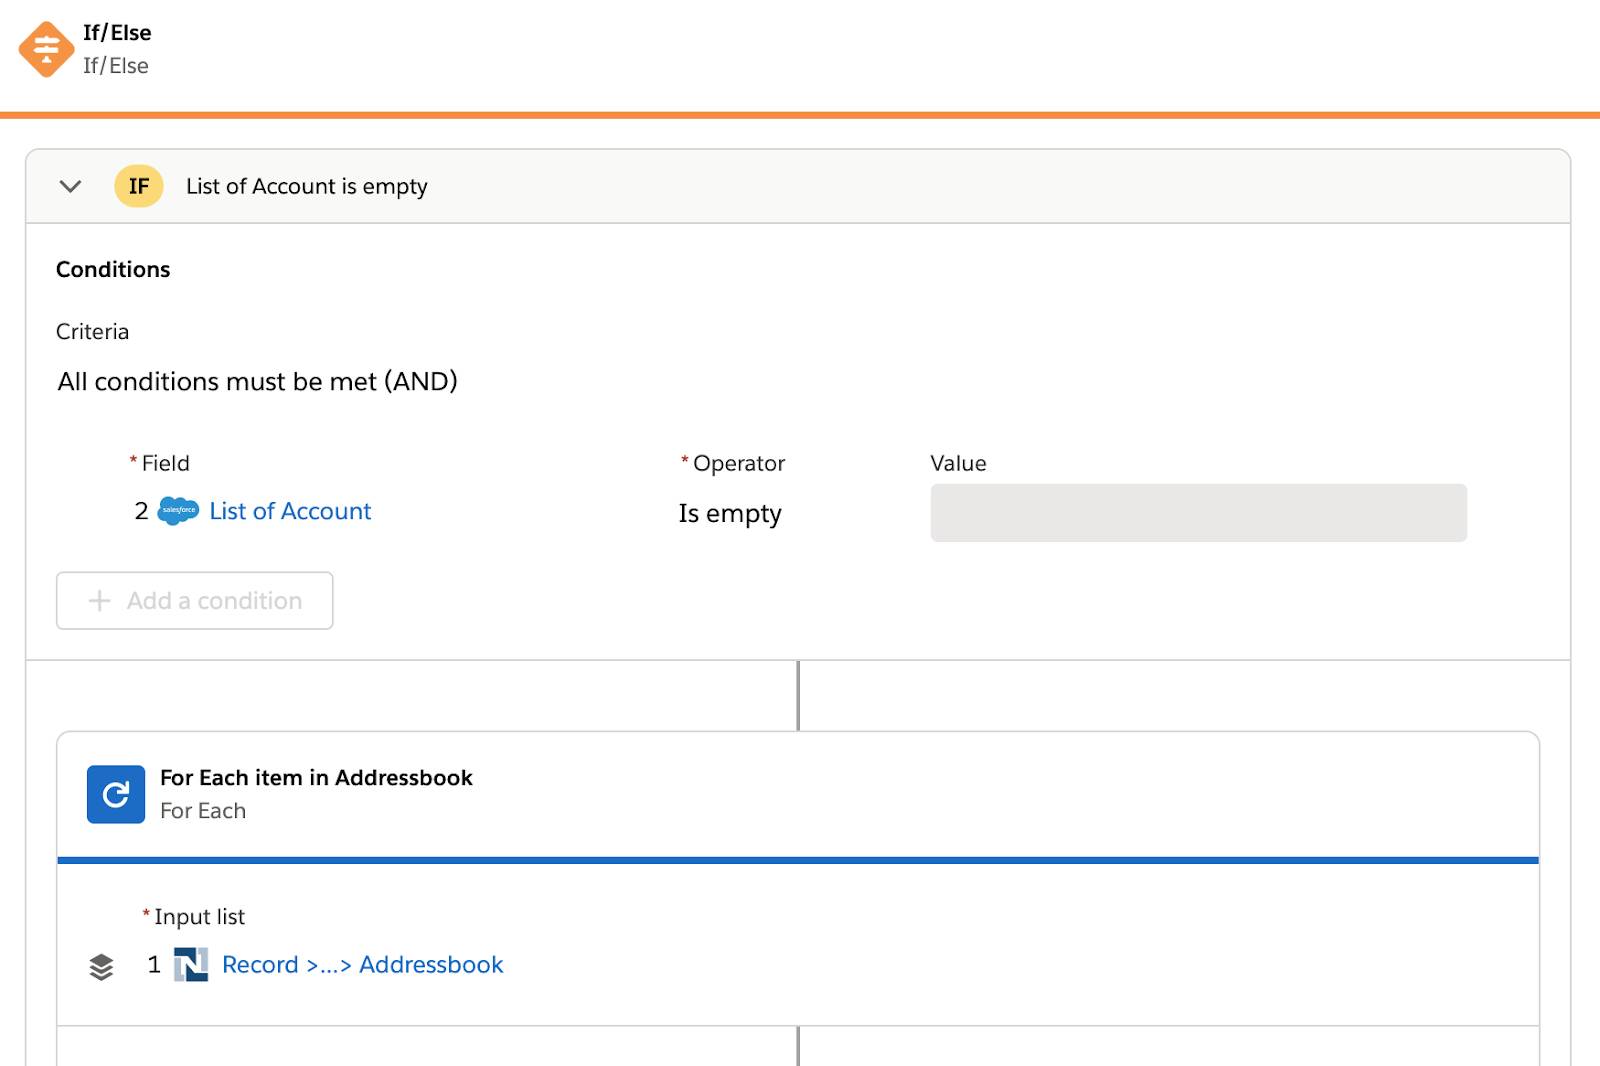
- Go back to your flow and wait for the test to complete. If only the first two steps of the flow show a green check mark, this indicates the flow ran successfully. This is because the List of Account condition in the first If/Else block evaluates to false, indicating the new customer has a corresponding account in Sales Cloud. So the rest of the flow wasn’t executed.
- In the NTO org’s Sales Cloud, verify that no new account matching the NetSuite Cyberspace Sentinel customer has been created.

- Reload the Cyberspace Sentinel customer page in NetSuite and verify the customer has not been updated with a Salesforce account ID.
- Repeat steps 1 through 21 to test another customer of your choice. Your flow should work as expected.
Good job! In the next unit, you learn how to activate, monitor, and troubleshoot your flow in the production environment.