Use Insights in Data 360
Learning Objectives
After completing this unit, you’ll be able to:
- Preview insights in Data Explorer.
- Use calculated insights in segmentation.
- Create a data action and target.
View Your Insights
Once you have created and saved your insight, you can find it in the home page of the Calculated Insights tab. Review the status column to determine when your insight is ready to use in segmentation. The insight is ready to use when the status changes from processing to active.

Let’s review the possible statuses and what they mean.
Status |
Description |
|---|---|
Aborted |
Insight has been in the pending status for more than 8 hours and was terminated. Review your logic and retry. |
Active |
Insight is working as expected. |
Error |
Insight processing has failed. Review your logic or log a support ticket for assistance. |
Pending |
Insight is scheduled for execution. |
Processing |
Insight is processing. |
Success |
Insight processing is completed and now set to active. |
Check Your Work
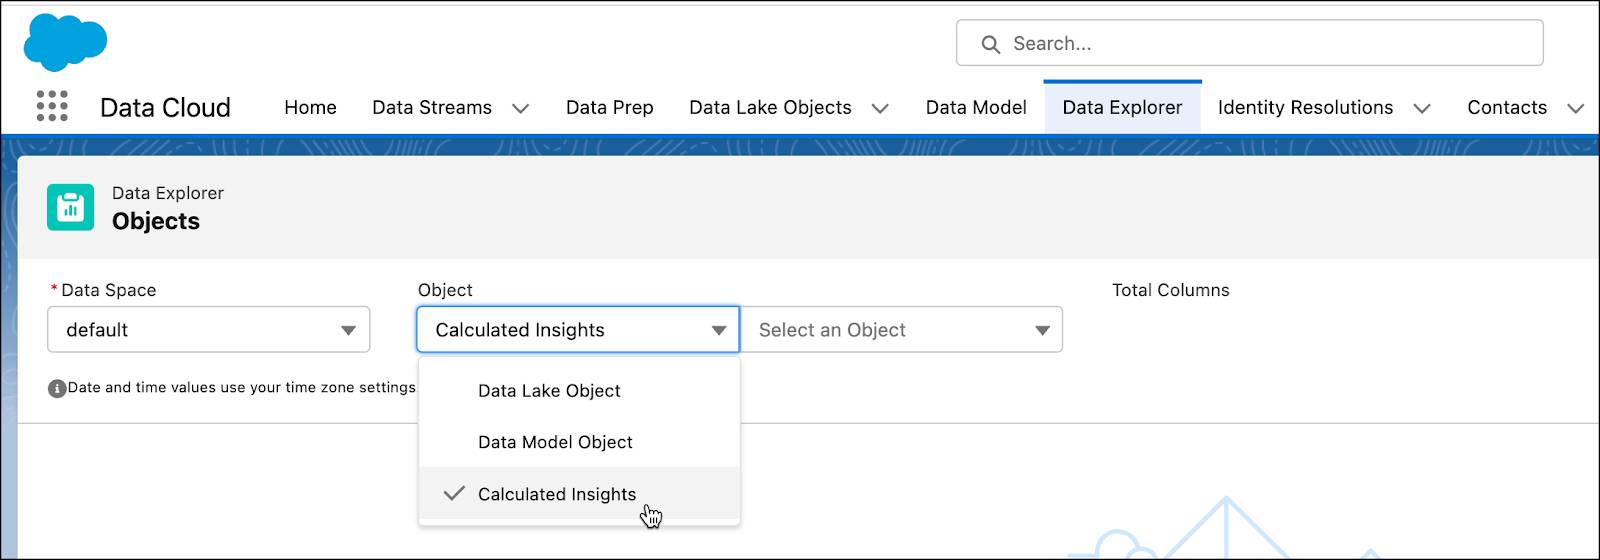
After your insights are created, it’s best practice to review your insights in Data Explorer before you use them in a segment. Let’s review Data Explorer to find out how to spot check your work. First, navigate to the Data Explorer tab in Data Cloud. Select the appropriate Data Space, then from the Object dropdown, select Calculated Insights.
From this screen, you should see the object and fields from your expression, along with your calculated measures. In this example, you can see all the customer IDs and their total spend. You can even spot check your data to see if you need to do any formatting, like updating the decimal place.
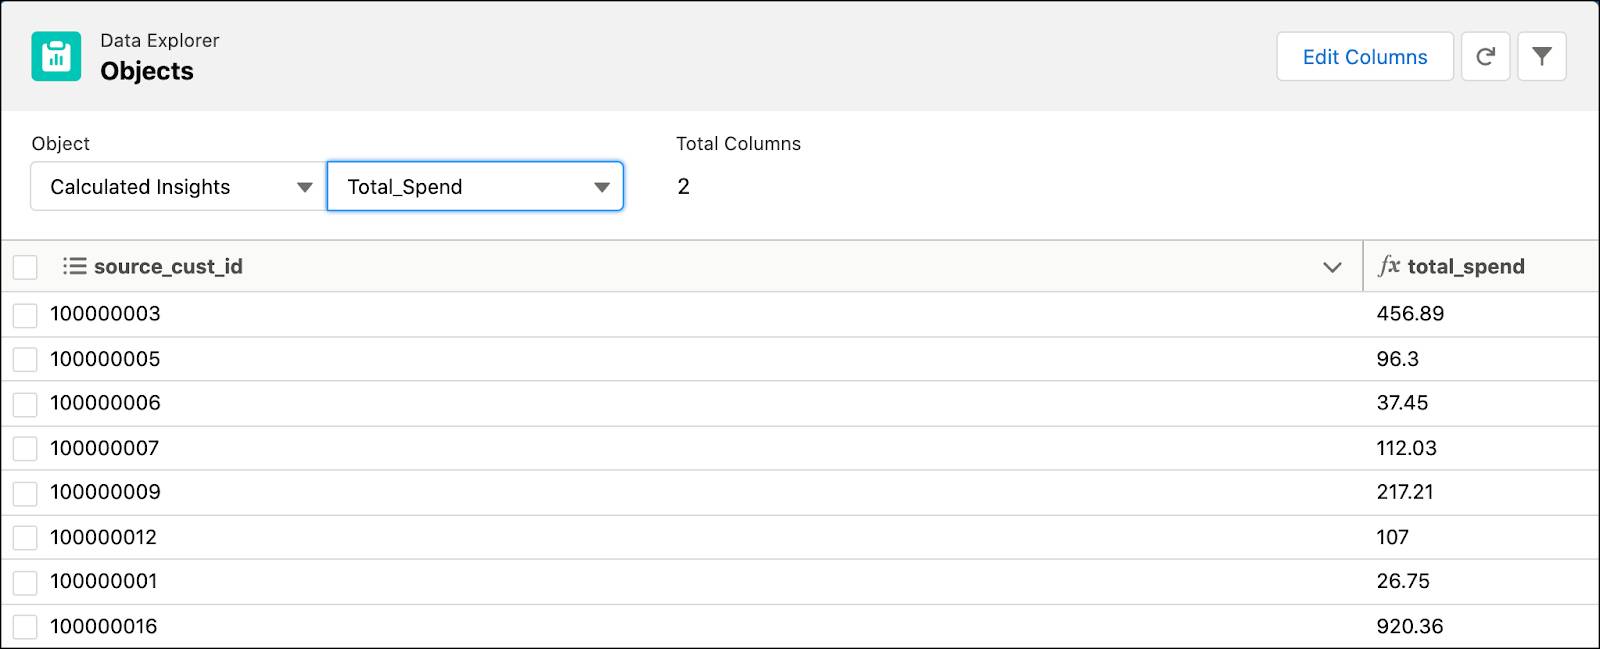
If anything is off, you can go back and clone your created insight and make updates.
Use Your Calculated Insights
Once you are confident with your calculations, you can begin using your insights. You can use calculated insights in your segmentation to narrow your results. You can also add them to activations to enable journey decisions and for message personalization in Marketing Cloud Engagement. Let’s review the steps for each of these.
Use in Segmentation
To improve and narrow the results of an existing segment, first navigate to the Segments tab in Data Cloud. Then follow these steps.
- Locate the existing segment you wish to update and click Edit Rules.
- Under Direct Attributes, select the insight you wish to add and then drag to the canvas.
- You can then update the operator (1) and add a value (2)

- You can also add more granular insights by adding additional dimensions to the segment by clicking Add Dimension.
Add to Activation
To add additional attributes to an existing activation, like a Marketing Cloud Engagement welcome journey, navigate to the Activation tab in Data Cloud. Then follow these steps.
- Locate the existing activation you wish to update and then click Edit.
- Review the first screen and confirm Segment, Activation Target, and Activation Membership are still correct. Once confirmed, click Continue.
- Review the contact point for the activation and then click Next.
- On the attribute page, click Add Attributes.

- From the Calculated Insights section, select the insight you wish to add (1) and then drag to the canvas (2).
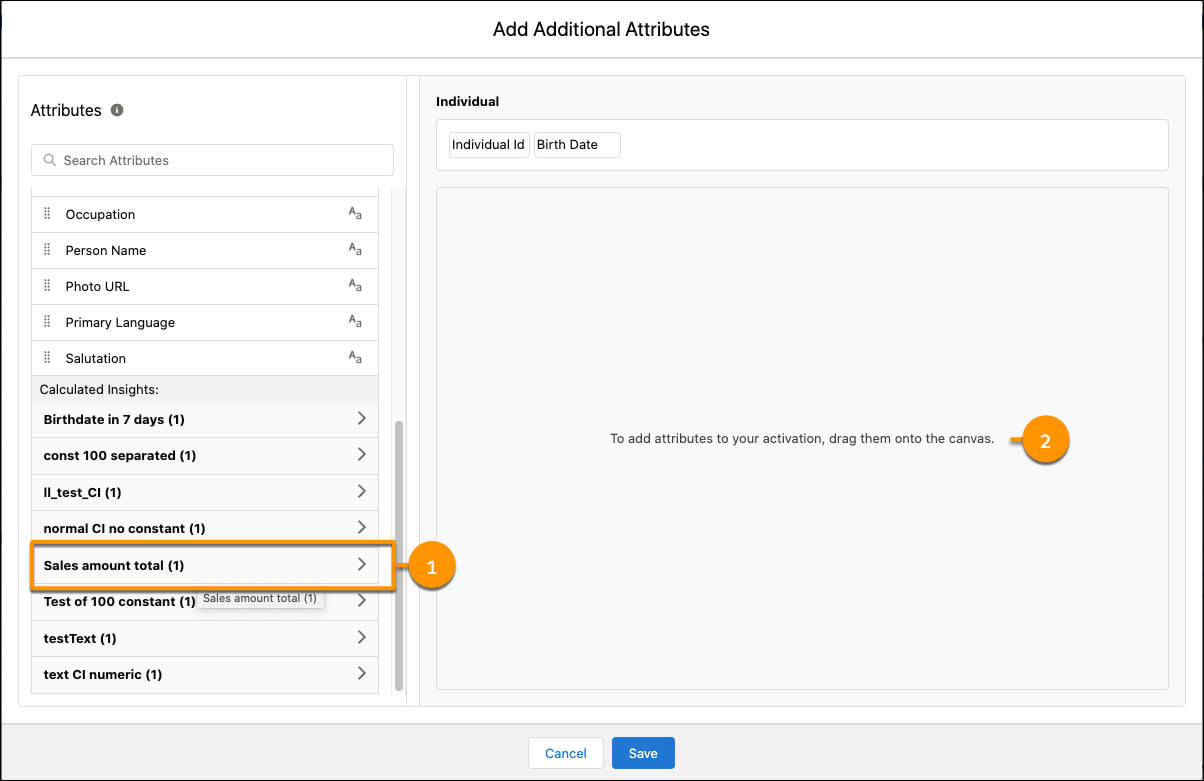
- Once selected, click Save.
- Review attributes and then click Next.
- Update your activation name, add a description, and then click Save.
Great! Now that we have reviewed how to use calculated insights, let’s cover streaming insights.
Use Your Streaming Insights
Once you have a streaming insight created, you can create data actions based on certain use cases. To begin using data actions, you first need to create a target or location to send your results. There are three supported targets.
-
Webhook: A webhook is a type of API for web applications that is event driven vs request driven. Send data actions to any webhook target and protect the message integrity with the Salesforce-generated secret key.
-
Salesforce CRM: Send data actions to the core event bus, enabling building flow applications based on near real-time insights generated in Data 360.
-
Marketing Cloud Engagement: Send data actions to the Marketing Cloud Engagement and utilize your streaming data events to send email objects and user journeys.
Create a Data Action Target
Let’s review the steps to create a target.
- From Data Cloud, navigate to the Data Action Targets tab.
- Click New to create a data action target.
- Enter an Action Target Name.
- Select an Action Target Type.
- If you select Salesforce CRM, select the org you want to connect.
- If you select Webhook, select Generate Key.
- If you select Marketing Cloud Engagement, select either Email or Journey.
- Once selected, a scrollable menu populates showing all eligible email objects or user journeys depending on your selection.
- Click Save.
That’s it! Now you can create your data action.
Create a Data Action
- From Data Cloud, navigate to the Data Action tab.
- Click New.
- Select the data action target you created and then Next.
- Select Streaming Insight from the object type dropdown.
- Then search for the Streaming Insight’s Object Name and click Next.
Now you can add optional conditions called action rules to your action. For example, you could add a rule like: product_category is equal to camping.

Next, you can add profile attributes. Once done adding optional conditions and attributes, follow the remaining steps.
- From Properties, add a name and an optional description.
- Finally, click Save and Publish.
You can view your created data actions from the Data Actions tab. After the new action is created, the target starts receiving events in less than 15 minutes.
Enhance Your Data with Insights
You’re now ready to build, check, and use your own insights. Consider the possibilities and start creating insights to enhance your data in Data 360.
Resources
- Salesforce Help: Calculated Insights in Segmentation
- Salesforce Help: Data Actions in Data 360
- Salesforce Help: Data 360 Limits and Guidelines