Use Calculated Dimensions
Learning Objectives
After completing this unit, you’ll be able to:
- Create calculated dimensions in Marketing Cloud Intelligence.
- Use calculated dimensions in visualizations across the platform.
What Are Calculated Dimensions?
Your data has a fixed number of fields, whether you’re looking at a single dataset or a mix of various platforms and flat files. Sometimes you need a way to classify your data so you can build on fixed fields. Examples: applying a classification to more than just one of your datasets; unifying similar dimension values throughout your data. This is where calculated dimensions come in. With calculated dimensions, you can easily classify your data and generate new dimensions on top of your existing data.
Calculated dimensions don’t exist physically in the Marketing Cloud Intelligence database. Rather, each calculated dimension represents a query that you can reference in any report, pivot table, widget, or other tool throughout the workspace. This makes maintenance easy and flexible because any change you make in the calculated dimension is reflected everywhere it’s used in the workspace.
Calculated dimensions have many different uses. Some common use cases are:
-
Consolidating dimensions: When you have dimensions that display long names, such as website addresses, you can shorten them without manipulating the actual data that you bring into Marketing Cloud Intelligence. You do that by using the IF function; for example: IF([Site_Name] contains ‘http://www.netflix.com’, ‘Netflix’)
-
Removing unwanted characters: If a dimension value includes extra characters, you can remove them. The REPLACE() function allows you to specify a string and replace it with a different one. For example, REPLACE([Creative_Name],'@',' '), converts the Creative Name 'Become@an@Intelligence@expert@today!' to 'Become an Intelligence expert today!' by replacing the @ symbols with spaces.
-
Removing unwanted spaces: The TRIM() function removes extra spaces from your dimension values. For example, TRIM([Campaign_Name]) turns the campaign name 'Summer 2020 Seasonal Sale' into 'Summer 2020 Seasonal Sale', leaving only single spaces between words.
Calculated dimensions and the functions within them flex to accommodate a wide variety of use cases.
Create Calculated Dimensions
Now that you know what calculated dimensions are, let’s see how you create them. There are two ways to create calculated dimensions, through the Calculated Dimensions tab and directly from a dashboard page. You can choose the method that you prefer.
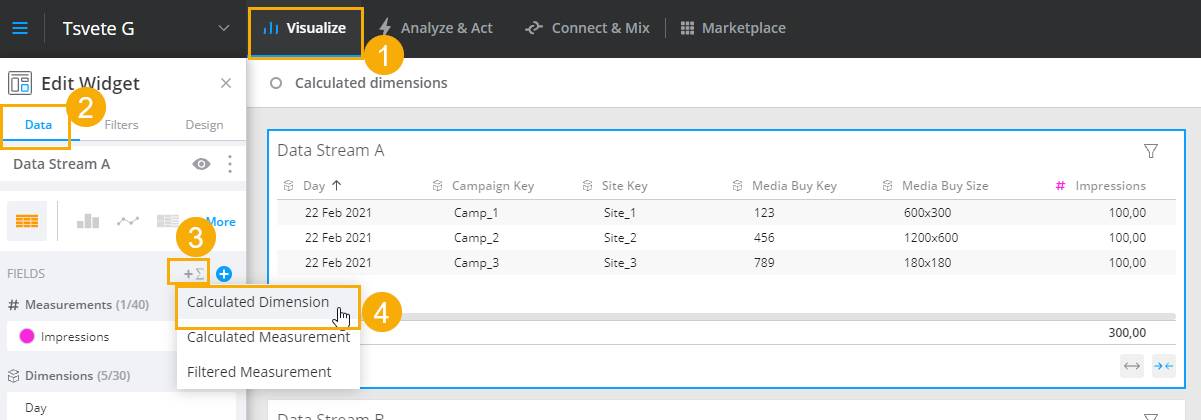
Create a Calculated Dimension from a Dashboard Page
- Navigate to Visualize.
- Go to a dashboard page with a widget and click the Data tab.
- Click the Calculated Fields icon.
- Click Calculated Dimensions.
Create a Calculated Dimension Through the Calculated Dimensions Tab
- Navigate to Connect & Mix.
- Click Dimensions to expand it.
- Click Calculated Dimensions.
- Click Add New.

The calculated dimensions dialog appears. It’s divided into sections: General (5), Advanced (6), and Expression (7).
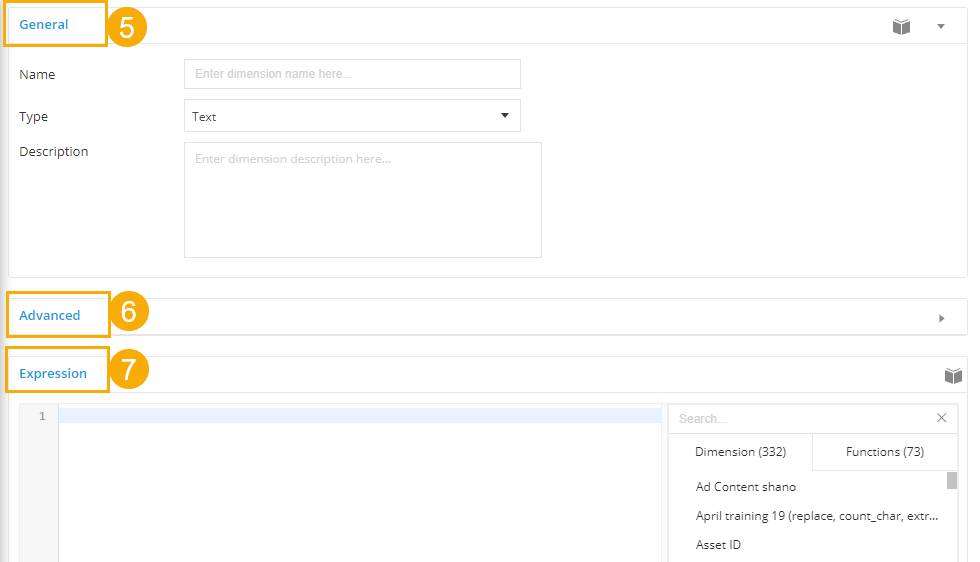
The Expression section (1) is where you input the logic for the calculated dimension. In other words, it’s where you add your functions and formulas for the calculated dimension to perform. Click the Functions tab (2) to see a list of all available functions.

Use Calculated Dimensions
After you create a calculated dimension, you can use it to slice your data in various places across the platform. Similar to regular Marketing Cloud Intelligence dimensions, a calculated dimension can be used in:
- Widgets
- Pivot tables
- Reports
- Filters
- Calculated measurements
- Other calculated dimensions
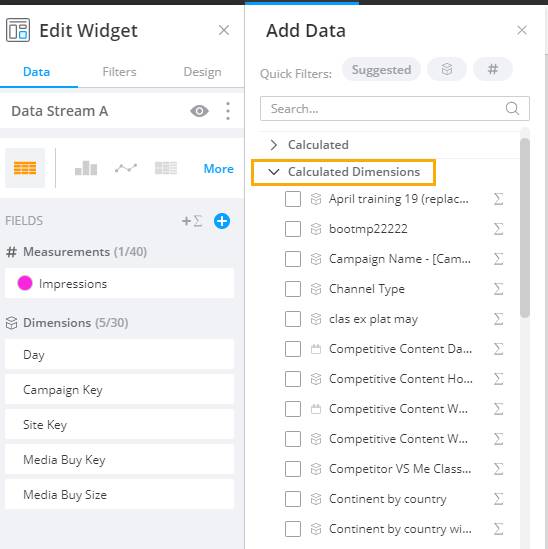
To add a calculated dimension to a platform component, navigate to its relevant section where you select dimensions and measurements and select your calculated dimension from there. In a widget, for example, you go to the Add Data section.
Next Up
Now you know how to create and use calculated dimensions. Next, let’s dive into the feature that lets you create custom calculations, calculated measurements.
Resources
- Salesforce Help: Calculated Dimensions