Add a Child Node to the Relationship Graph
Learning Objectives
After completing this unit, you’ll be able to:
- Add a child node to an ARC relationship graph.
- Configure a child node.
- Customize an ARC relationship graph to meet the needs of the business.
Customize the B2B Graph Template
The B2B graph template is a great starting point for building an ARC graph. The nodes are preconfigured with display fields and record actions, but you can also update them to match those requested by users. You can even customize the node labels.
In this unit, you learn how to customize the graph’s nodes.
Customize the Subsidiaries Node
In the Cumulus example, the subsidiaries node has a many-to-many relationship type that shows accounts that are related to a parent account.
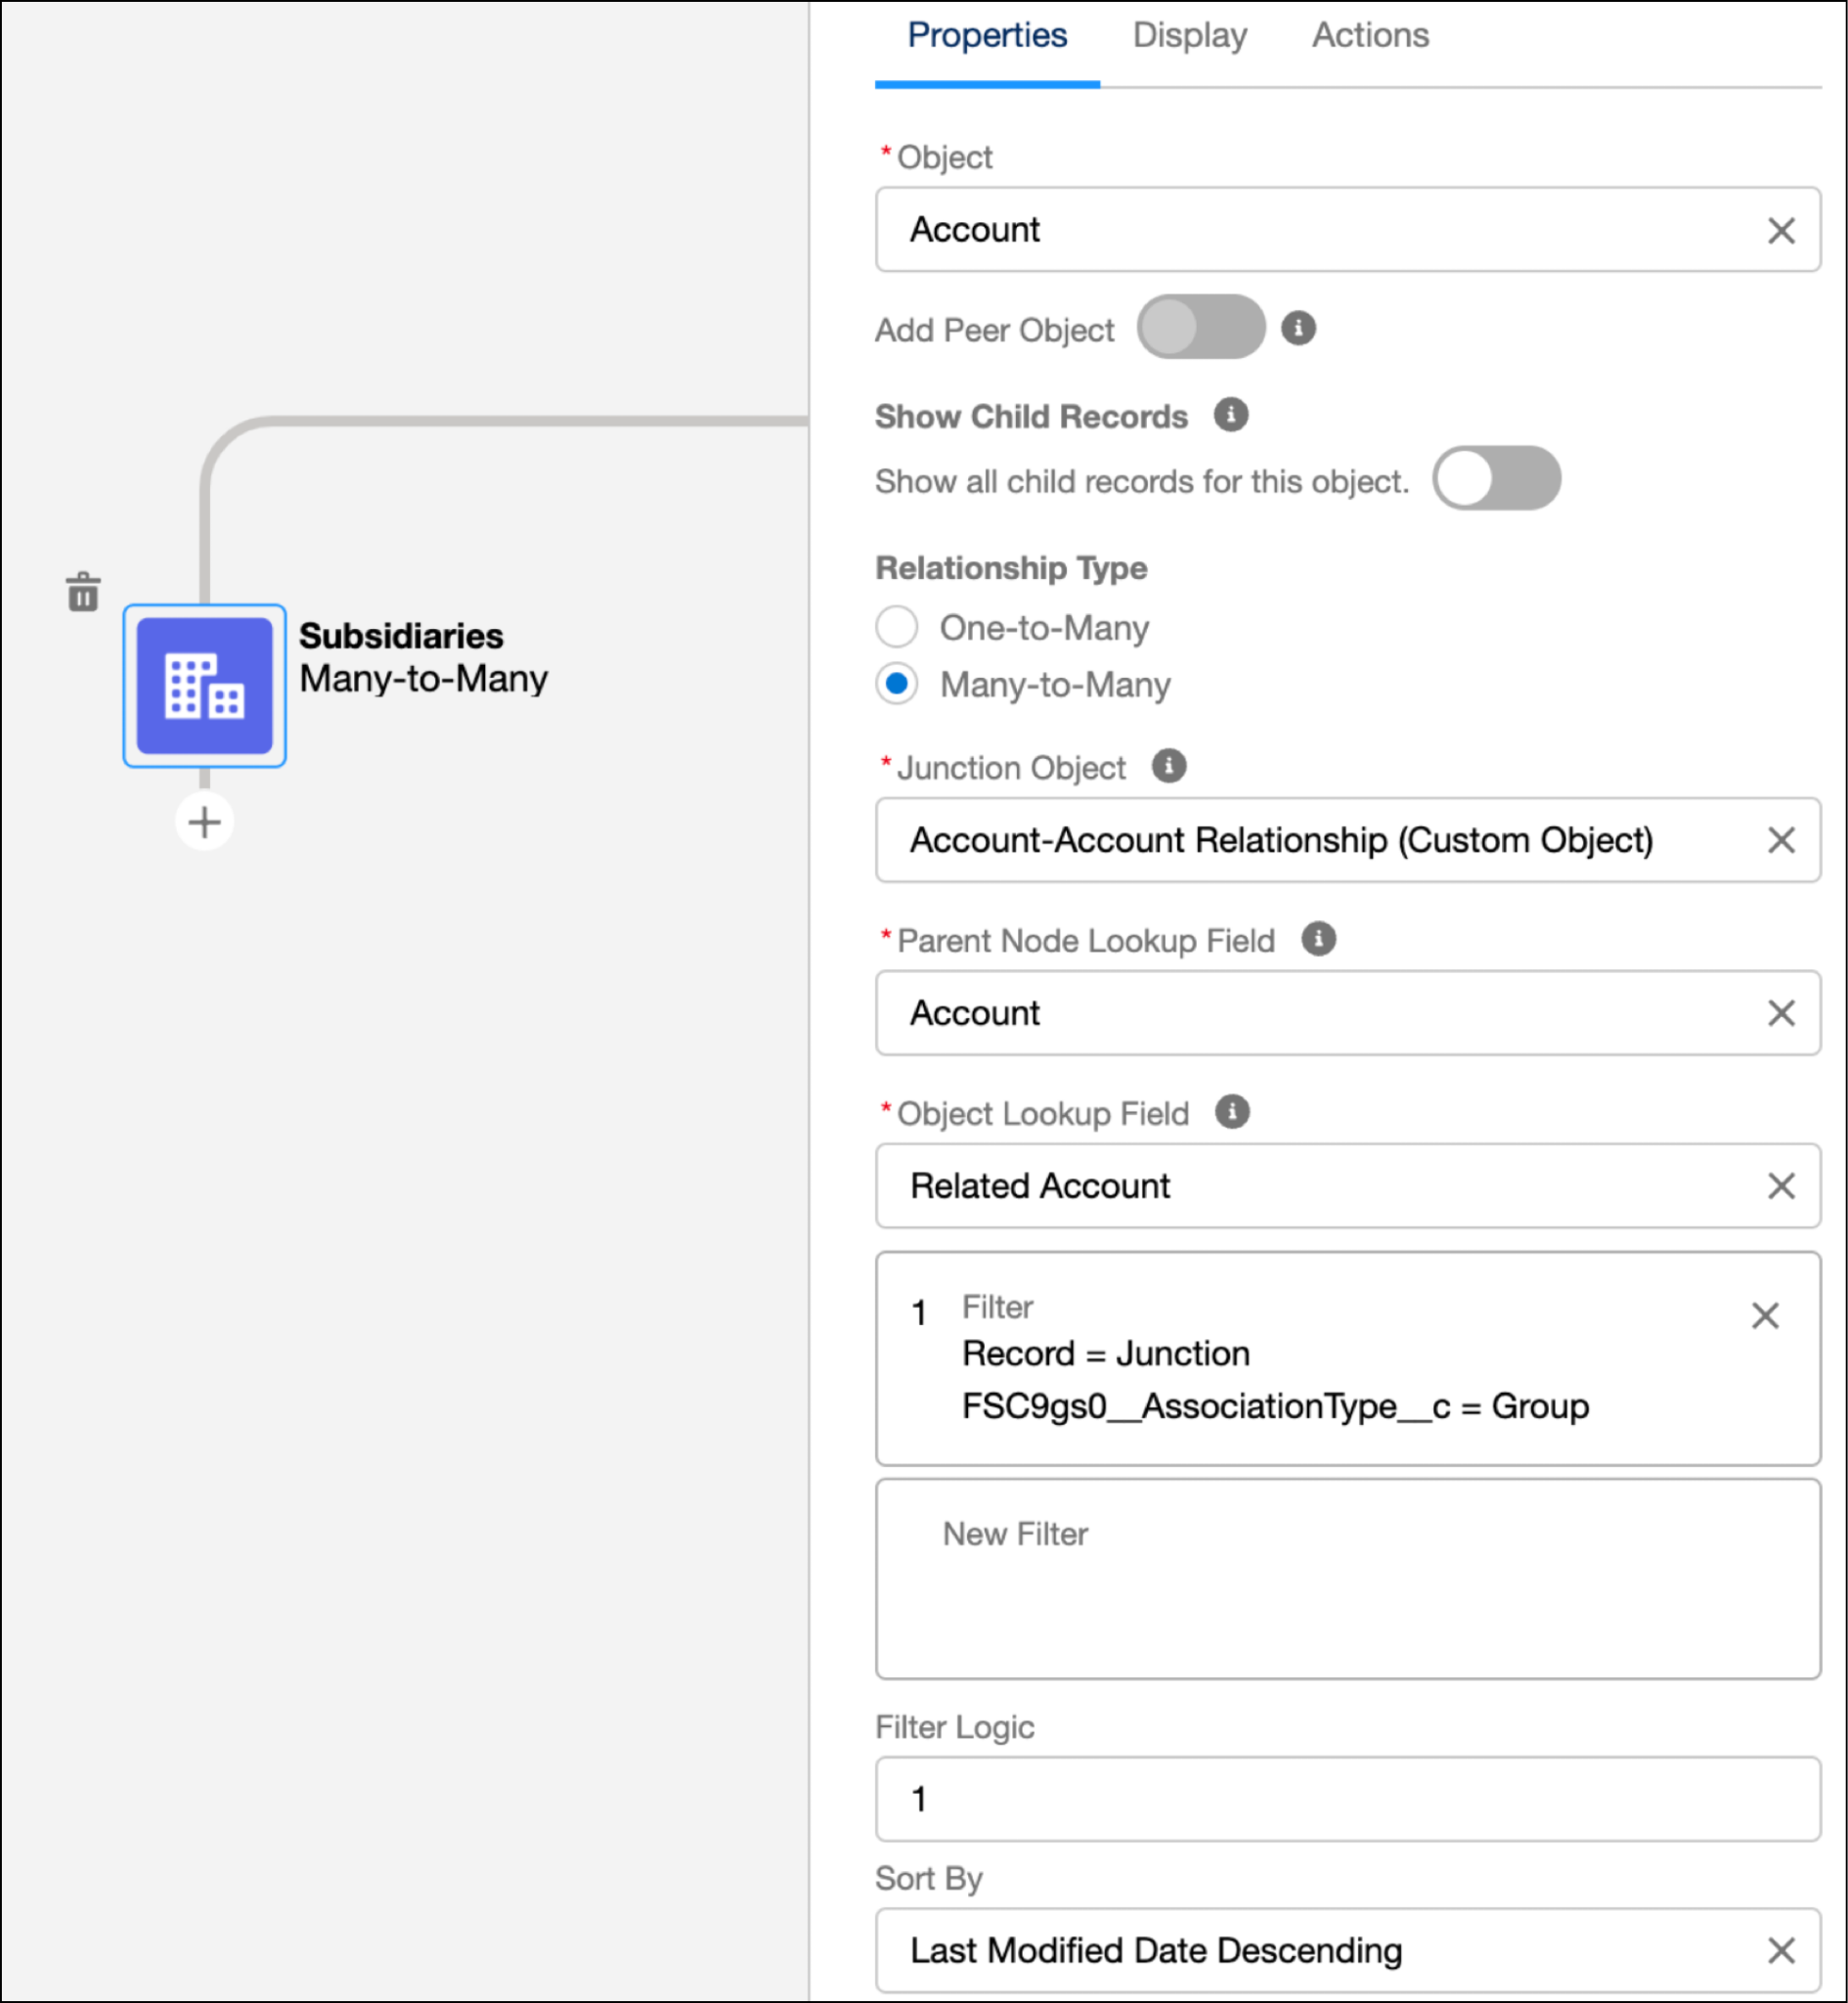
A many-to-many relationship enables each record of one object to be linked to multiple records from another object and vice versa. When modeling this type relationship, use a junction object to connect the two objects you want to relate to each other.
On the subsidiaries node:
- The junction object of account-account relationship represents a relationship between two accounts, such as between a primary business and a franchise. For example, an account-account relationship links Buttercream Bakery and its franchise Buttercream Bakery Downtown.
- The parent node lookup field is a field on the junction object that points to the parent node object.
- The object lookup field is a field on the junction object, which is account-account relationship, that points to the node’s object.
Now, customize the subsidiaries node on the B2B graph.
- Open the Retail Banker Graph you created in the previous unit.
- Select the Subsidiaries node.
- On the Properties tab, remove the filter and save your changes.
- Click the Display tab.
- Under Card Information, customize the card fields for your users.
- Select Customize field labels.
- To customize the first field, click the X to remove Country, and select Parent Account and Account Name.
- Enter
Main POCin the Field Label text box.
- To customize the second field, click the X to remove Industry and select Billing Address.
- Enter
Addressin the Field Label text box.
- To update the last field, select Phone in the Show Field, and enter
Phone Numberfor the field label.
- Select Customize field labels.
- Save your work.

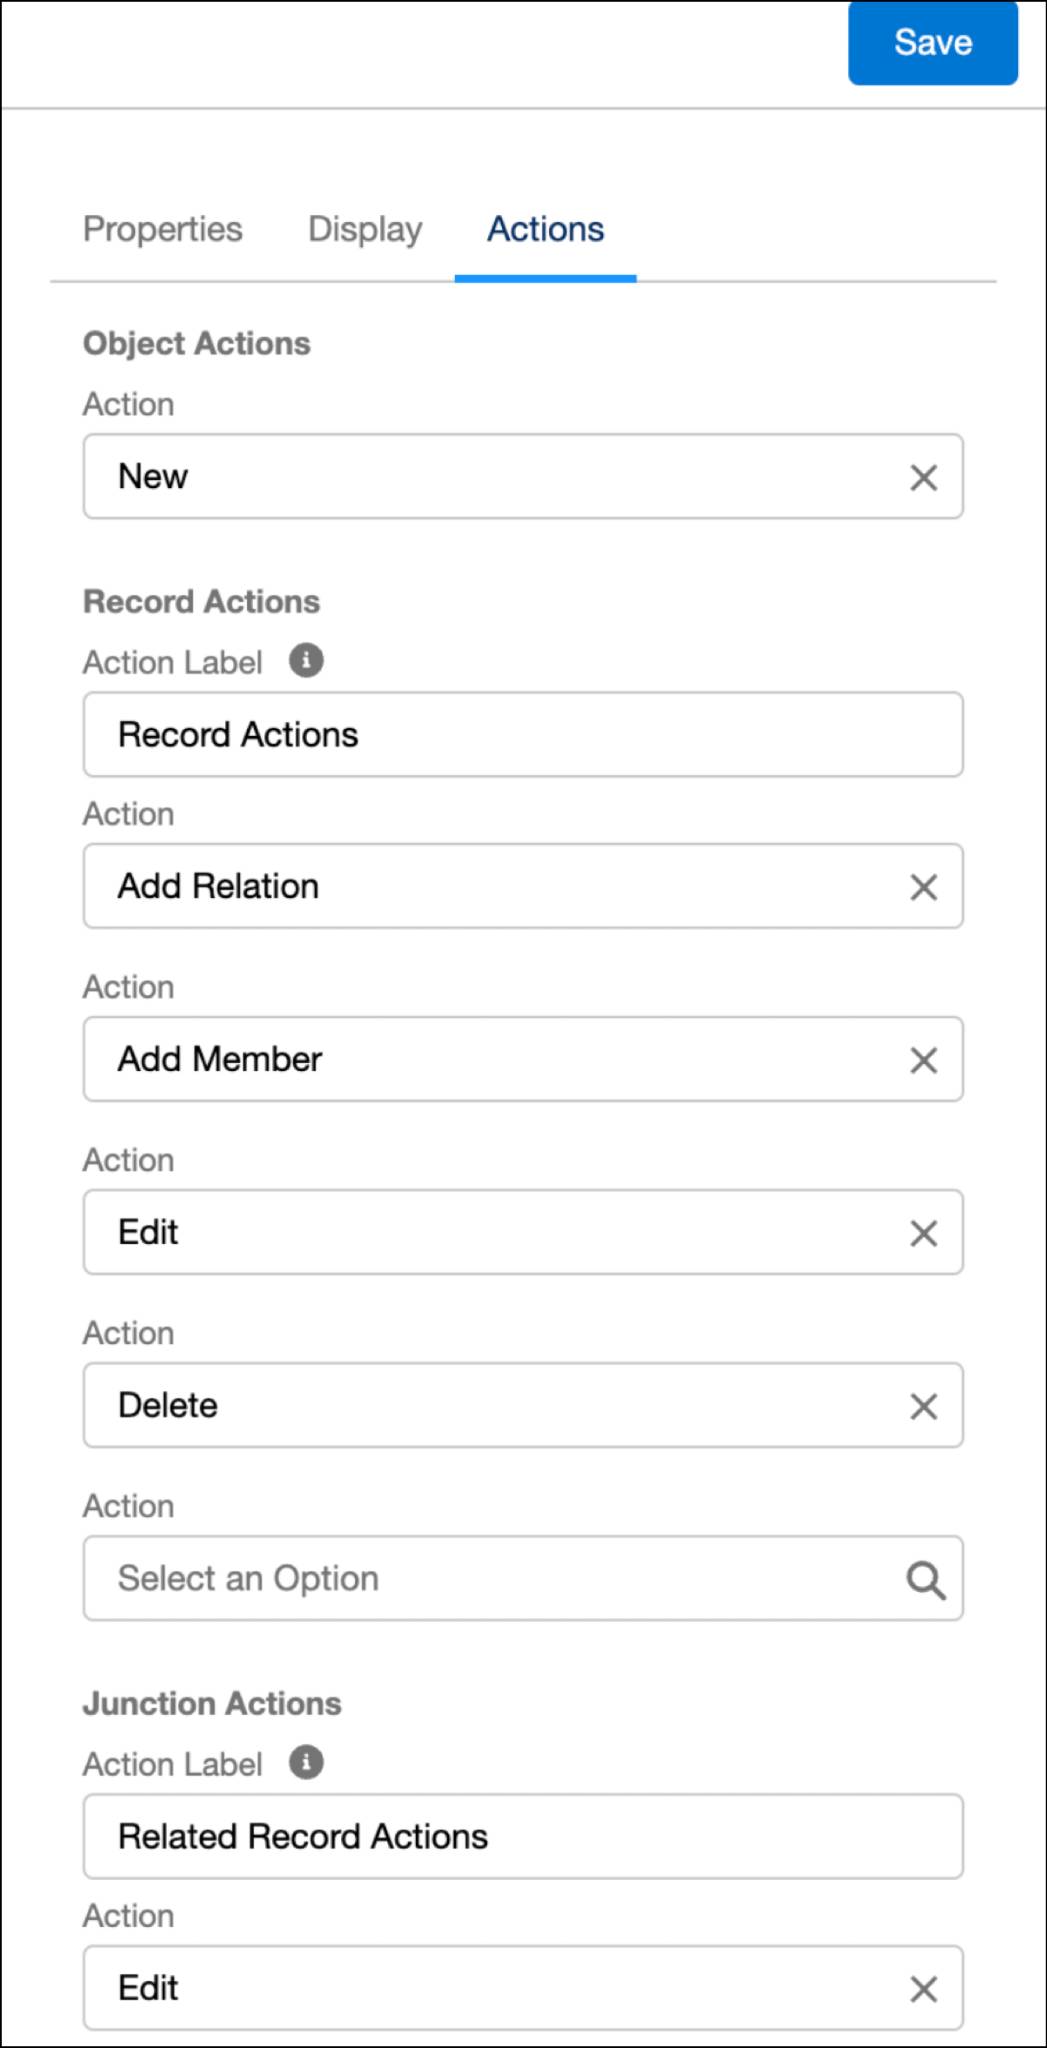
Next, configure the Actions tab.
- Click the Actions tab.
- In Object Actions, confirm New is selected. This gives users quick access to add new subsidiaries.
- In Record Actions, for Action Label, enter
Record Actions.
- Confirm the Add Relation, Add Member, Edit, and Delete actions are shown. This gives users quick access to take the actions on a subsidiary.
- In Junctions Actions, for Action Label, enter
Related Record Actions.
- Confirm that the Edit and Delete actions are shown.
- In Object Actions, confirm New is selected. This gives users quick access to add new subsidiaries.
- Save your work.
You just customized the display and action options for the Subsidiaries node.
Add an Employees Node to the Subsidiaries Node
At Cumulus, users want to see the employees at each subsidiary. That means you must add an employees node to the subsidiaries node.
To start, click the + icon under the Subsidiaries node.
Then, complete the child node fields on the Properties tab.
- Select Object, Person Account.
- Select Many-to-Many relationship type.
- For the Junction Object, select Account Contact Relationship.
- For the Parent Node Lookup Field, select Account. The lookup field is a field from this node object (Person Account) that points to the parent node object (Account).
- For Object Lookup Field, select Contact.
- For Sort By, select Last Modified Date Descending to determine the sort order of the records on the node.
- Save your work.
Next, click the Display tab, and add these details.
- For Label, enter
Employees.
- Select Customize field labels.
- In Show Field, select Junction Object, then Roles. Note that Junction Object may be at the end of the list and not in alphabetical order.
- Enter
Rolein the Field Label text box.
- Select Email in Show Field.
- Enter
Emailin the Field Label text box.
- Select Title in Show Field.
- Enter
Titlein the Field Label text box.
- Save your work.
Finally, click the Actions tab and configure these options.
- In Object Actions, for Action, select New Relationship.
- In Record Actions, in the Action Label, enter
Record Actions.
- For Actions, select Edit and Delete.
- In Junction Actions, for Action Label, enter
Related Record Actions.
- For Actions, select Edit Relationship and Remove Relationship.
- Save your work.
That’s it! The subsidiaries node is customized to meet the needs of Cumulus’s bankers.
Add a Financial Account Child Node
Now customize the financial account node on the graph. Cumulus users want to view their clients’ financial account information. They want to see account type, account balance, primary owner, and household for each financial account. And they also want quick access to edit and create financial accounts.
Add and configure the financial account child node.
- Add child nodes to the relationship graph. Below the Account root node, click the + icon.
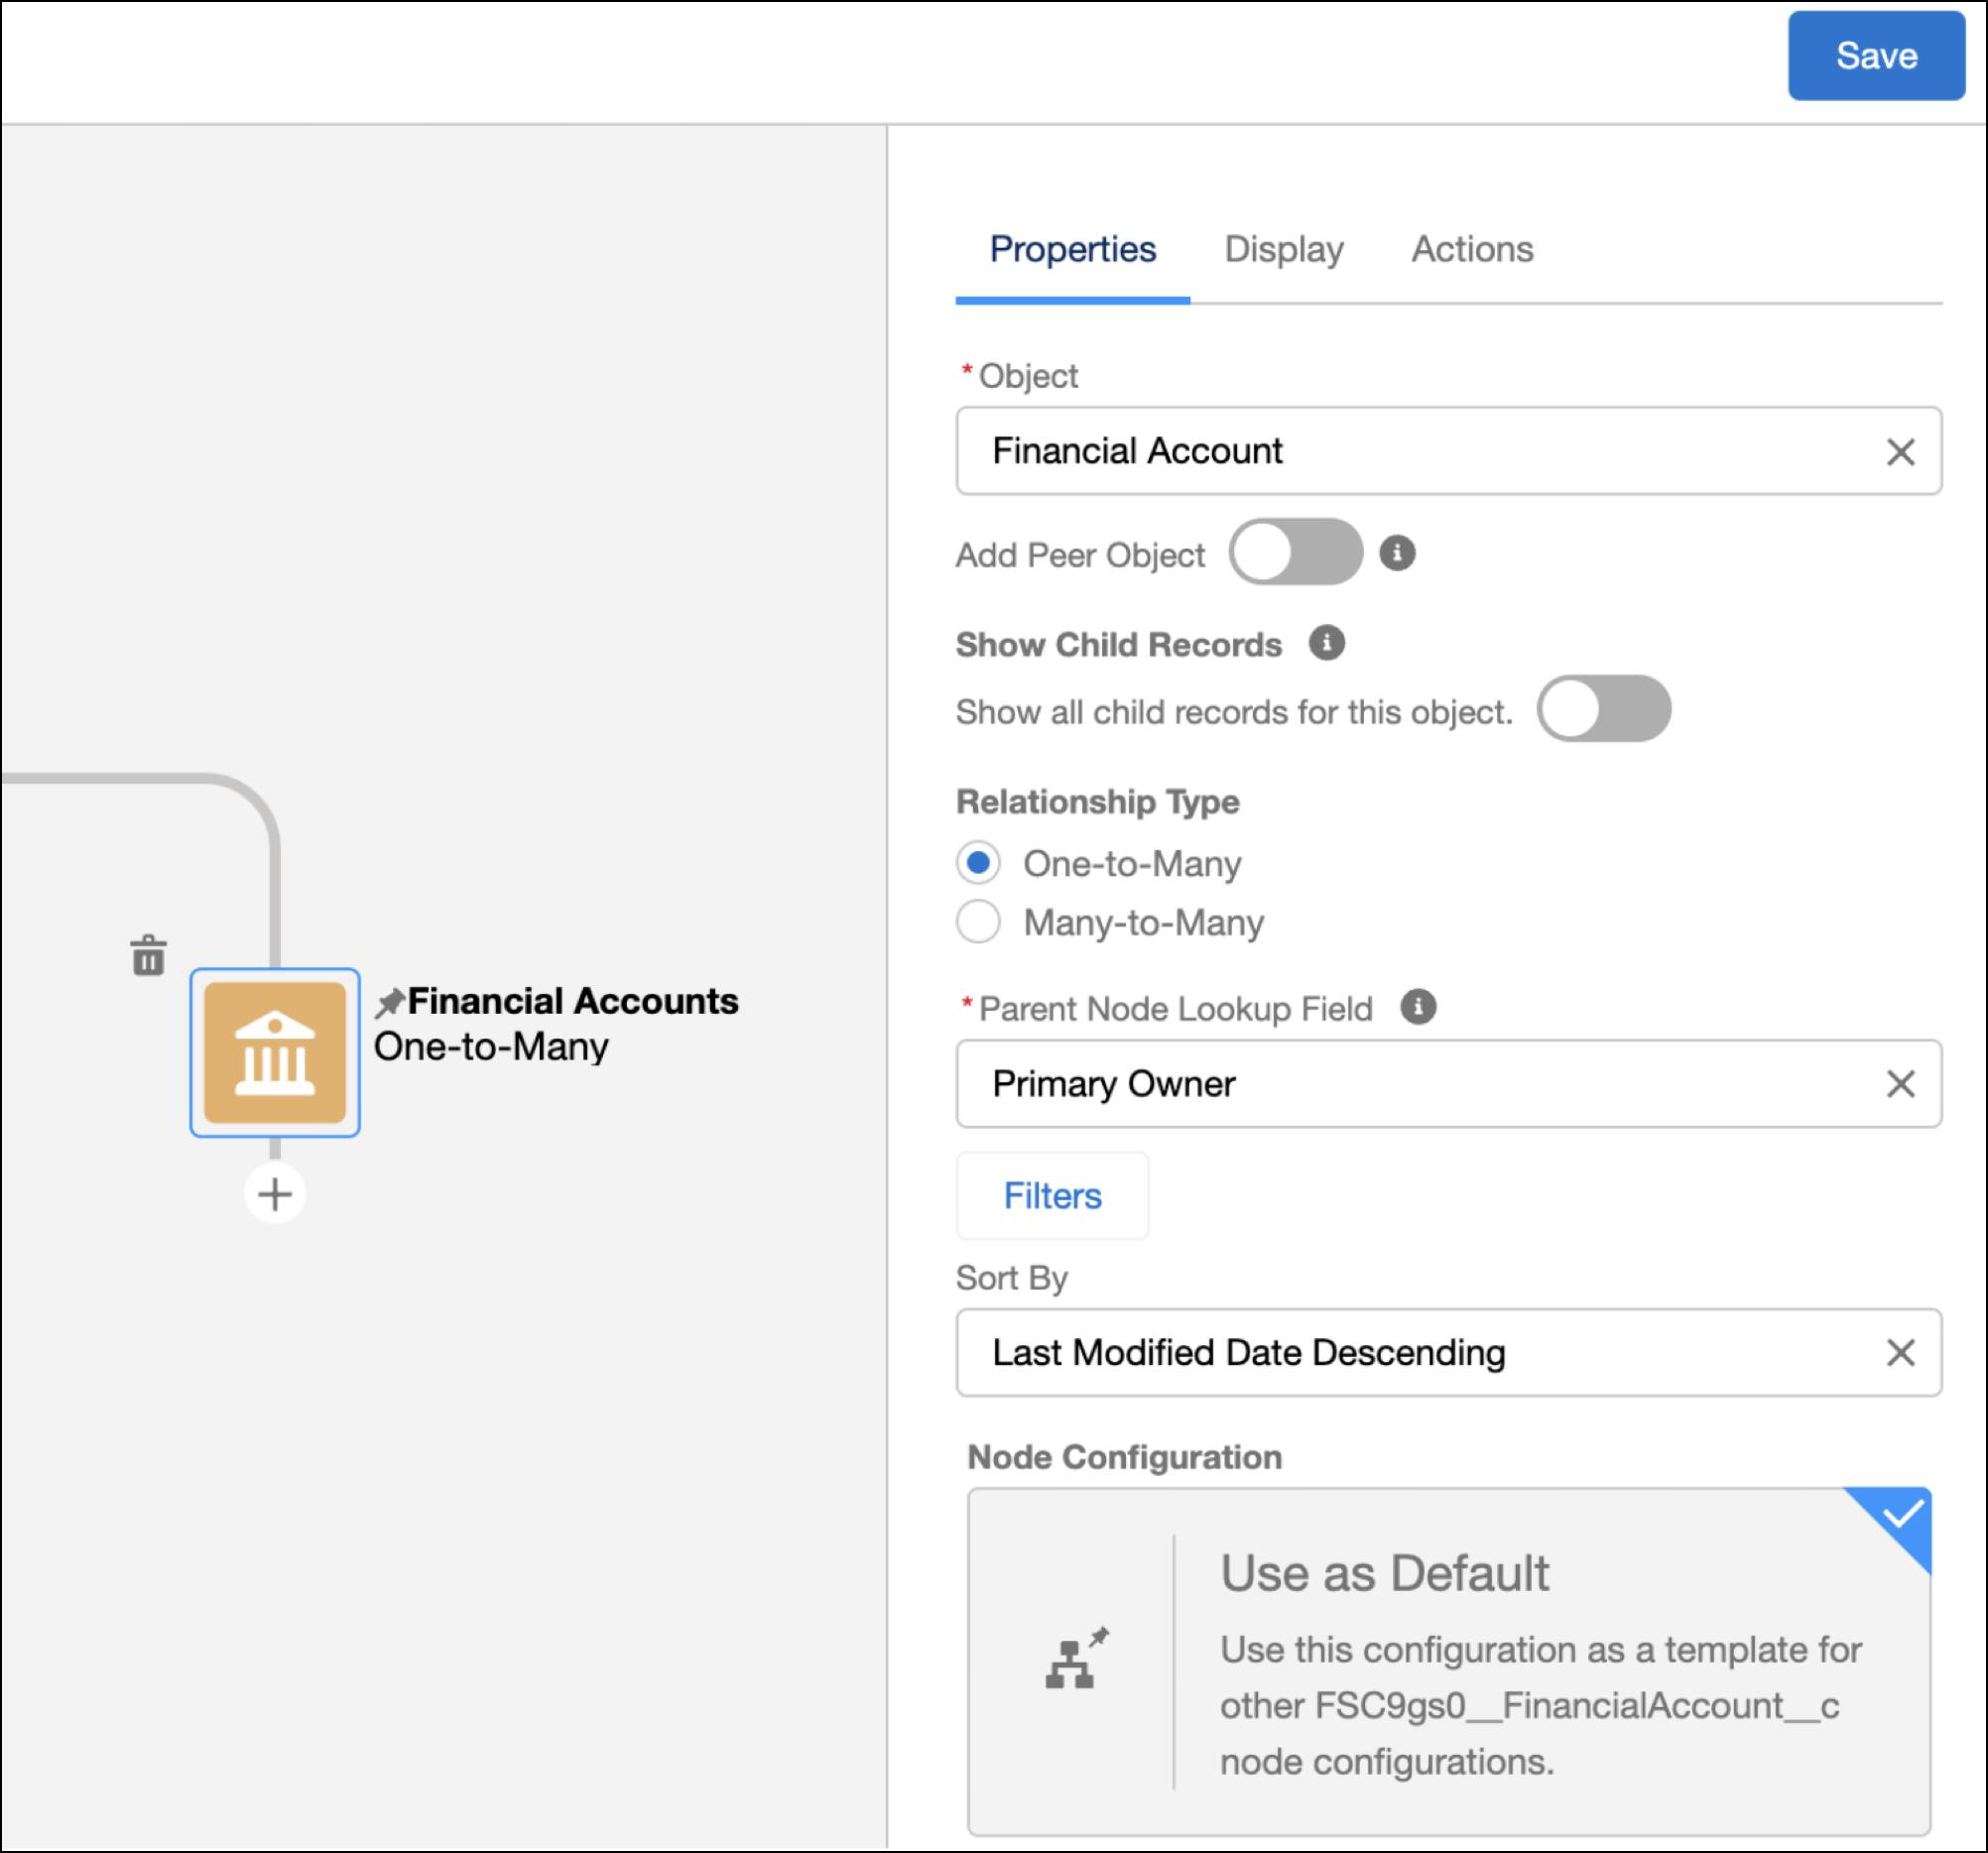
- Complete the child node fields on the Properties tab.
- Select an Object, Financial Account (Custom Object).
- Select One-to-Many relationship type.
- For the Parent Node Lookup Field, select Primary Owner. The lookup field is a field from this node object (Financial Account) that points to the parent node object (Account).
- For Sort By, select Last Modified Date Descending to determine the sort order of the records on the node.
- Select an Object, Financial Account (Custom Object).
- Save your work.
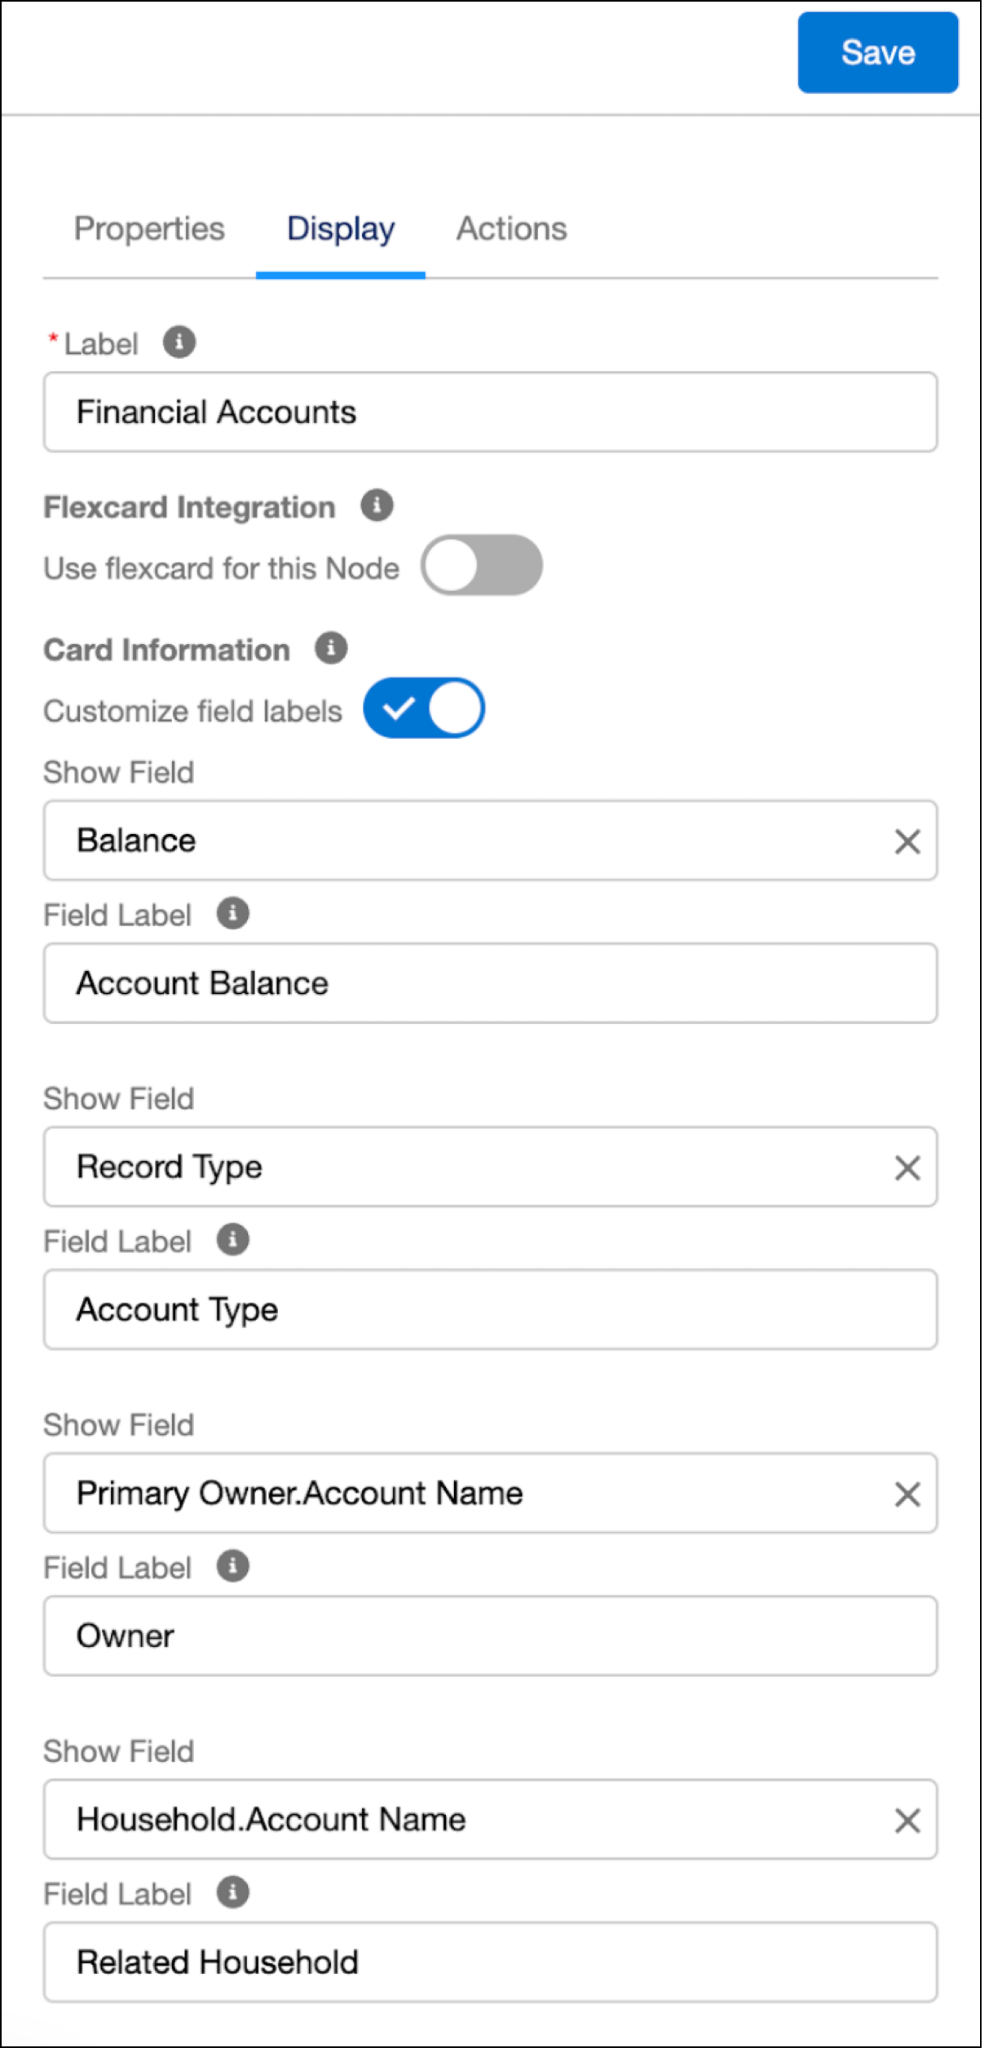
Now customize the display tab to show users relevant fields.
- Click the Display tab, and add these details:
- For Label, enter
Financial Accounts.
- Select Customize field labels.
- Select Balance in Show Field.
- Enter
Account Balancefor the field label.
- Select Record Type in Show Field.
- Enter
Account Typefor the field label.
- For the next field, select Primary Owner and Account Name,
- and use
Ownerfor the label.
- For the last field, select Household and Account Name, and enter
Related Householdfor the label.
- For Label, enter
- Save your work.
Finally, customize the actions tab to show the fields requested by users.
- Click the Actions tab.
- Under Object Actions, for Action, select New.
- Under Record Actions, for Action Label, enter
Record Actions.
- Add two actions as New Opportunity and Edit.
- Save your work.
Cumulus users can now quickly review their client’s financial account information.
Add Other Child Nodes Based on the Plan
Similarly, follow the same steps to customize the employees and opportunities nodes included with the B2B template.
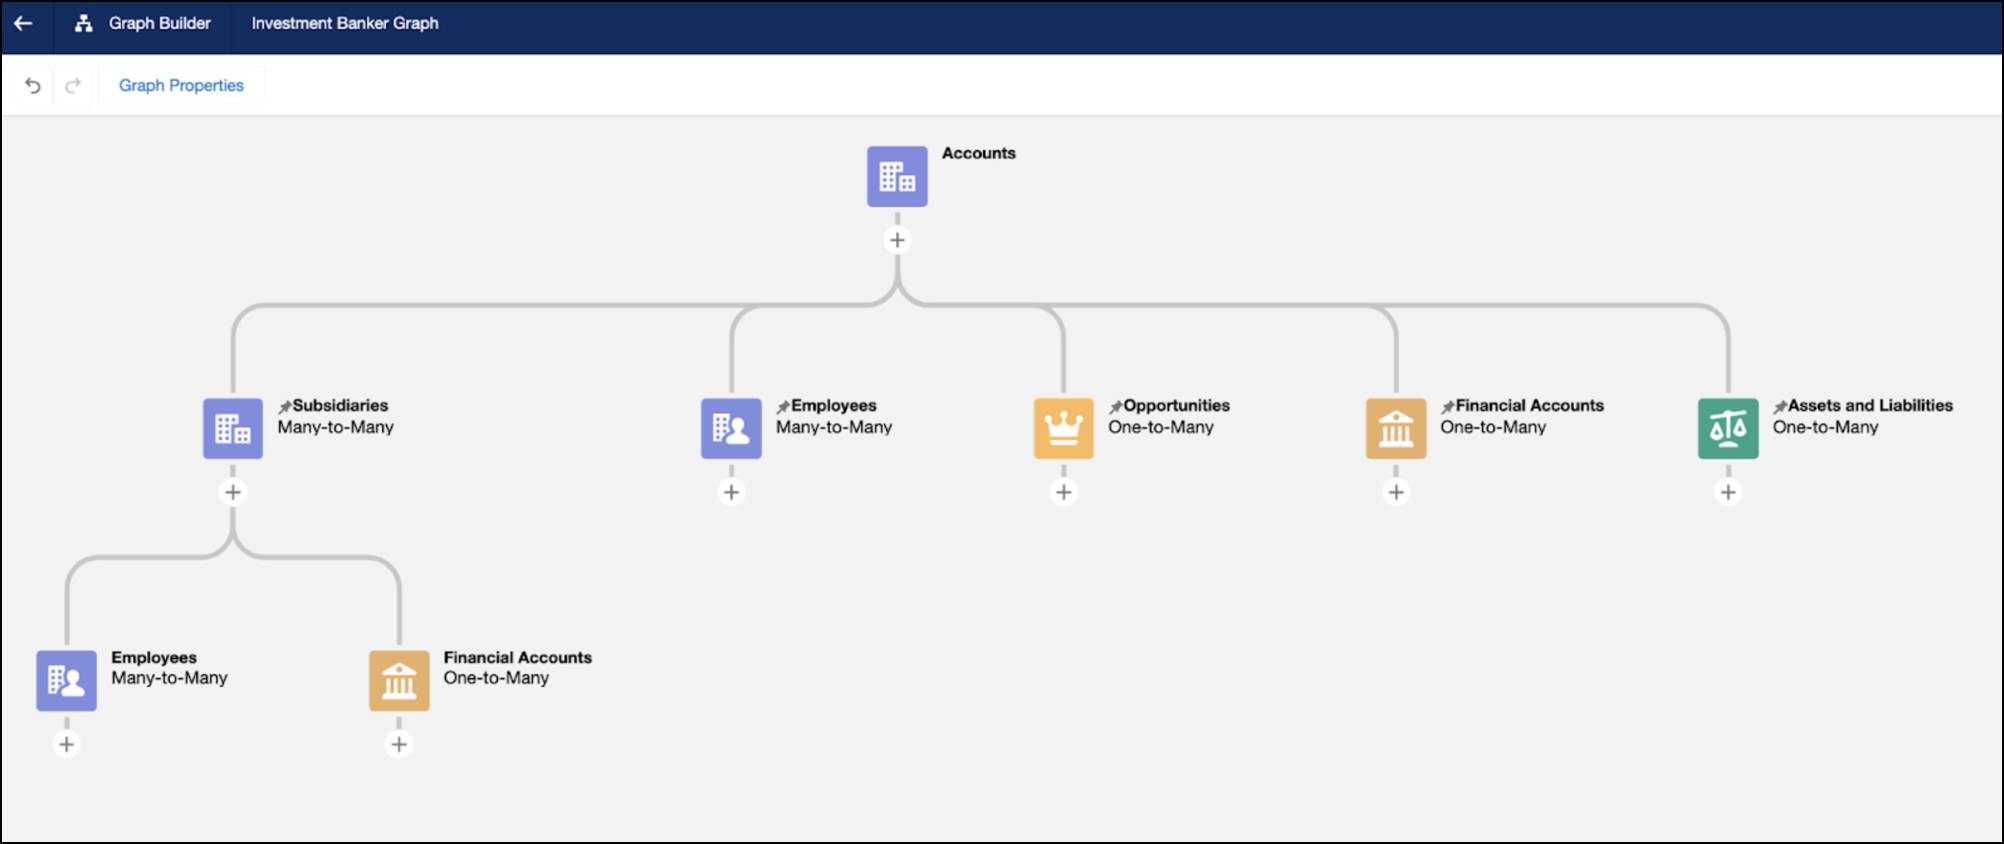
Then add and customize the financial accounts and assets and liabilities nodes.When you’re finished, the ARC graph contains all the information most relevant to Cumulus users.
What’s Next?
In this unit, you learned how to update the fields and labels on the ARC graph’s existing nodes and customize a new child node. Bankers at Cumulus can now quickly determine their clients’ financial needs.
Or, they could, at least, if they could view the graph. In the next unit, learn how to add a graph to a record page so users can access it.