Find, Create, and Edit Stakeholder Records
Learning Objectives
After completing this unit, you’ll be able to:
- Define Salesforce terms related to stakeholders.
- Search for stakeholders in Salesforce.
- Identify the important sections on a contact record.
- View and create contact records.
- Create household accounts.

Build the Relationships That Drive Change
As a nonprofit, people are your most important resource—and managing those relationships is top priority. Good thing you’re using Salesforce to help you input, organize, and access stakeholder data efficiently.
In this badge we review how to manage the data you need about the relationships that make your world go round—staff, donors, volunteers, clients, agencies, businesses, partner organizations, and any other individual or group with which your nonprofit interacts.
Learn the Vocabulary
Before we go too deep, let’s make sure we’re using the same vocabulary. When we talk about people data, there are a few terms to know.
Stakeholder: An individual person. A stakeholder can be a staff member, donor, volunteer, client, or anyone else important to your mission. We use the word stakeholder interchangeably with everyday language, like people and person. Stakeholder data can be stored more than one way in Salesforce, depending on your relationship to the person. Most stakeholder data is stored in a contact record but a less-developed relationship can be stored as a lead record.
Contact: An object record that stores information about a stakeholder with a relationship to your organization. A contact record typically includes a person’s name, address, phone, email, and related information like past and potential donations. It can also include related information about an individual’s involvement with a program, volunteering skills and interests, and more depending on your organization's customization and what other apps you use. We explore contact records in depth later in this unit.
Account: An object record that groups contacts. In Nonprofit Success Pack (NPSP), you can choose between a household account for grouping contacts that live together or belong to the same family, or an organization account for grouping contacts that have another association, like everyone who works for a particular grantmaker or company. Contacts can belong to both.
Lead: An object record that stores stakeholders who expressed interest in your organization but haven't committed further. Lead records function differently than contacts, even though they’re both used for storing information about people. You usually know much less about leads than you do contacts, so a lead record usually stores less information. Leads are special, and we’ll cover them later in this badge to keep the focus on contact management.
If any of this vocabulary is new to you, like object and record, review the Nonprofit Success Pack (NPSP) Basics badge.
Find and Read Contact Records
Before you start working with contacts, it’s important to know how to find and read a contact record.
There are a few of ways to find a contact record quickly. If you already know who you’re looking for, use global search, or the search bar that appears at the top of all pages in Salesforce. Type the name in the search bar and use the dropdown arrow to limit your results to contacts. Select a record from the suggested results or press the return (or enter) key to see all possible search results.

The other way to find contacts is to click the Contacts tab in the navigation bar. Your Salesforce admin can customize which objects appear in the navigation bar, so yours might look a little different than this one. It’s possible that you don’t have Contacts as an option, but most organizations choose to include it and it's there by default in NPSP.

You should see a list of contacts. You can use the dropdown arrow to see different list views, like My Contacts or All Contacts. If you want to get a closer look at a single contact record from the list, click a contact name.
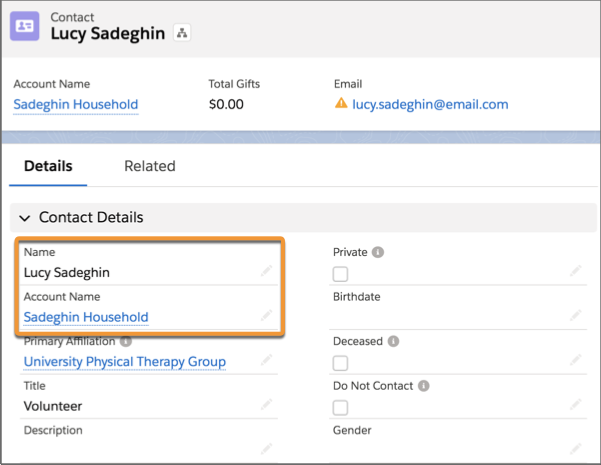
Let’s take a tour of a contact record.

- The Highlights panel gives you a quick glance at some important contact information. Your admin can customize which fields appear here, so you see what’s most relevant to you.
- The Details tab displays information about the contact, like name and phone number, organized into logical sections of fields. Depending on customizations and installed apps, you can access sections for Contact Information, Volunteer Information, Program Details, or Donor Research and Scoring.
- The Related tab includes lists of other object records associated with this contact record. The objects you see depend on your customizations, but might include Relationships, Organization Affiliations, Cases, and Campaigns.
- The Activity Timeline includes tasks, emails, and events listed in reverse chronological order. The timeline shows all past and upcoming communications and meetings with a constituent.
-
Chatter is a Salesforce collaboration tool that works like a private social media network just for your organization. It helps you collaborate internally on records and files with a colleague or in groups. Only staff who can view a record can see the related Chatter posts.
We cover some of these items from the contact record in more detail elsewhere in Trailhead. For now, let’s get to the business of creating and managing contacts.
Create a New Contact and Household Account
Before you create a contact, always check if that contact already exists in Salesforce. While you can go back and merge duplicate records later, it's always easier to type a name into global search first to check that the contact isn't already in the system.
If you're sure that this is a new contact, you can go ahead and create it and a new related household account.
- Find and select Nonprofit Success Pack from the App Launcher (
 ).
).
- In the navigation bar, find the Contacts tab. Click the dropdown arrow.
- Select + New Contact.
- In the Contact Details section, enter all relevant details. Scroll to make sure you’ve completed all the sections. Leave the Account Name field blank—this is how you create a new household account in NPSP.
- Click Save.
Achievement unlocked: There’s now a new contact and household derived from the contact’s name and information.
This is the recommended way to create a new household in NPSP—via a new contact. Remember that as you follow along in Salesforce, your Salesforce may look a little different from our example screenshots. Your Salesforce admin can customize the fields on the contact record, so you can have different options. Regardless, the general process for creating contacts and households is like the one we just followed.
So now you know how to create contacts and households, but what about managing those households? Thankfully, managing a household in Salesforce is more straightforward than managing a household in real life, and you can do most of it while sitting down. We'll pick up there in the next unit.
Resources