Tailor Global Search to Your Aura Site in Experience Cloud
Learning Objectives
After completing this unit, you’ll be able to:
- Make more content searchable across your site.
- Set up the Search Results page.
- Learn about autocomplete.
Create an Experience Builder Site: A Refresher
Let's get started by looking at a scenario where the Capricorn Coffee company creates an Aura Experience site and customizes global search for their customers.

To enable Digital Experiences:
- From Setup, in the Quick Find box, enter Digital Experiences then select Settings.
- Select Enable Digital Experiences. Your digital experiences domain is shown. It includes your My Domain name in the format MyDomainName.my.site.com for production orgs.
- Click Save.
To provide a branded experience for users who access your external-facing Salesforce content, set up a custom domain. Custom domains serve your Experience Cloud site on a domain that you own, such as https://www.example.com. To learn more, see Custom Domains in Salesforce Help.
After you enable digital experiences, you are redirected to the All Sites page in Setup. If not, enter All Sites in the Quick Find box, and select that option.
To create a new site:
- From the All Sites page, click New.
- From the Service page, select the Customer Service template.
- Click Get Started.
- For Name, enter Capricorn Cafe.
- If you’re asked for a URL, enter capricorncafe or another URL that’s not used for an existing site in your org.
- Click Create.
Take a quick look around. This is Experience Workspaces, where you have easy access to the Experience Builder and Dashboards, which we visit later.
Make Global Search Even More Global
Using the Global Search Results component, you can:
- Make almost any object from your Salesforce org searchable in the site, including custom objects. You can even get results from external sources like Wikipedia. We talk more about external sources in the next unit.
- Turn on search results filtering, so users can refine their results and find exactly what they need.
- Add a search results overview page, called the All results tab, that lets users see a quick view of their best matches.
If that sounds like stuff your users would be excited about, read on.
To find your site's search results component, head to the Experience Builder, open the Search template page, and select the component.
- Select one of the following ways to get to the Experience Builder.
If you created a new site using the previous steps, you’re in Experience Workspaces. Click the Builder tile.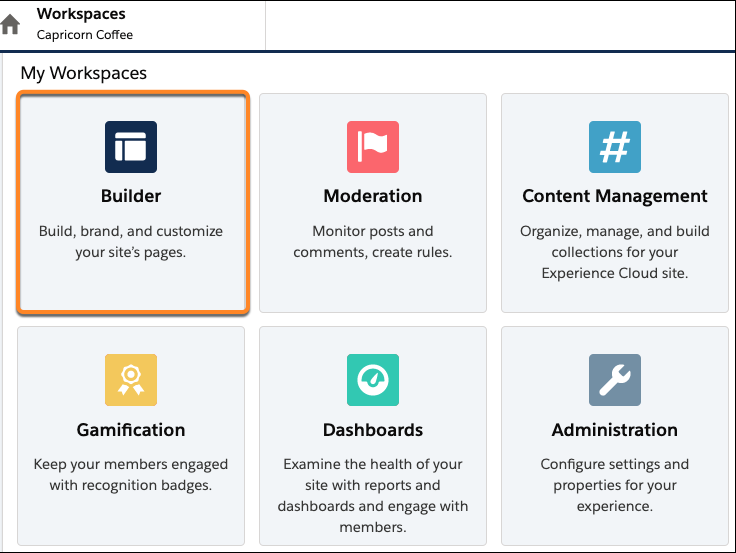
If you're a Community Manager who is logged in to the site, select Experience Builder from your profile header. 
If you're a Salesforce administrator, go to Setup, and in the Quick Find box, enter All Sites. Select the Builder link for the appropriate site.
- Click Home in the top navigation bar to see the Pages menu. In the Pages menu, enter
Searchin the search box then select Search from the list.
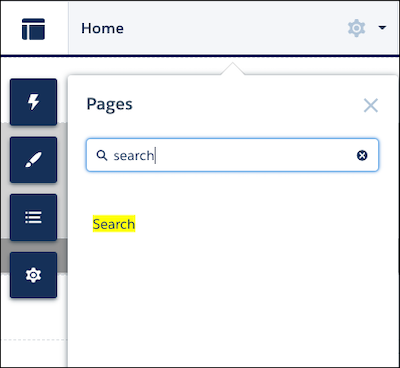
- On the Search page, hover the cursor over the search results section. A blue border appears, and you can see the component name at the top(Global Search Results). Click the component name to open it.
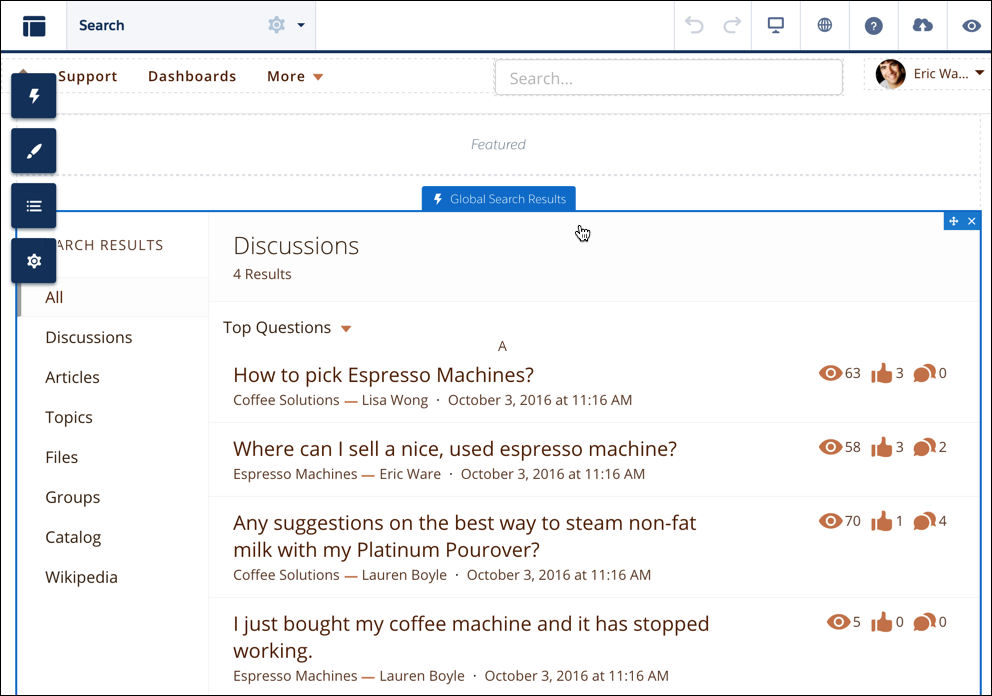
By default, the Global Search Results component shows results for Articles (if Knowledge is enabled), Discussions, Cases (for Service Cloud users), and Groups. But it’s easy to add any other object that’s searchable in Lightning Experience and supported in the Customer Service template. To learn which objects those are, check out the article in the Resources section called Which Experience Cloud Template Should I Use? You can make a custom object searchable, too, by creating a custom tab for the object in your Salesforce org.

Let's say you want site members to be able to search for PDFs and other files:
- At the bottom of the Global Search Results component, click Add. The first object from the list of available objects is added.
- To change it, click the object name to open its properties. In the Object dropdown, choose Files then click Save.

After adding all the objects you want to be searchable, keep the Global Search Results component open to adjust how the objects appear in search results.
Search Results, Just the Way Your Customers Like Them
You might’ve noticed that you can drag and drop objects in the Global Search Results component to change their order. That’s the order that objects appear on the search results page. So if your site is strong on a certain type of information, like Articles, consider putting that object at the top.
You probably also noticed the two checkboxes:
- Show the All results tab
- Allow search result filtering
The All results tab gives your site members a place to see the top results for every object on one page. When users aren’t sure whether their answer is in a Discussion, an Article, or a File, seeing this overview can be a time-saver.
To see all results for an object, click the object name or View More.
If you select Allow search results filtering, your members can narrow search results by selecting a supported object on the left side of the search results page and then applying filters.

Search filtering for sites is on by default in your Salesforce org. From Setup, in the Object Manager, go to Search Layouts for each object you want to filter. To the layout, add the fields that users want to filter. Supported field types are checkbox, phone number, picklist, text, and URL. You can’t filter encrypted fields.
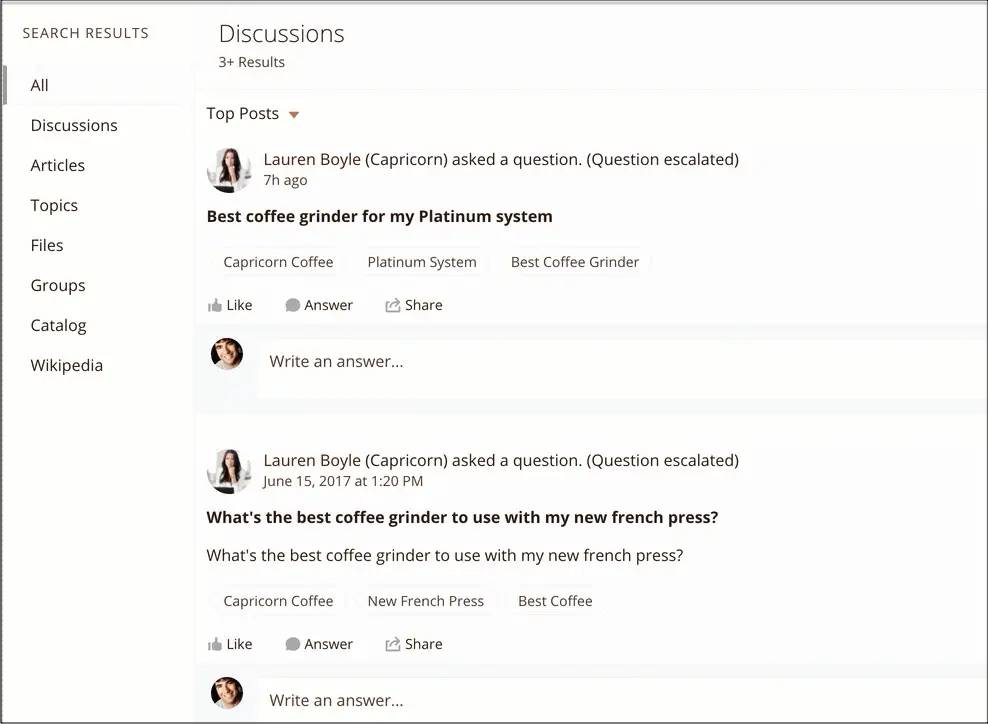
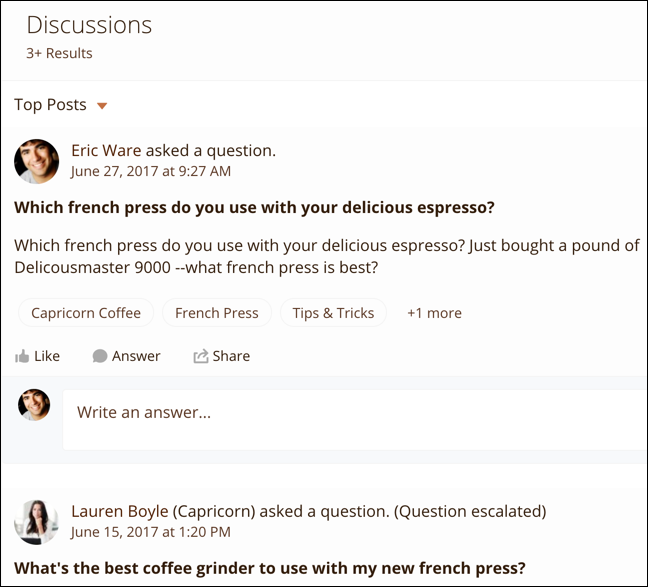
If you have search results for Discussions, you can also decide how much information to show for each match. Capricorn Coffee selected “Show search results for all feeds, including questions, posts, and comments” to give its site members as many matches as possible for their search terms.

If you don’t check this box, only questions and answers that have topics are searched. Site members don’t see matches in Groups, feeds on records, or feeds on user profiles.
Something to consider when making your decision: When you check this box, the search results page also shows more information for each matching discussion.
Here are Capricorn’s Discussion search results with the box checked. Each result shows the title and text of the post, and the topics assigned to the post. This expanded format makes it easier for members to scan complete posts for information.
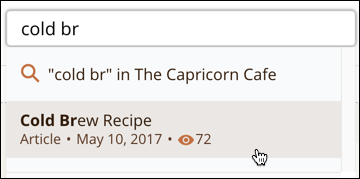
Here’s what Capricorn’s Discussion search results look like without the box checked. Note that the results don’t include any text from the post. This compact feed makes it easier to scan titles of posts.

If it’s more important for your site that Discussion results are compact, leave this box unchecked.
To see how great your new search results page looks, enter a test word in the Search Term field of Global Search Results component, then press Enter. (If you’re following along in a new Trailhead Playground, you might not see many—or any—search results for this test.)

When you’re satisfied with how your search results look, click Publish in the site header.
All About Autocomplete
Let’s talk about what happens before your site members get to the search results page. In Experience Builder sites, they can also get search results as they type in the search box.
Meet the Global Search for Peer-to-Peer Communities component, where you can set up a feature called autocomplete. When site members start typing their search terms in the search box, autocomplete suggests matching articles, discussions, and more. It’s kind of like having a friend who finishes your sentences for you—in a helpful way. It helps users get to what they’re looking for faster.
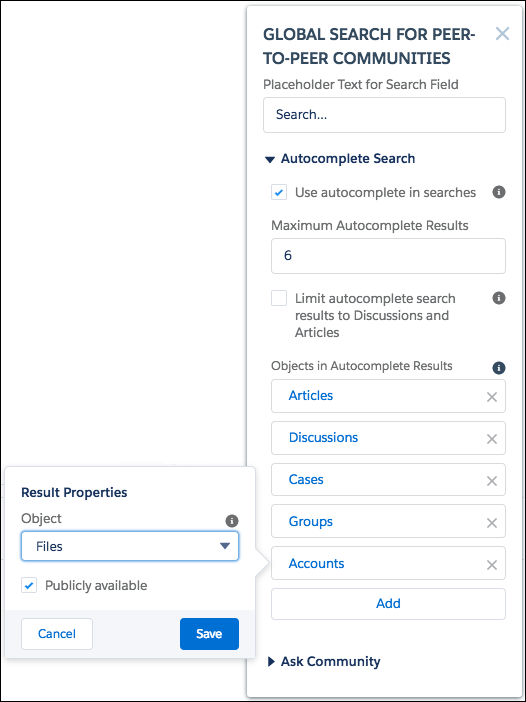
The Global Search for Peer-to-Peer Communities component is in the Experience Builder. To open it, hover the cursor over the search box at the top of the page and click when the blue border appears. To get started, expand the Autocomplete Search section.

As you can see, there’s a lot here about autocomplete. Let’s go through it step by step.
- To turn on autocomplete, select the Use autocomplete in searches checkbox. It might even already be checked. Nice work!
- For the rest of the settings, let’s simplify things. Let’s talk about what Capricorn Cafe set up for its site. Think of it as ordering the Barista’s Special.
- Maximum Autocomplete Results: Capricorn kept the default of 6 results showing as the user types in the search box. Too many results can be overwhelming, and with the most relevant ones at the top, there’s no need to go too wild here.
- Limit Autocomplete Search Results to Discussions and Articles: Capricorn wants its members to see results for more objects than Discussions and Articles, so this option is left unchecked.
- Objects in Autocomplete Results: Just like Capricorn added the Files object to the Global Search Results component, it added Files here, too.
That’s it! It’s easy like a Sunday morning drip coffee.
You might wonder how we determine which autocomplete results are most relevant. We put Articles and Discussions at the top of the list, and we pay attention to how many views and likes an article has. We also see whether any site members choose an answer as the best answer or give it a thumbs-up rating. The rest of the results are ordered based on factors we discussed in the last unit.
Next, we discuss some additional search features you can set up in your site.
Resources
- Which Experience Cloud Template Should I Use?
- Navigate Experience Builder
- Edit Pages and Components in Experience Builder
- Global Search Results
- Configure Search Results in Lightning Experience