Enable Code Builder
Learning Objectives
After completing this unit, you’ll be able to:
- Enable Code Builder in your org.
- Assign the proper permission for users to access Code Builder.
Before You Begin
In this badge we show you how to enable Code Builder in your org and prepare users to access it. Before you start, complete the Code Builder: Quick Look badge for an introduction to Code Builder.
Why Code Builder?
Are you looking for a coding tool for Salesforce? One that you don’t have to get IT approval for? One you don't have to download and configure all the required add-ons for? How about a browser based integrated development environment (IDE)?
Browser Based
Built on the Visual Studio Code platform, Code Builder is set to run in a browser. Code Builder comes preconfigured with all the required add-ons you need to work on the Salesforce platform: Apex, SOQL, Lightning Web Components, and Salesforce CLI. Code Builder is ready to go.
No Need to Download
Created by Salesforce, Code Builder is a managed package that you install in your Salesforce org. All anyone needs to use the Code Builder App is permission to access it in Salesforce. Let’s jump into how it all works.
Install the Package
Code Builder is installed in your production environment with a managed package. Code Builder can be enabled only in the Production org.

Salesforce makes it easy to manage the Code Builder Setup.
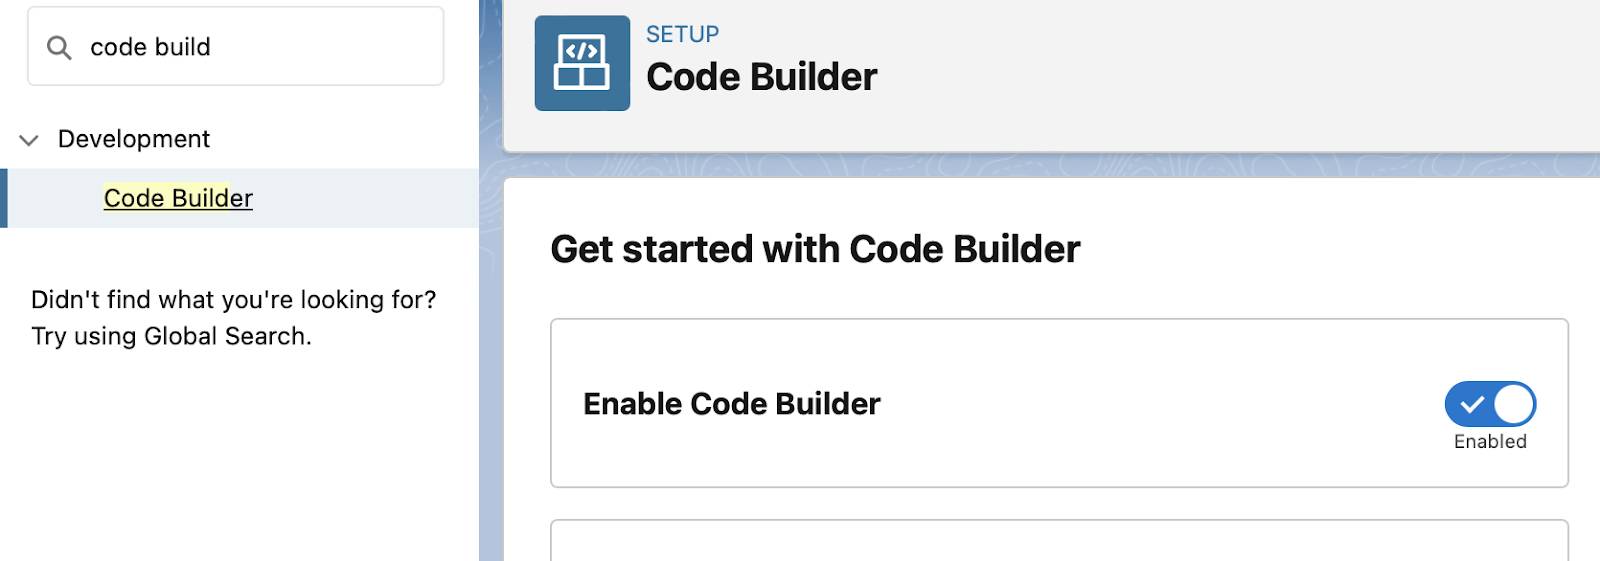
- From Setup, enter
Code Builderin Quick Find and select Code Builder.
- Select Enable Code Builder.
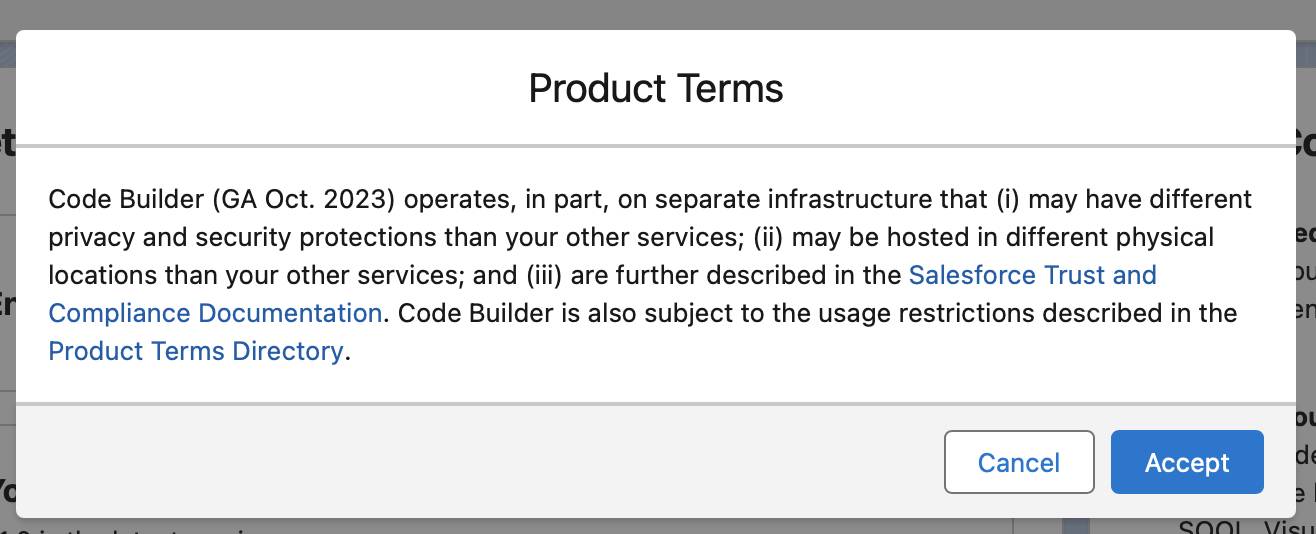
- Click Accept to accept the Product Terms.
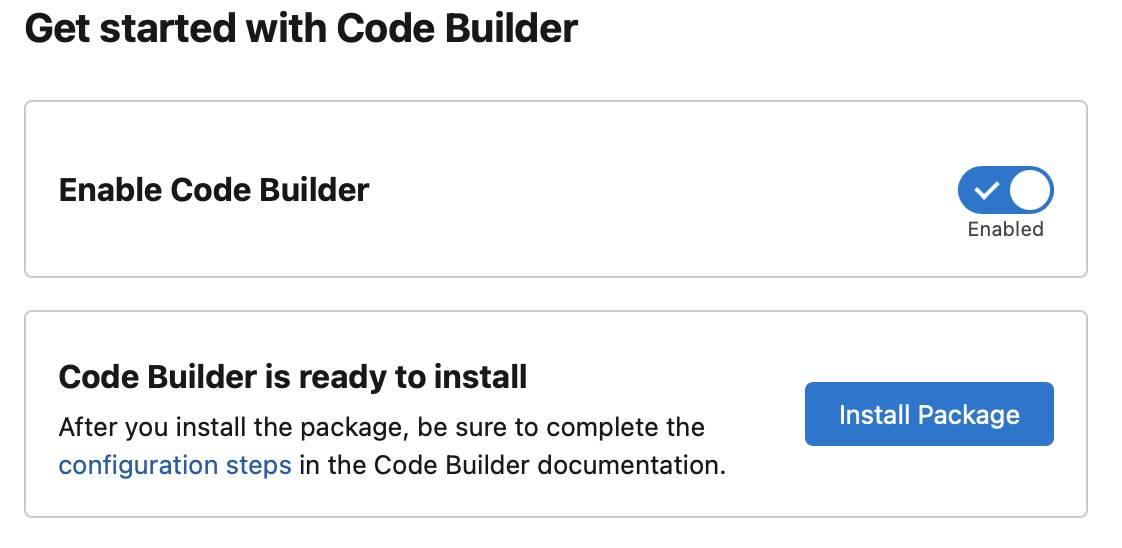
- Click Install Package.
- For Install Code Builder, select Install for All Users.
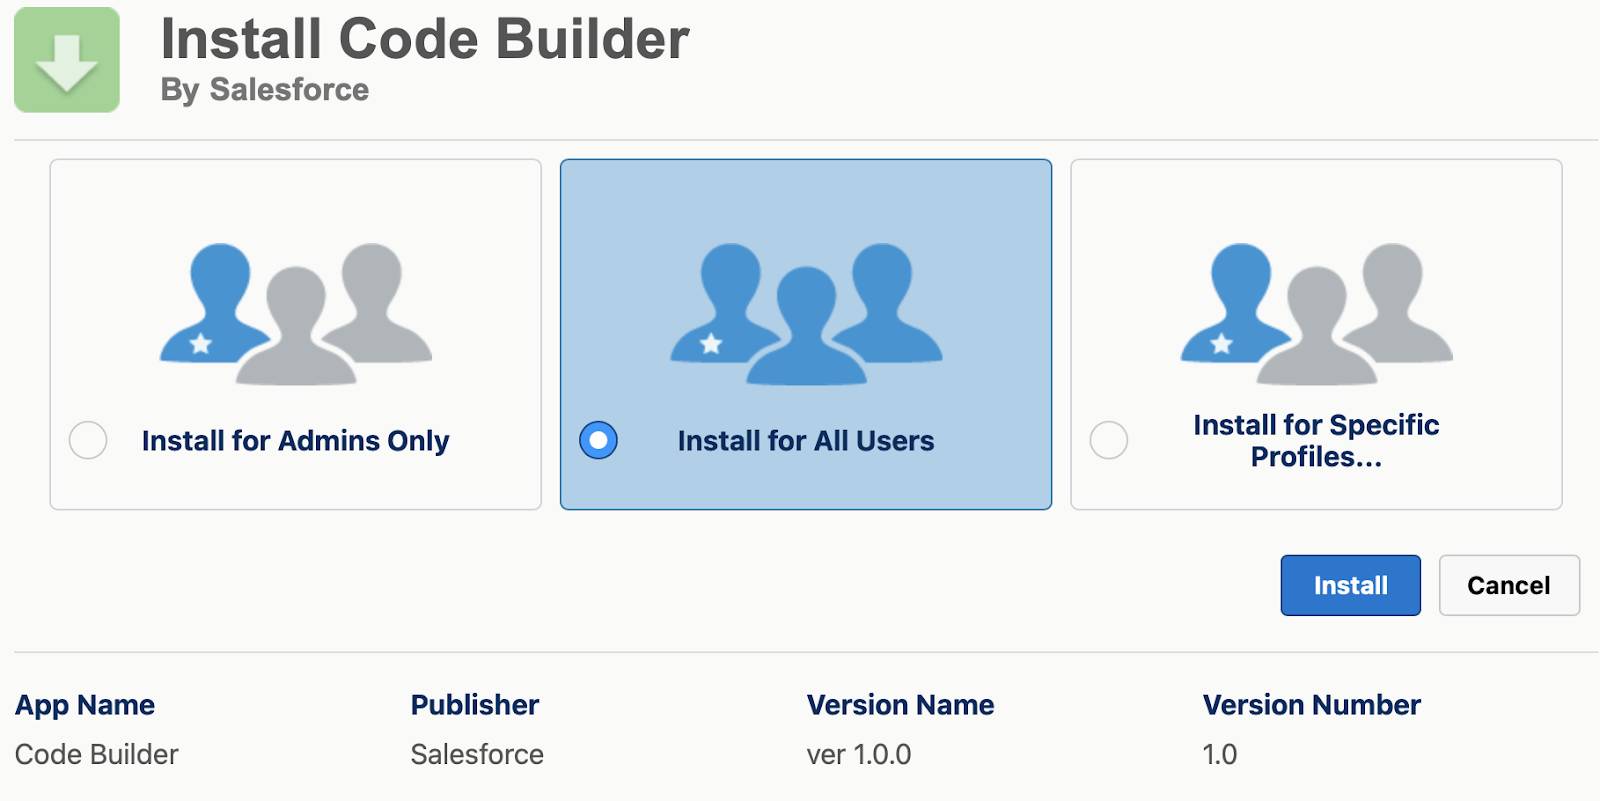
- Select Install.
- For Approve Third-Party Access, select Yes, grant access to these third-party web sites.
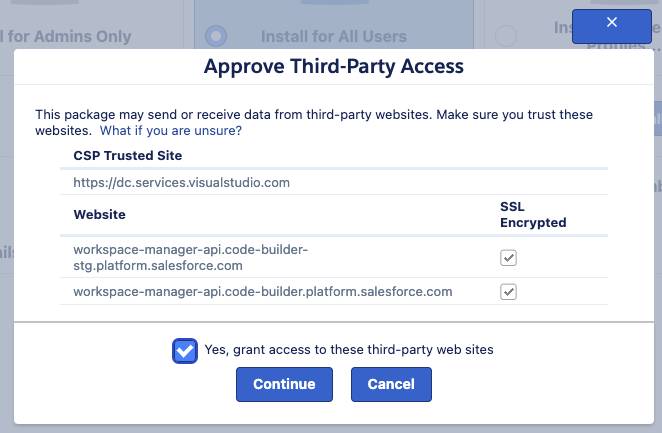
- Click Continue.
The app may take a few minutes to install. You’ll get an email when it’s complete.
Set Permissions
When the Code Builder package is installed and ready for use, assign the right permissions so your coders can use it.
- From Setup, enter
Permission Set Groupsin Quick Finder and select Permission Set Groups.
- Select CodeBuilderGroup.
- Click Manage Assignments.
- Click Add Assignments.
- Select the users you want to give permission to.
- Click Next.
- Click Assign.
Now your coders are all set to start coding with Code Builder. In the next unit we start Code Builder and take a look at using the new tool.