Manage Client Case Plans
Learning Objectives
After completing this unit, you’ll be able to:
- Create a case plan using goals and action items.
- Update a client’s case plan to reflect their progress.
Create a Client Case Plan
Tim Hill, a client at No More Homelessness (NMH), is living in the organization’s short-term housing and decides to enroll in its transitional housing and career counseling programs.
He needs a comprehensive plan to show how his efforts and NMH’s services work together to meet his goals. Let’s follow NMH Case Manager Rosa Sanchez and Tim as they create his case plan using Case Management.

Create a Case Plan from Template Goals and Action Items
Case plans in Case Management consist of two elements: goals and action items. Think of goals as what you want to accomplish and action items as what you do to get there. You can have any number of goals and any number of supporting action items under each goal. Together, they make up a holistic plan to help a client improve their life or overcome a challenge.
From their intake discussions, Rosa knows many of Tim’s goals are the same as other NMH clients.
NMH set up many common goals and action items as templates in Case Management, so the case plan wizard can guide the creation of most of Tim’s case plan. Plus, because Tim has existing program engagements in Case Management, Rosa can add template goals related to his programs.
- Navigate to the Case Plans tab on Tim’s contact record.
- Click New Case Plan to start the wizard.
- Enter a plan name and description. In the first prompt, Rosa enters a case plan name following NMH’s standard naming convention: Client Name - Month - Year. Tim’s name is already in the Contact field, and Rosa adds a brief description to explain his goals. She then clicks Next.

- Select the programs related to the case plan and click Next. Tim’s plan spans two programs, so Rosa selects Career Counseling and Transitional Housing. There are some programs here she doesn’t select because they aren’t part of this plan. Other NMH programs and program engagements don’t use template goals and action items.

- Identify goals. Only the goals associated with programs selected in the previous step are available. Rosa’s Salesforce Admin and program leadership added specific instructions for one of the programs, and goals in the other program are required and can’t be removed. The decisions about when to add instructions, and which elements are required, are made based on program and staff needs. (Keep this process as simple as possible for your own staff!) In addition to the required goals, Rosa selects Secure Full-Time Employment (Construction) and clicks Next.

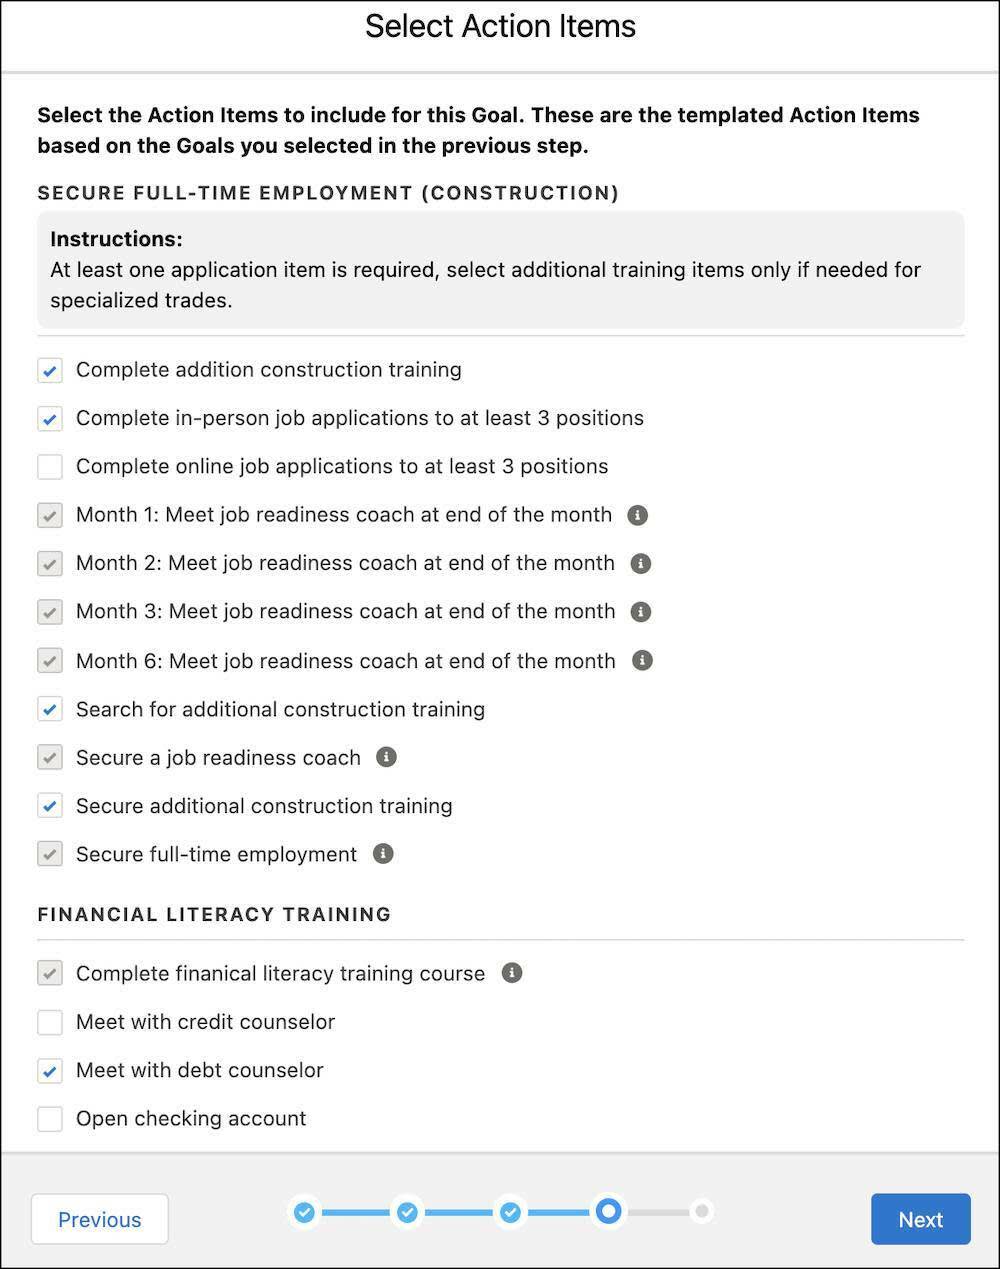
- Select action items. Only action items associated with the selected programs and goals are available. As with goals, some goal-specific instructions and action items are required. Rosa selects the rest of the action items that apply—Tim is going to apply to jobs in person and not online, for example, so she selects only one of those options—and clicks Next.
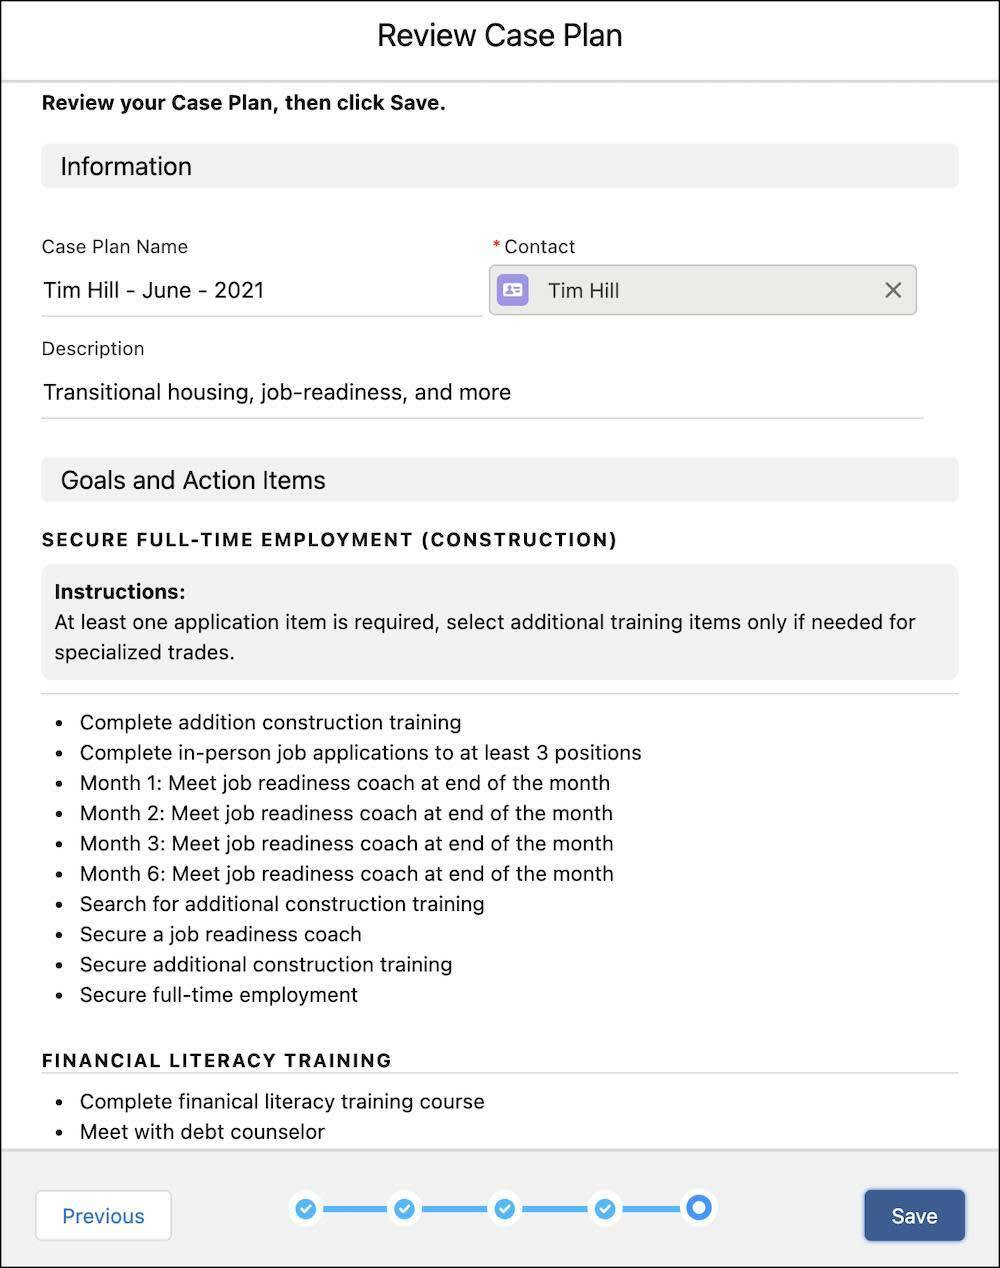
- Review your work. The last screen of the wizard gives Rosa a chance to review everything she selected. If something isn’t right, she can go back by clicking Previous. Everything is correct, though, so she clicks Save.

Explore a Case Plan Record
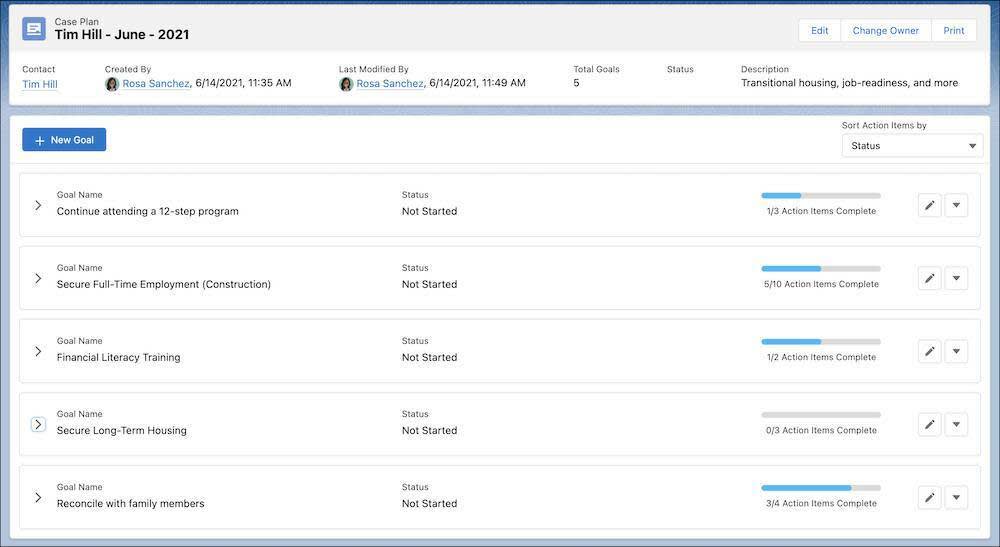
All of the pieces come together to create a case plan for Tim! Let’s review the plan so far.
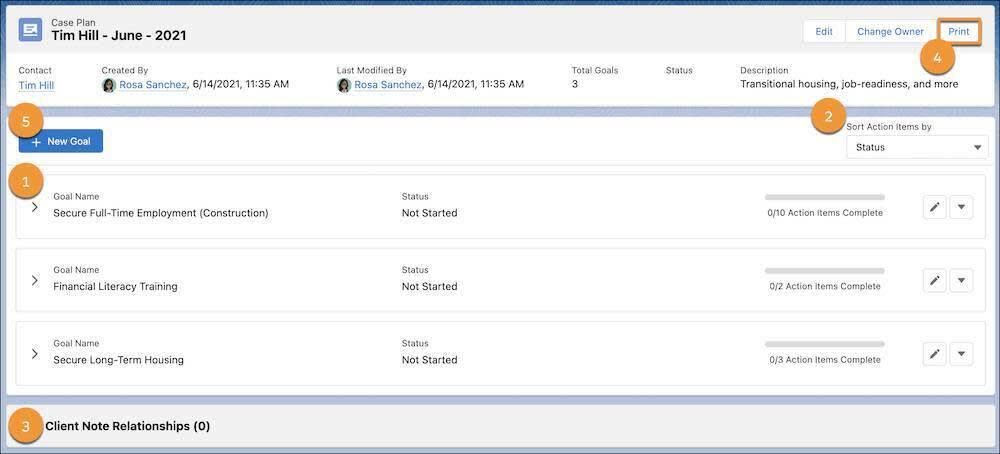
- The goals component (1) shows each goal, its status, and progress toward completing action items. These goals can expand or collapse to give you a high-level view or dig into action items. Clicking Edit (
 ) on a goal helps Rosa to edit goals and action items, add new action items, update progress, set due dates, and assign tasks to herself, Tim, or another service provider.
- The Sort Action Items by list (2) sorts the action items within goals by either Status or Due Date.
- The Client Note Relationships related list (3) displays notes related to this case plan. There aren't any on this new case plan yet, but Rosa is diligent about relating notes to case plans. (More on notes in the next unit.)
-
Print (4) creates a printer-friendly version of the case plan. Rosa wants to give Tim a paper copy to keep.
- Clicking + New Goal (5) adds template or custom goals, and associated action items, to the plan. Let’s follow Rosa as she adds a goal.
Add Goals and Action Items to an Existing Case Plan
Case plans can change and new goals can emerge. In those situations, you can add a goal and action items from your organization’s templates by clicking +New Goal, then selecting a template. You can then click +Add Action item to select a template action item.

Tim is also working on a few unique, personal goals that don’t appear in NMH’s templates. Rosa needs to make sure he’s following through on those goals, too—remember, this case plan is holistic. Let’s follow along as she adds goals and action items on Tim’s case plan with NMH.
- Click + New Goal.
- In Select a template, select + Add Custom Goal.
- Enter a Goal Name. Rosa enters
Continue attending 12-step program.
- Select a Status. Tim is already working with the program, so Rosa selects In Progress.

- Click + Add Action Item.
- Enter an Action Item Name and set its Due Date, Status, and assignment. Rosa enters
Select a sponsorand sets the due date to 2 weeks from today, leaves the status as Not Started, and assigns the task to Tim.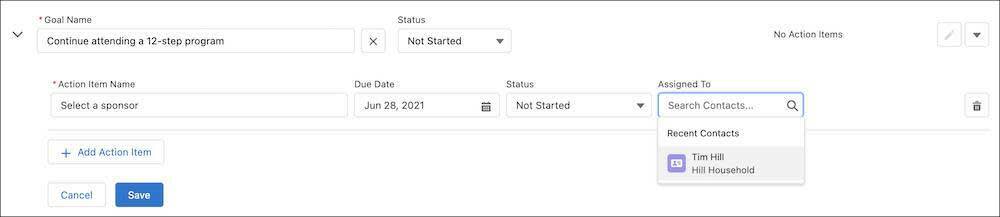
- Click + Add Action Item again. Rosa adds two more action items—talking with his sponsor at least one time a week for 12 weeks in a row and attending meetings for 12 weeks in a row.
- Click Save.

Everything is set for Rosa’s discussion with Tim.
They have a good conversation. Tim asks Rosa to add another goal to the plan—he has some relationships to mend with his family, and he’d like to make that part of his plan. She adds the new custom goal and custom action items as they talk. Then Rosa prints the plan (remember that handy print button?) to give to Tim.
Update a Case Plan with Client Progress
Over the next few weeks, Tim makes good progress.
When Tim and Rosa next meet, they review what he’s done so far: completed a financial literacy course, stayed in regular contact with his 12-step sponsor, reconnected with a few family members, and started work with his career coach.
Rosa needs to mark another action item as complete, since Tim met with his job-readiness coach. To do that, she clicks Edit ( ) in the same row as the employment training program. She changes the status of the action item to Completed and clicks Save.
Between each of the milestones in Case Management, there’s work to do for both Tim and Rosa. In the next unit, we’ll follow Rosa as she uses Case Management to take and store her notes.
Resources
- Salesforce Help: Create a Case Plan
- Salesforce Help: Create Goal and Action Item Templates
- Salesforce Help: Case Management with Experience Cloud
- Salesforce Help: Update a Case Plan
- Salesforce Help: Customize Case Plan Goals and Action Items