Set Up and Test Payment Methods
Learning Objectives
After completing this unit, you’ll be able to:
- Explain how to set up Salesforce Payments with Stripe.
- Explain how to set up Salesforce Payments with PayPal.
- Describe how to register an Apple Pay domain.
- Explain the onboarding process for Stripe and PayPal.
- Describe how to validate payments in test and live modes.
Pick Your Payment Service
Linda is ready to configure Salesforce Payments in Business Manager. The steps she takes depend on which service she uses.
Service |
Tasks |
|---|---|
Stripe |
You can use a Salesforce Payments Stripe merchant account that’s already associated with a Agentforce Commerce instance. |
PayPal |
|
Apple Pay |
|
So what’s an instance? For Agentforce Commerce for B2C, it begins with a realm. One or more realms are assigned to each merchant. A realm has multiple instances, each of which provide an application infrastructure that includes web, application, and database servers. Developers use certain instances to develop, test, and deploy online storefronts. A single instance can include multiple storefronts.
Configure Stripe
To implement Stripe, Linda creates a Stripe account and associates it with her Agentforce Commerce for B2C instance. Here’s how to do it.
- Open Business Manager.
- Select Administration > Global Preferences > Salesforce Payments.
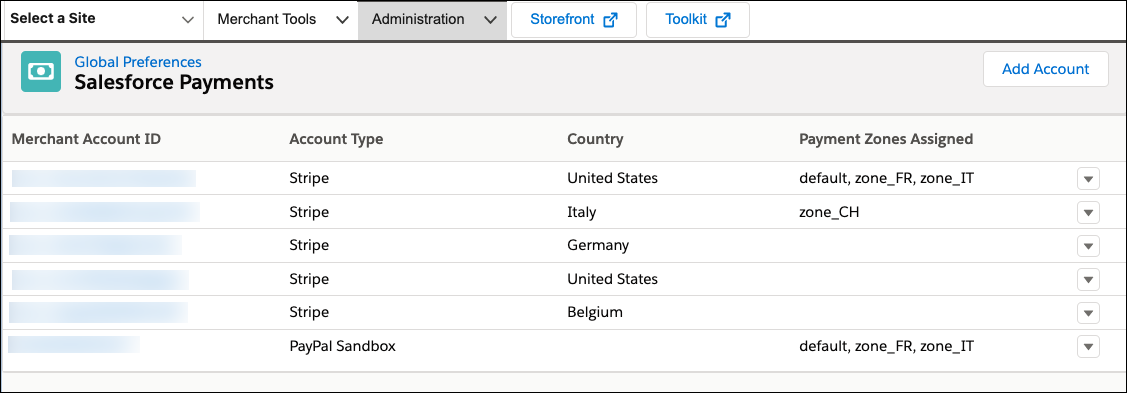
- Click Add Account.
- To create and associate a Salesforce Payments account connected to Stripe:
- On the Stripe Account Associate page, select Create a Stripe Account with Salesforce Payments.
- Select the country where the account-holding organization resides or where the business is legally established: USA
- To associate a Salesforce Payments account you’ve created with Salesforce Payments:
- On the Stripe Account Association page, select Associate a Salesforce Payments Account with this Instance.
- In the Stripe Account ID field, enter the ID for an existing Salesforce Payments account.
- Access the ID from your instance’s Salesforce Payment Setup page or from the Stripe Dashboard’s Account Details page. You can only associate a Salesforce-created Stripe account within Business Manager.
- Click Next.
The page refreshes with a message that your account was created and associated. A status prompt shows your onboarding status.
Onboard the Stripe Account
Next, Linda onboards the Stripe account. This process collects business information such as names, addresses, and bank accounts. The steps vary based on the Stripe account’s country and the business entity. Linda can modify or add information from the Stripe dashboard that’s accessed from Business Manager or directly on Stripe.com, using her Stripe account user permissions.
Here’s the onboarding process.
- Select Administration > Global Preferences > Salesforce Payments.
- Select a merchant account ID.
- Click Onboard with Stripe.
- Follow the instructions on the Stripe site. You return to the Business Manager Account Association page when the onboarding process is complete.
- To verify if Stripe requires further steps, click Go to Stripe Dashboard, and sign in to your account.
Test the Integration
Linda can quickly determine the status of payments on her instance via these modes.
-
Test: Use to verify that Salesforce Payments works as expected after you modify the payments configuration or add a payment type on a development or sandbox instance.
-
Live: Use to activate Salesforce Payments on your production instance.
She can enable charges to test payments even if she hasn’t completed onboarding her account. She can use a Salesforce Payments account associated with the instance to create payments in test mode.
Linda reviews the Stripe documentation to learn how to test the integration before it goes live.
She wants to trigger different flows in her integration to ensure that Stripe can handle each of them correctly.
Here’s how she sets up test payments in test or live mode for an instance.
- Select site > Merchant Tools > Ordering > Salesforce Payments.
- Select the Settings tab.
- On the Settings page, in the Instance Status section, select Test Mode or Live Mode.
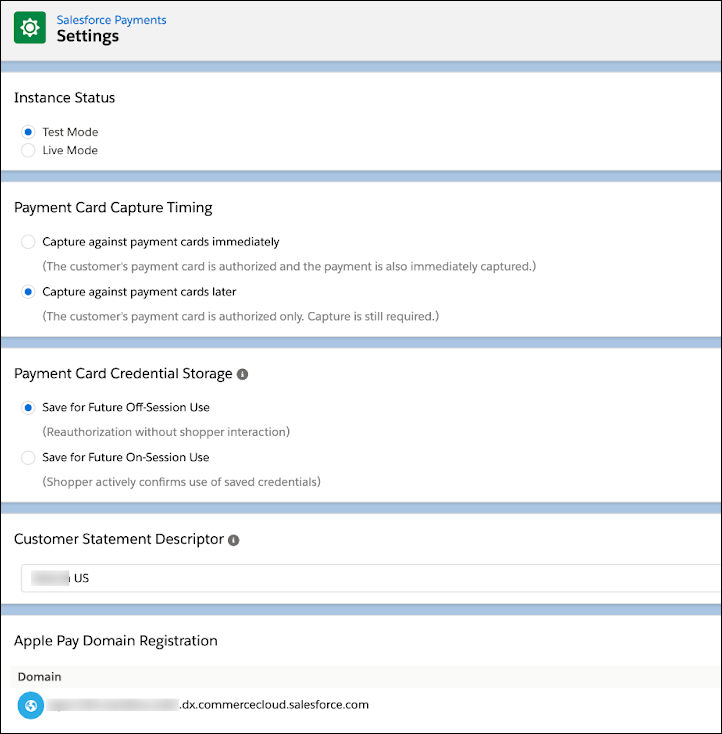
- Select Test Mode to test.
- Select Live Mode if you want to go live.
The Stripe account must be onboarded and Stripe must have determined the account is ready to take live payments. This information appears in the Stripe dashboard.
Here’s how to test a payment.
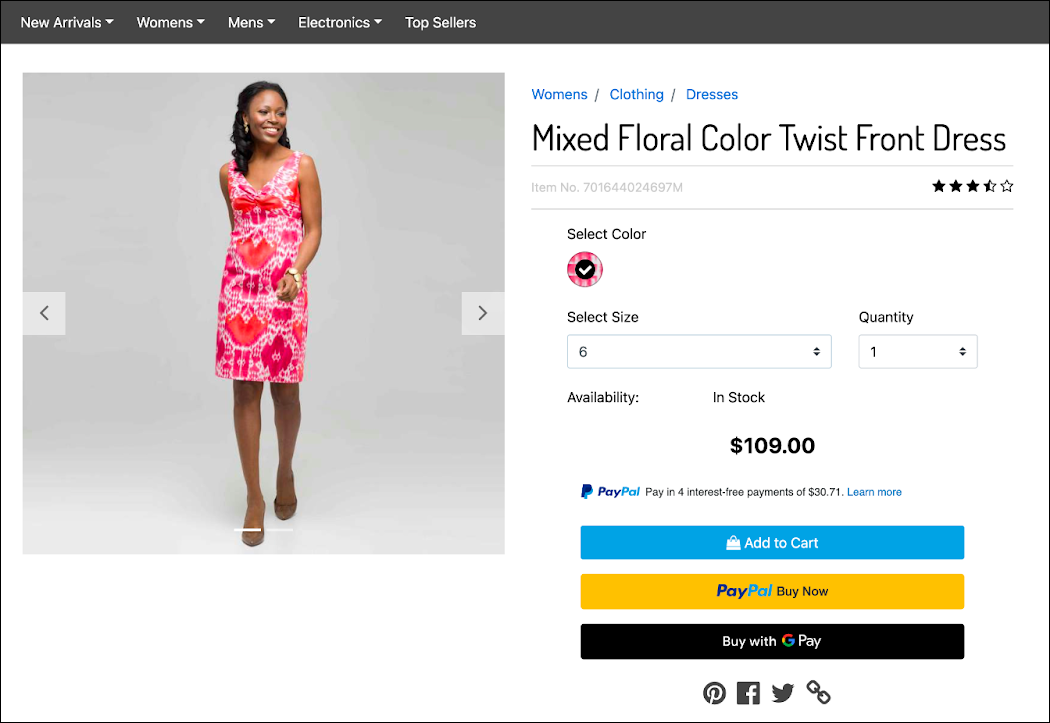
- Open your storefront and place an order.
- Select Add to Cart, PayPal Buy Now, or Buy with GPay (Google Pay for Chrome or Android, and Apple Pay for Safari or IOS).
To test in test mode, for example, you must use Stripe test credit card numbers, SEPA Debit bank account numbers, and so on. See the Stripe documentation for details. Google Pay and Apple Pay need valid credit cards added to their respective wallets.
Whether in live or test mode, Linda can view the order from the storefront or the Stripe Dashboard to confirm that Salesforce Payments processed the payment using the Stripe processor. A Stripe payment intent ID is listed for the order.
Configure PayPal
Salesforce Payments with PayPal uses immediate capture and funds disbursement. For example, when a shopper completes a cart checkout and their order is approved, their payment is immediately captured and dispersed to the merchant. Here’s the process flow.
- The shopper completes a cart checkout.
- The order status is set to Approved.
- The order is captured.
- Funds are transferred from the buyer PayPal account to the seller PayPal account.
Linda uses Business Manager to associate a PayPal account with Salesforce Payments and then onboards the PayPal account.
Associate a PayPal Merchant Account
Here’s how to associate a PayPal account with Salesforce Payments.
- Select Administration > Global Preferences > Salesforce Payments.
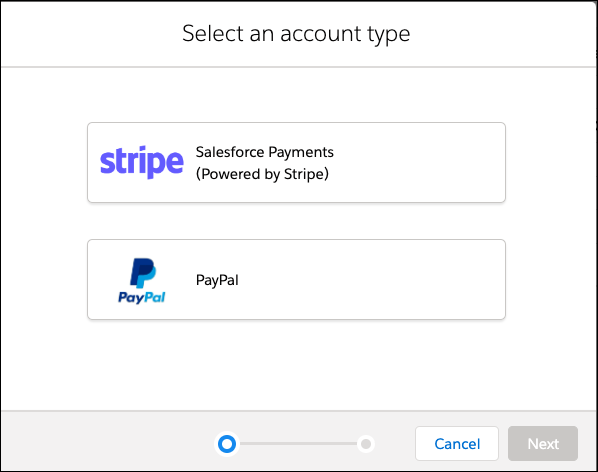
- Click Add Account.

- Click PayPal.
- Select the type of PayPal account to add.
-
PayPal Sandbox: Test PayPal.
-
PayPal Live: Use PayPal in production.
You must create a separate account for each mode: test or live.
- Click Next.
You can add an existing or new account.
- Select Add an existing account.
On the PayPal site:
- Enter the email address for your existing merchant account.
- Enter your password.
- Click Agree and Consent.
- Click Go Back to Store.
You are returned to the Business Manager account detail page.
- Select Add a new account.
On the PayPal site:
- Enter an email address for your new merchant account.
- Enter a password.
- Review the PayPal Operations Consent form. By accepting, you give the Salesforce Payments service consent to perform the operations listed in the form on your company’s behalf.
- Click Agree and Connect.
- Click Go Back to Store.
You are returned to the Business Manager account detail page.
- Select Administration > Global Preferences > Salesforce Payments and confirm the newly created account.
Onboard a PayPal Merchant Account
The PayPal onboarding process collects business information such as names, addresses, and bank accounts. The steps vary based by country. Linda can modify or add information from PayPal. She can access PayPal from Business Manager with her merchant account's user permissions. Here’s how to do it.
- Select Administration > Global Preferences > Salesforce Payments, confirm that the Business Manager details page lists the newly created account.
- Click the PayPal account you want to onboard.
- Click Manage Account at PayPal.com.
- Follow the instructions on the PayPal site.
Test a PayPal Configuration
Linda is now ready to test her configuration in a sandbox. Here’s how to test the PayPal Buy Now option.
- Launch the storefront instance you want to test.
- Select a product for purchase, and confirm that the PayPal Buy Now option is active.
- Click PayPal Buy Now.
- Log in to the PayPal buyer account that you set up for testing.
- Select the payment method that you set up for testing.
- Confirm that the purchase total is correct, and complete the PayPal transaction.
- In the Checkout window, confirm that PayPal and the correct PayPal account is listed as the payment method. Click Place Order.
- In the Order Confirmation page, confirm the products and totals are correct and that PayPal and the correct account is listed as the payment method.
Here’s how to test PayPal with the Multistep checkout option.
- Launch the storefront instance that you want to test.
- Add a product to the shopping cart.
- Click Checkout.
- Click Next: Payment.
- Complete the checkout fields, select PayPal as the payment method, and then complete the transaction.
- In the Order Confirmation page, confirm the products and totals are correct and that PayPal and the correct PayPal account are listed as the payment method.
For each PayPal payment type, here’s how to verify that the PayPal buyer account recorded the transaction.
- Log in to the PayPal buyer account that you set up for testing.
- Confirm that the test transactions are listed and that the totals are correct.
Register an Apple Pay Domain (Optional)
Linda selected the Apple Pay payment method and needs to register her Apple Pay domain. Before she registers the domain, she makes sure that the host at the domain has a valid, trusted, and active SSL certificate. This is required.
Apple Pay for the Web requires that she register all domains (mybrand.com, for example) that might appear in the Safari toolbar on the storefront site. Stripe handles all other Apple Pay interactions with the Apple PaySession API in Safari. Here’s how to configure Apple Pay.
- Set the alias in the hostname file in Business Manager.
- Select Merchant Tools > Ordering > Salesforce Payments.
- Click the Settings tab.
- Scroll down and click Add Domain. (Start here if you’re registering the Apple Pay domain from the Salesforce Payments page.)
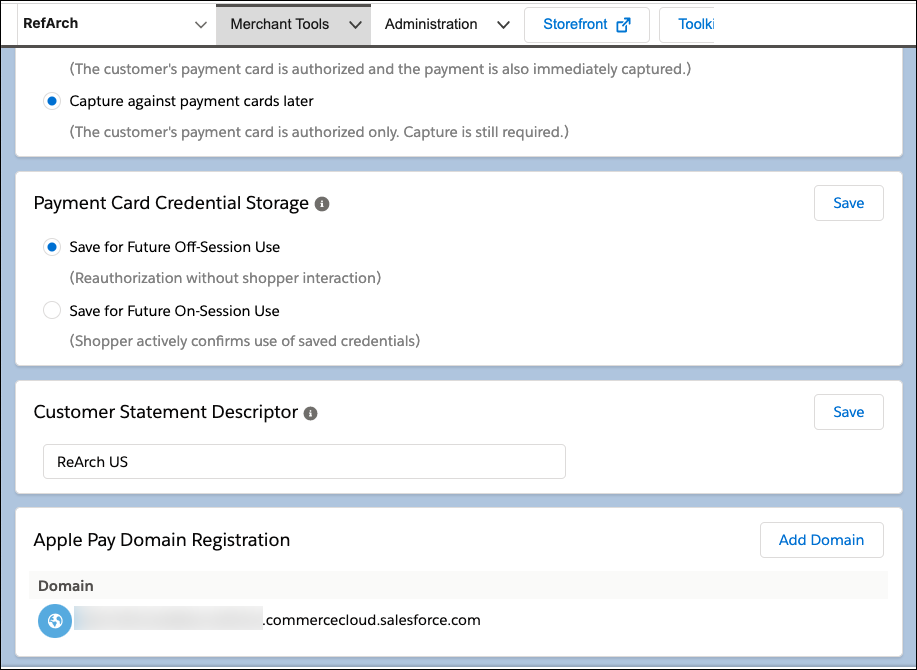
- Enter a top-level domain, such as
mysite.comor a subdomain such asmybrand.mysite.com.
You can list multiple domains.
- Select the payment processing status for the instance: test or live
Linda can replicate the Salesforce Payments configuration for sites from Staging to Production or Development instances to apply the same configuration on those instances. Based on the type of instance, the test or live modes can be different.
Next Steps
In this unit, you learned how to set up Stripe, PayPal, and Apple Pay as payment services. Next, learn how to configure Salesforce Payments settings such as zones, checkout modes, payment services, and payment card capture timing.
Resources
- External link: European Payments Council: DD Core Mandate Translations
- External link: stripe DOCS: Testing
- External link: stripe API: Errors
- Salesforce Help: Salesforce Payments Platform Configuration
- Trailhead: Salesforce B2C Commerce Hostname Aliases
- External link: Stripe Testing
- External link: PayPal Developer: Sandbox Accounts
- External link: Testing Klarna Products