Orchestrate Rules with Expression Sets
Learning Objectives
After completing this unit, you’ll be able to:
- Summarize what expression sets are and when to use them.
- Identify the key elements of an expression set.
- Describe the basic process for creating an expression set.
Expression Sets at a Glance
Expression sets are the calculation engine of business rules. They’re made up of variables, constants, and logic connected in a meaningful flow. Expression sets take inputs as formatted JSON data and use lookup tables, algebraic operations, and aggregation operations to calculate new data. Then they output specified data in formatted JSON that guided processes like Omniscripts and Flow can use.
Several Salesforce tools can do mathematical operations. So, you may wonder what’s so special about expression sets?
Here are some things you can do with expression sets.
- Integrate them seamlessly with decision tables and decision matrices.
- Build a rule once and reuse it any number of times with different input values.
- Create multiple versions of a single rule to anticipate calculation changes over time.
- Use advanced calculation features such as array calculations, branching, and aggregation functions.
- Simulate expression sets to check that they work, and then modify them as required.
Expression sets can help guide a customer or agent through a series of questions and pull data from various sources. You can use expression sets to deliver quotes or determine eligibility for many use cases, for example:
- A health insurance plan
- A term-life quote
- A volume discount on an order
- A permit or application fee
- A benefits or service determination
When an expression set has multiple factors, values, and calculations, it can call multiple decision matrices.
You build expression sets using, you guessed it, the Expression Set Builder. Use it to easily create expression sets by defining elements and combining them into a sequence.
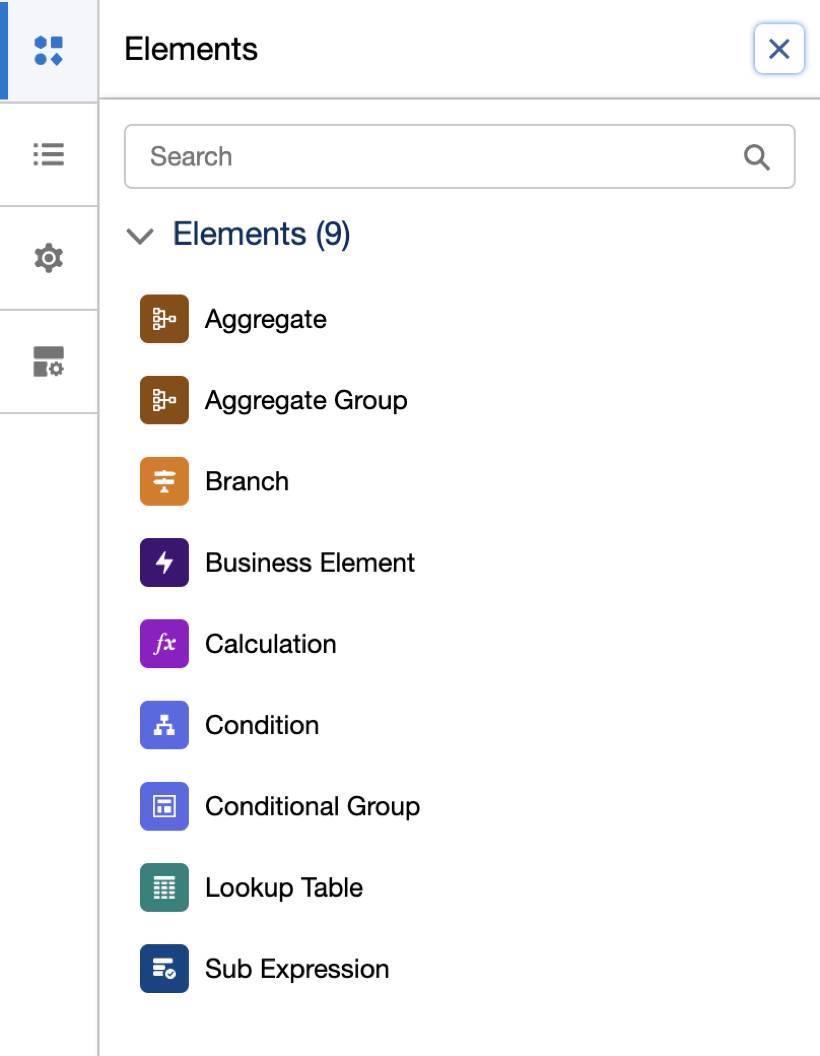
There are many elements available for use in expression sets. This table briefly defines each type.
Element type |
What does it do? |
|---|---|
Aggregate |
Performs addition, average, maximum, or minimum functions on multiple runs of the preceding steps of the expression set. |
Aggregate Group |
Runs the previous expression set steps once for each set of input values and then runs the Aggregate steps. |
Branch |
Shows multiple conditional paths that an expression set can take based on the priority you assign to each path. A branch can have up to six conditional paths, including the default path. All non-default paths require a condition step, which evaluates the entry criteria for the path. |
Business Elements |
Solution-specific, customized elements that are designed specifically for your industry’s business requirements. Business elements are shipped as part of your Industries solution. When a business element is available in your org, you can add the element to an expression set and use the element like other step elements. |
Calculation |
Performs one or more functions or mathematical operations on variables, constants, and numbers and returns a single result. |
Condition |
Allows the steps that follow it to run if its expression evaluates to true. |
Conditional Group |
Runs a group of steps if its Condition step expression evaluates to true. |
Lookup Table |
Looks for and matches input values to rows in a decision matrix or a decision table, and returns the output of that row. |
Sub Expression |
Runs a child expression set and returns its results to the parent. |
In addition to these core elements, expression sets contain additional handy features, like access control, versioning, and a live simulation tool.
And you can easily save, copy, and reuse expression sets, saving time and effort for similar processes.
Let’s return to Zercovana and see how Jessica builds an expression set to simplify the business application process.
Expression Sets in Action
In the previous unit, Jessica Morales configured and enabled a decision matrix that determines the base fee for the business application license fee.

Now, it’s time for her to create an expression set that invokes this matrix. This expression set also calls calculation and conditional elements to determine the final fee. Let’s see how she does it.
- Click
 , and then find and select Expression Sets.
- Click New.
- For Name, enter
Application Total Fee.
- For Usage Type, select Default from the dropdown.
- Click Save.
After creating and naming the expression set, click the Application Total Fee V1 expression set version to open it in the expression set builder.

The Expression Set Builder has two main areas.
- Canvas (1) - The canvas is where you create rules by adding various elements.
- Configuration Panel (2) - The configuration panel is where you’ll find additional resources and settings to configure your expression set.
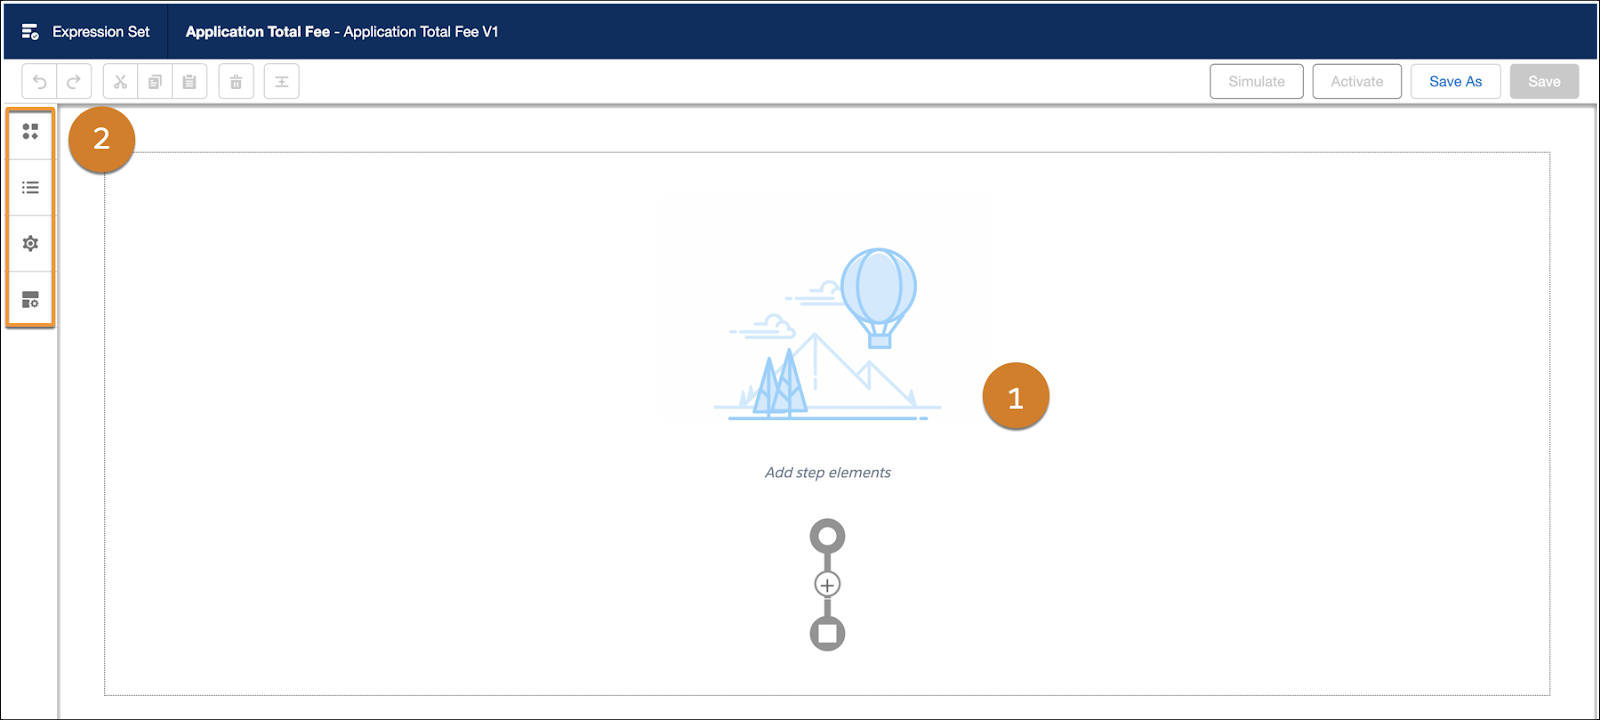
The Configuration Panel consists of the following options.
- Elements
 : Use this option to view a list of all the available elements.
- Resource Manager
 : Use this option to create variables and constants.
- Expression Set Properties
 : Use this option to add additional details such as Start and End date and time, Version Number, and Rank. You can also choose to show decision explanations for the steps in an expression set version if required.
- Element Details
 : Use this option to include an element in the output.
Let’s walk through an example process.
Create Variables and Constants
Jessica’s first order of business is to add the variables and constants because her calculation steps need to reference them. A variable is a placeholder for a dynamic value. A constant is a placeholder for a fixed value.
To do this, click Add Resource, which opens a dialog for defining variables and constants. The Add New Resource window contains some simple fields, such as Resource Type, Variable API Name, and Data Type, which you fill out with the appropriate values.
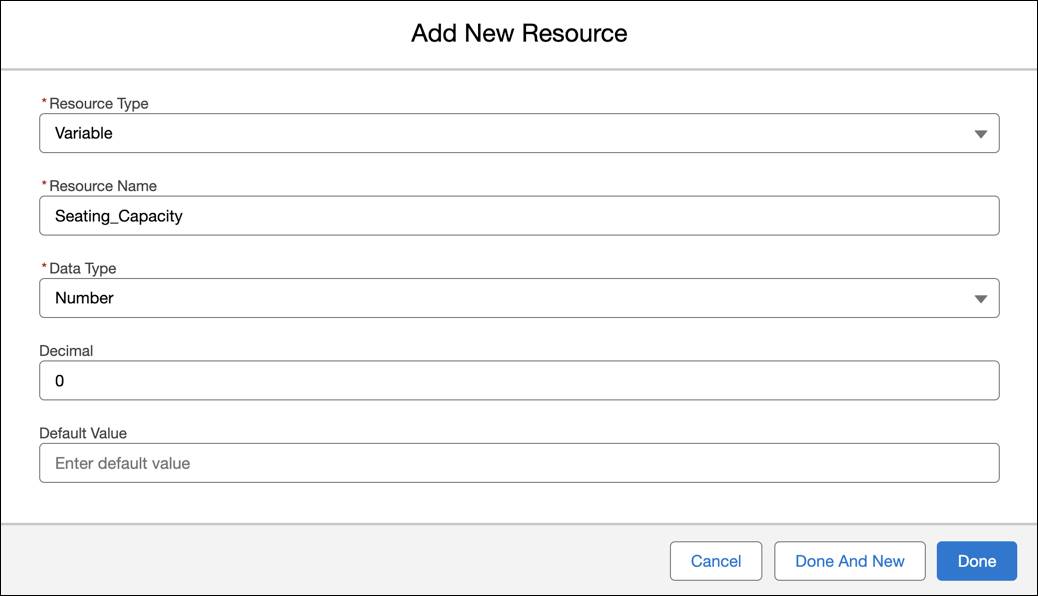
Notice the Resource Type field is set to Variable. The Seating_Capacity resource needs to be a variable because the user defines its value during the guided process.
In this scenario, Jessica creates the following resources.
Resource Type |
Resource Name |
Data Type |
Decimal |
Default Value |
|---|---|---|---|---|
Variable |
Seating_Capacity |
Number |
0 |
|
Constant |
Seating_Capacity_Base_Fee |
Currency |
2 |
20 |
Variable |
Additional_Fee |
Currency |
2 |
|
Variable |
Total_Fee |
Currency |
2 |
Call the Decision Matrix
After adding all the required constants and variables, add the first element, which invokes the decision matrix created previously.
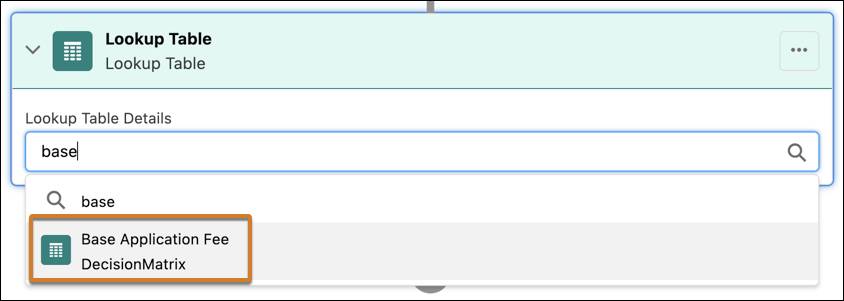
Find and select the matrix called Base Application Fee. A summary of input and output columns for the matrix appears.
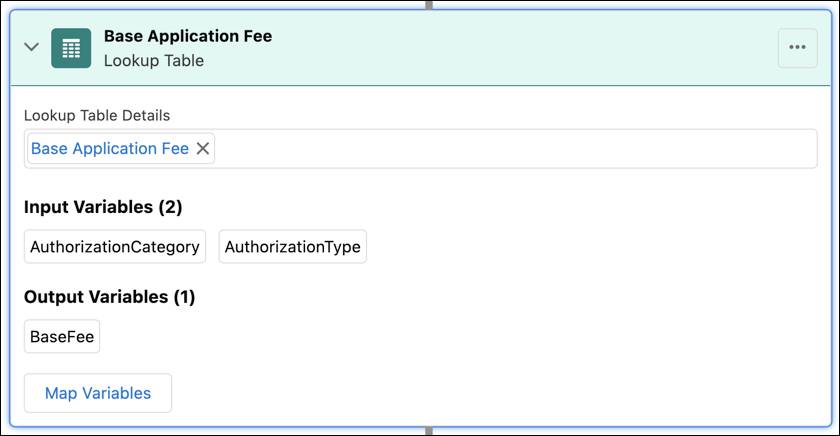
Review the input and output variables and confirm you selected the correct matrix.
Add a Calculation Step
Next, Jessica adds a calculation step that computes an additional fee based on the seating capacity of the business.
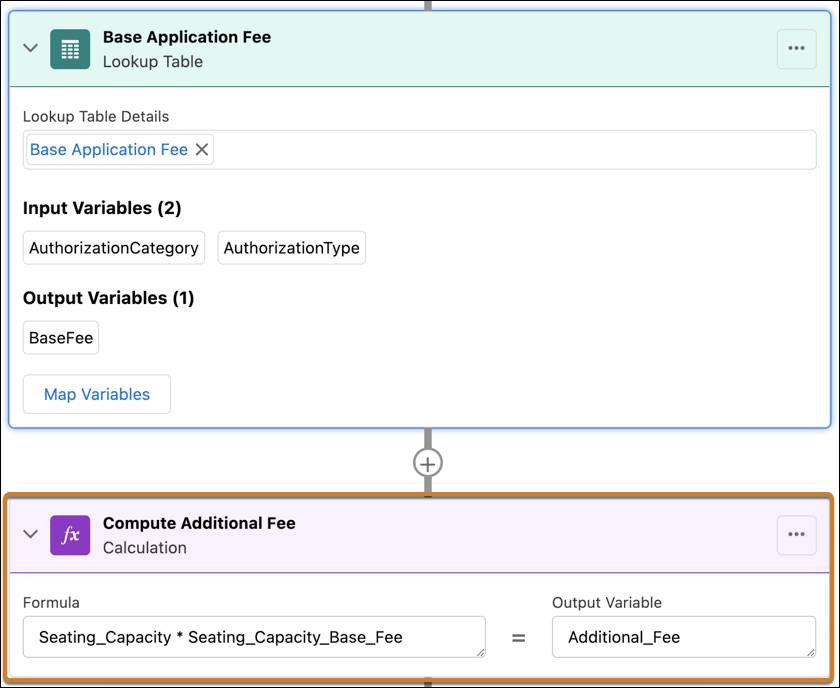
Additional_Fee is calculated by multiplying the Seating_Capacity variable by the Seating_Capacity_Base_Fee constant. Type-ahead functionality makes it easy to reference the appropriate variables and constants in an expression.
Add Up All the Fees
After adding the additional fee calculation element, Jessica must add one final calculation element that adds up all the fees to determine the total application fee.

The formula for this final step takes the Base Application Fee from the decision matrix and the Additional Fee from the first calculation step and adds them all together. The final output is simply the Total Fee.
Save the Rule and Simulate
Jessica feels good about the rule but wants to test it out before adding it to any guided flows. The Expression Set Builder gives you a handy simulation tool to do just that.
On the Input Details tab of the simulation tool, add the required input variables.
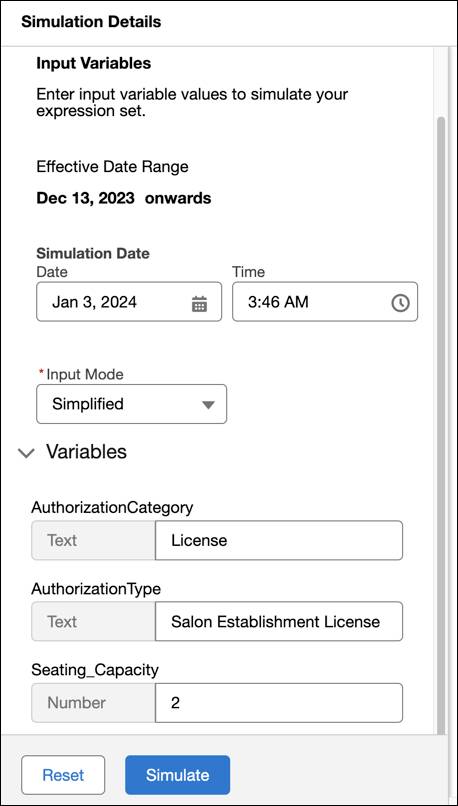
For inputs, specify the area, authorization category, authorization type, and seating capacity of a business. Then, click Simulate to test the expression set. On the main panel, the simulation results quickly appear, so you can review the execution of each step.
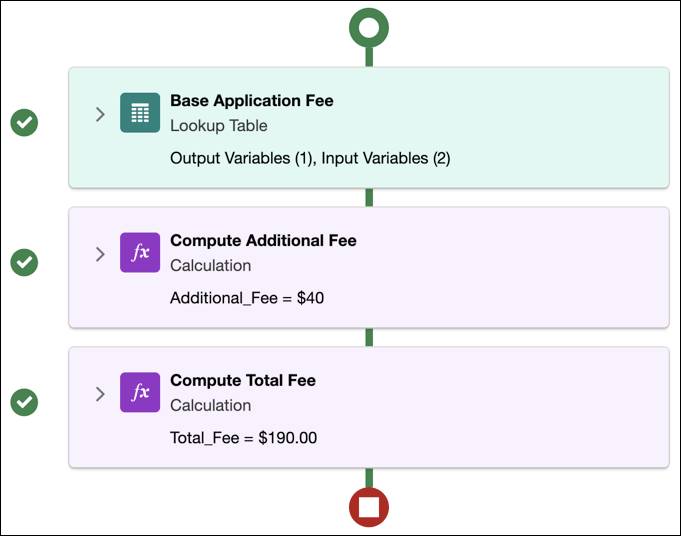
Jessica is thrilled to confirm that her rule works precisely as intended. The main panel shows the output for each step. The checkmarks to the left of each element indicate there are no errors. Based on the provided inputs, the Total Fee for this business application is $190.
If she likes, Jessica can expand each step to view more details. This feature comes in super handy when troubleshooting.
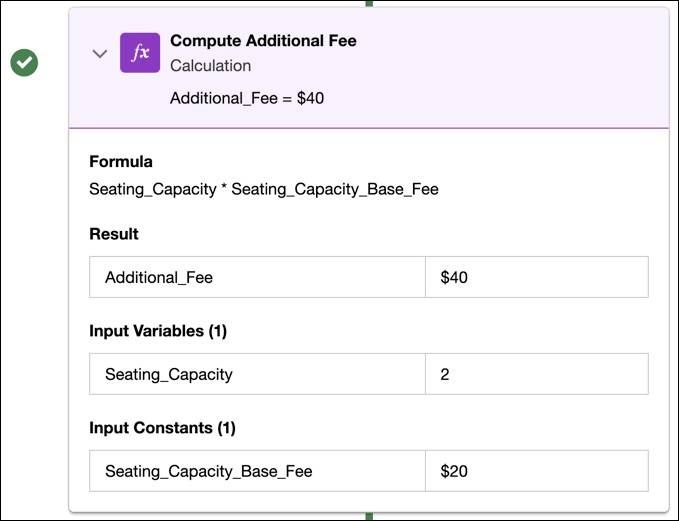
The screen shows the calculation step for computing the additional fee, which is $40 because the seating capacity is 2.
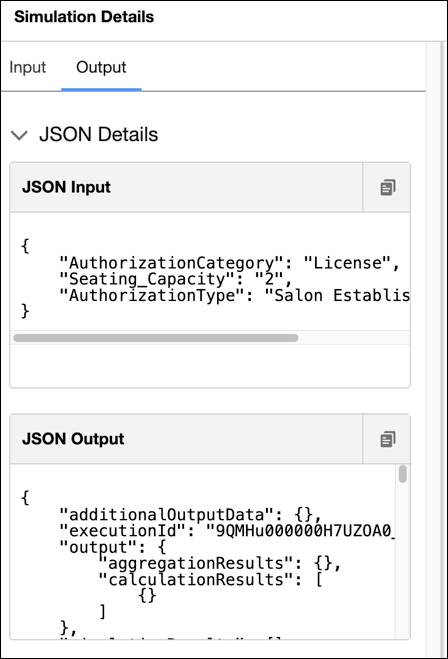
On the left panel, expand View JSON Results for more technical details about the execution of each step. Reviewing the JSON is another way to help solve potential issues.
Jessica is seriously impressed with how easy it is to build and test her new expression set. She also finds out about more advanced features, such as aggregation and conditional branching. Jessica rubs her hands together. She plans on using those features for her more complex rules.
After simulating a couple of times with different inputs, she’s confident that the rule is ready to add to Zercovana’s guided flow for the application fee. Phew!

Expression Set Templates
Jessica wonders if creating expression sets in the future can be even easier. And why not?

Instead of creating complex expression sets from scratch, use templates to speed things up. Just view a template, save it as an expression set, and start editing it. To learn more, see Build Your Expression Set From a Template.
Next Steps
After activating the expression set, Jessica reaches out to Alex Park, Zercovana’s resident Omnistudio expert. He’ll invoke this expression set from the guided application process. Let’s find out how Alex tackles the task in the next unit.
Resources
- Salesforce Help: Expression Sets
- Salesforce Help: Branch
- Salesforce Help: Build Your Expression Set From a Template