Configure an On-Demand Sandbox
Learning Objectives
After completing this unit, you’ll be able to:
- List three tools used with an on-demand sandbox.
- Describe the difference between on-demand sandbox administrators and regular developers when assigning Account Manager roles.
- Explain what an API client ID is used for.
- Itemize the Account Manager configuration steps for on-demand sandbox users.
Introduction
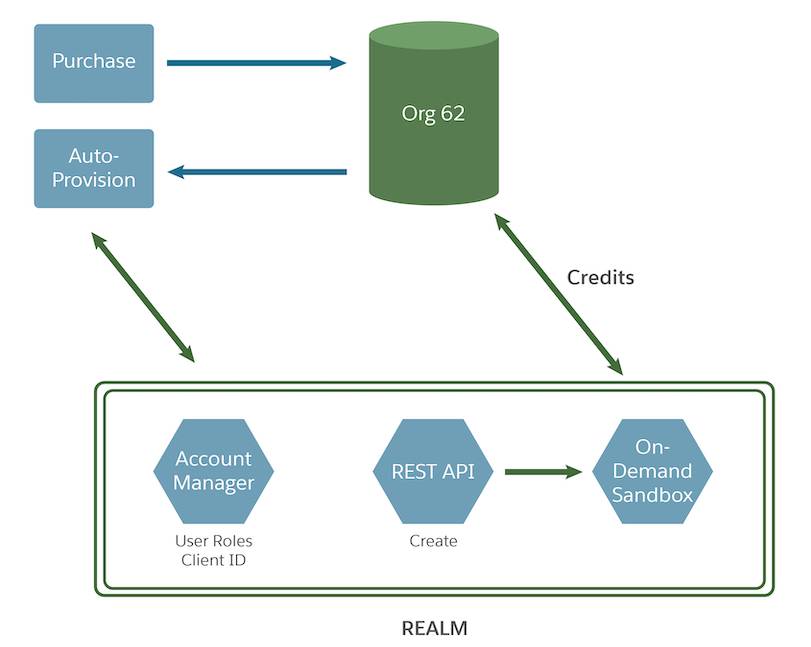
Cloud Kicks management purchased a sandbox license for a certain number of sandbox credits. When they placed the order, an auto-provision message was sent to the on-demand sandbox system to enable the realm.
To get started using these sandboxes, Linda Rosenberg needs to configure user roles and an API client ID in Account Manager, the online tool for creating, maintaining, and disabling Salesforce B2C Commerce sites.
She's responsible for on-demand sandboxes numbered from cloudkicks-1 to cloudkicks-12, and uses a URL like this to access Business Manager on them.
https://cloudkicks-12.sandbox.dx.commercecloud.salesforce.com/on/demandware.store/Sites-Site

Tip
Business Manager is the Salesforce B2C Commerce online tool for configuring and managing B2C Commerce storefronts.
When Linda (or an authorized developer) issues an API call to create an on-demand sandbox, the system that tracks credits makes sure that the Cloud Kicks license has enough of them.

On-demand sandboxes are enabled for a specific realm. Once Salesforce enables a realm, Account Manager users with the right credentials can use the API and issue commands to create, stop, start, and remove sandboxes. They can also view sandbox usage for their entire realm.
It’s Linda’s job to make sure the right people have the right credentials to access what they need.
Log in to Account Manager
Each account in Account Manager is assigned various roles. Some roles, like Linda’s, require two-factor authorization to log in to the account. If your site requires two-factor authentication, you need a mobile device with the Salesforce Authenticator app installed. You must pair your mobile device to the account. See Account Manager for B2C Commerce for details.
In this module, we assume you are a B2C Commerce administrator with the proper permissions to perform these tasks. If you’re not a B2C Commerce administrator, that’s OK. Read along to learn how your administrator would take these steps in a staging instance. Don’t try to follow our steps in your Trailhead Playground because B2C Commerce isn’t available in the Trailhead Playground. If you have a staging instance of B2C Commerce, you can try out these steps in your instance.
If you don’t have a staging instance, ask your manager if there is one that you can use.
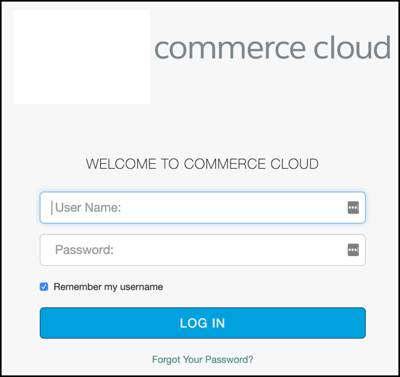
Here’s how Linda logs in to Account Manger:
- In a web browser, go to https://account.demandware.com/. (You must have Account Manager credentials.)

- Enter your password.
- Click Log In. If you need two-factor authorization and you’ve already paired a mobile device, the Account Manager system sends an authorization request to your paired device.
- If an authorization request is sent to your mobile device, use the Salesforce Authenticator app to acknowledge the request.
Create User Accounts
The user permissions Linda configures include access to the Open Commerce API (OCAPI) and WebDAV. She can also specify a time-to-live (TTL) value to automatically delete a sandbox after a specified time interval. This comes in handy for developers who want to use a continuous integration and continuous delivery (CI/CD) development process. We talk more about those later in this module.
Here are the steps Linda takes to create an account.
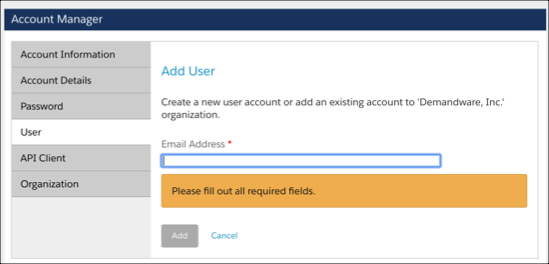
- In Account Manager, click User.
- Click Add User.

- Enter the email address and click Add.
- If Account Manager finds an account with the entered email address, add the user to your organization.
- If Account Manager doesn’t find an account, the Add User page opens, prompting you for more information.
- On the Add User page, enter:
- Email Address (automatically filled in)
- First Name
- Last Name
- Enter or select these optional values:
- Business Phone
- Mobile Phone
- Home Phone
- Preferred Language
- In the Organizations section, click Add to open the Assign Organizations window.
- Search for organizations, and check each organization to which the account belongs. (Each account must belong to one or more organizations.)
- Click Add to apply the organizations to the user.
- In the Primary Organization list, select the user's primary organization. Only account administrators for the primary organization can manage the user's account.
Now Linda assigns roles to the on-demand sandbox developer users.
Configure Your User Roles
For each role, she configures a scope filter and sets it to All Sandboxes in her realm.
The most important role is Sandbox API User. Users assigned to this role can create on-demand sandboxes and consume credits. Because this role gives them a direct link to credit consumption (and the cost of using on-demand sandboxes), Linda limits who has it. Users given this role are considered on-demand sandbox administrators.
Linda assigns all other roles to all developers so that they can fully access the on-demand sandbox features.
Here are the steps she takes.
- Log in to Account Manager.
- Navigate to the User area and select the user you want to assign the role to.
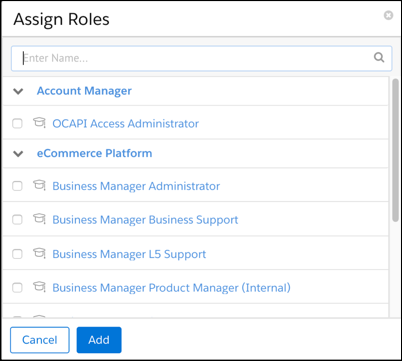
- In the Roles section, click Add.
 (Your list of rules can differ.)
- For on-demand sandbox administrators:
- Search for the Sandbox API User role and click Add.
- Click the filter icon
 .
.
- Configure the role scope (required for access to a specific sandbox or PIG instance).
- On the Add Instance Filters tab, select an organization.
- Enter the names for the instances you want the user to have access to (for example, All sandboxes).
- Select the instances.
- Click Add.
- Return to the user detail page, and click Save.
- For all other developers:
- Search for the Business Manager Administrator and LogCenter User roles and click Add.
- Click the filter icon
 for each role: Business Manager Administrator and LogCenter User.
- Select the organization, realm, and instance group (for example, All sandboxes).
- Click Add.
- Return to the user detail page and click Save.
Account Manager sends a message to the user’s email address, which the user can click to activate their account. The user’s email address appears immediately in the Account Manager list of users.

Tip
Vpods do not support on-demand sandboxes. Account Manager on a vpod does not have the Sandbox API User role.
Add an API Client ID
Linda uses Account Manager to create an API client ID. She and the administrator developers need the API Client ID password for authentication when they automate API calls via scripts. They also need an API client ID to access the On-Demand Sandbox API. The Open Commerce API (OCAPI) requires that each client have a client ID. You must append this ID to the URLs you use to interact with OCAPI.
Users with the Account Administrator or API Administrator roles can manage API client IDs (also called API keys).
To create an automated process (for example, a build server integration) you need an API client ID and an API secret for authentication.
Here are the steps Linda takes to add an API client ID.
- Open Account Manager.
- Click API Client.
- Click Add API Client.
- Enter the client’s (user’s) display name.
- To use authentication in interactive mode, set Redirect URIs to http://localhost:8080.
- To manage sandboxes, set Default Scopes to 'roles', 'tenantFilter', 'profile', each on a different line.
- Click Add. Account Manager creates a client ID to make sure you can access the display name you provided.
- Click Add again.
- Review the list of client IDs to verify that you created a client ID for the display name you just entered. The client ID is enabled by default.
Next Steps
In this unit, you learned how to log in to Account Manager to create user accounts and assign roles. You also learned how to access Business Manager on an on-demand sandbox. Next, you learn how to start, use, and monitor an on-demand sandbox.
Resources
- Help: Account Manager
- External Site: GitHub (you must have GitHub credentials)
- External Site: Account Manager (you must have Account Manager credentials)