Organize Your Data
Learning Objectives
After completing this unit, you’ll be able to:
- Describe the difference between a list and a data extension.
- Describe the use cases for lists and data extensions.
- Explain how Marketing Cloud Engagement manages external data and data relationships.
Let’s Get Organized
Organizing and managing your data is key to segmenting effectively. Marketing Cloud Engagement organizes data in two ways: lists and data extensions.
- A list is a collection of subscribers who receive your communications. Lists have attributes, such as name, address, interest and birthday, that contain information about subscribers. One thing to note about lists is that attribute-related information cannot exist alone without a subscriber. You can create as many lists as you need to segment your subscribers and target your email communications.
- A data extension is a table within the application database that contains your data. You can use a data extension to store not only sendable subscriber data—just like with a list—but also relational data, such as purchases, inventory, and rewards program data.
How you organize your data influences the tools you use to segment it. When it comes to choosing a data model, in general, we recommend the following.
Use lists when:
- Your lists contain 500,000 subscribers or fewer—even over the long term
- You prefer simplicity over performance
- You do not require fast import speed
- You plan to use a limited number of subscriber attributes
Use data extensions when:
- Your lists contain more than 500,000 subscribers
- You support multiple subscriber data sets, with separate values
- You send global messages
- You require fast import speeds
- You implement triggered sends
- You use the SOAP or REST APIs
- You prefer a flexible subscription model
- You want to leverage relational data, such as purchase history or location references
Creating a Data Copy or Import Activity
What if you have data flowing in from elsewhere? No problem! You can set up a simple Data Copy or Import (formerly Import File) activity in Automation Studio to bring data from outside of Marketing Cloud Engagement—for example, CRM or point-of-sale data—into your lists or data extensions.
Paulo is the marketing specialist at Northern Trail Outfitters. He’s been sending his weekly promotional email for several weeks, and he’s seen great success—a lot of opens, a lot of clicks, and a lot of purchases. The only problem is that he has to manually update his MainSubscriber data extension with data from other systems.

Manual work for something that can easily be automated is a bad use of his limited time, he decides. He plans to set up a Data Copy or Import activity and automation to update his MainSubscriber data extension daily. Let’s first take a look at how to set up a Data Copy or Import activity.

- Hover over the Salesforce blue cloud to display the main Marketing Cloud Engagement navigation bar.
- Hover over Journey Builder.
- Select Automation Studio.
- Click Activities.
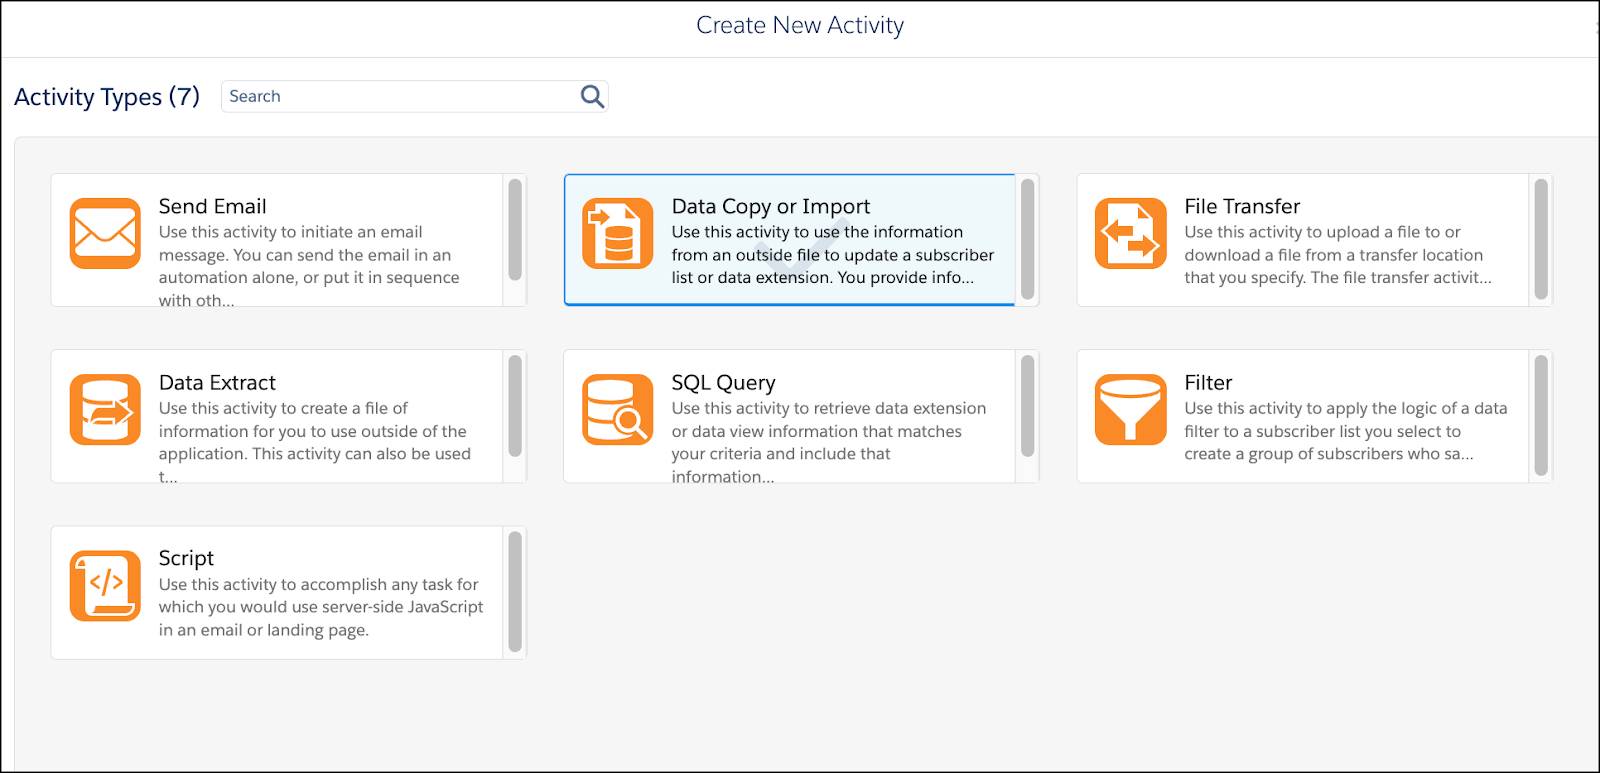
- Click Create Activity.
- Select Data Copy or Import.
- Click Next.
- Configure the Data Copy or Import activity properties.
- Name: Enter a name.
- Description: Enter a description.
- External Key: Enter a key or leave this blank.
- Check Send notification email to checkbox.
- Email: Enter the email address where you would like the notification to be sent.
- Click Next to configure the data source. You can select Data Extension or File Location as your data source.

- If you use Data Extension as your data source, select the data extension you want to use.
- If you use File Location as your data source, select the file you want to import and configure the following import settings:
- Select the file location.
- Set up FTPs in Admin under Data Management.
- Set up FTPs in Admin under Data Management.
- Enter the file naming pattern.
- This allows any associated automation to run when a file whose name matches the pattern is dropped into an Enhanced FTP folder.)
- This allows any associated automation to run when a file whose name matches the pattern is dropped into an Enhanced FTP folder.)
- Click Next.
- Select the file location.

- Configure the destination.
- Select MainSubscriber.
- Click Next.

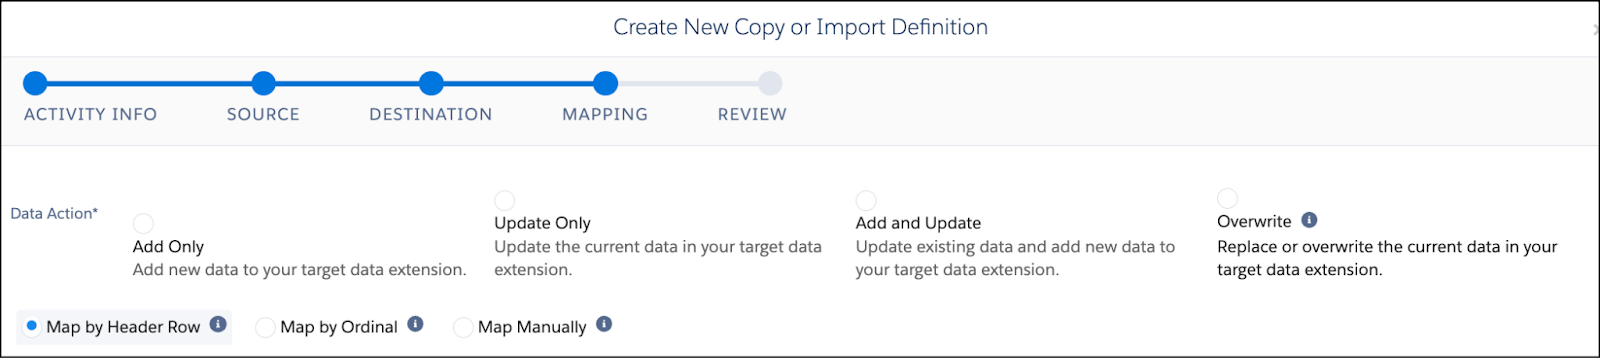
- Configure the mapping.
- Select the appropriate data action: Add Only, Update Only, Add and Update, or Overwrite.
- Select how you want to map columns between the source and the destination: Header, Ordinally, or Manually.
- Click Next.
- Review the Data Copy or Import activity details.
- Click Finish.
Now that Paulo has his data copy or import activity, he can automate it to run daily. He decides to hold off on this for now, since he can actually include the data copy or import activity in with the automation that segments his subscribers.
Scrub Your Data
A final note on organization. Make sure your data is clean, clear, and easy to find. To do this, frequently remove data that is incorrect, incomplete, improperly formatted, or duplicated. Implement naming conventions for lists, data extensions, folders, and content to provide structure and consistency across your account or business unit. For example, your naming conventions can reflect how you organize your data—either by campaign, publication type, frequency, or some combination thereof.
Now you know what segmentation is, why it’s important to your business, how to get your data organized, and how to set up a data copy or import activity. Let’s move on to segmentation tools.
Resources
- Salesforce Help: Data Copy or Import Activity
- Salesforce Help: Enhanced FTP Guide
- Salesforce Help: Lists vs. Data Extensions