Generate and Use Appointment Invitations
Learning Objectives
After completing this unit, you’ll be able to:
- Generate appointment invitation URLs.
- Book appointments from invitation URLs.
- Enable users to share availability with prospects.
- Manage appointment invitations.
Generate an Appointment Invitation URL
Ryan and Tessa can’t wait to start sending invitations and share Ryan’s availability with customers. Here’s how Ryan creates an appointment invitation URL for customers like Kiara Shah who want to meet Ryan along with a real estate specialist, Shirley Singh.
To generate the URL:
- Click
 to open the App Launcher, and find and select Service Resources.
 - Select Ryan Dobson’s record.
- Click
 .
. - Click the Generate Appointment Invitation quick action.
- Ensure that Ryan Dobson is selected as the Participant Service Resource.
- Select Wealth Management as the work type group.
- Select At a Branch as the appointment type or engagement channel.
If you’ve enabled the Schedule Appointments with Engagement Channel setting, Salesforce Scheduler shows the Select Engagement Channel Type page instead of the Select Appointment Type page. - Enter
Spectrum Center Drive, Irvine, CA, USA, and then select Irvine Branch. - Provide these details.
- Appointment Booking Start Date:
01-Mar-2023 - Appointment Booking End Date:
31-Mar-2023 - Invitation URL Expiration Date:
28-Feb-2023 - Active: Selected
- Appointment Booking Start Date:
- Expand Manage Service Resources, and then select Shirley Singh as a required resource.
- Click Copy to Clipboard, and then click Finish.
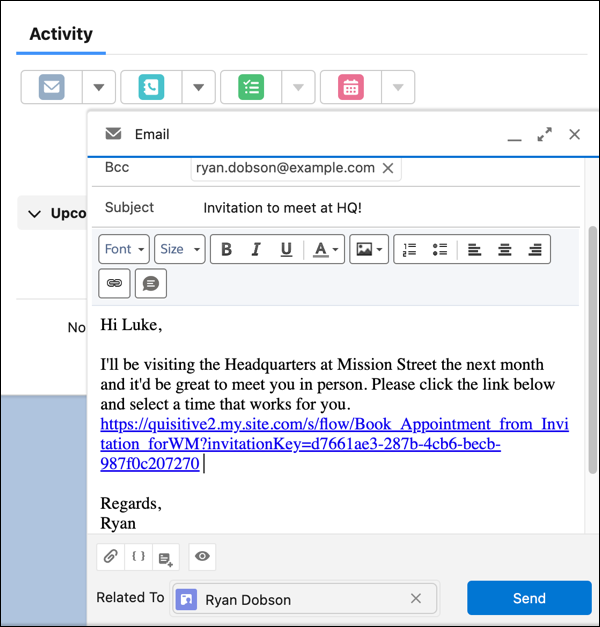
Ryan shares the appointment invitation URL with customers like Kiara Shah. Tessa starts creating invitation URLs for other customers and shares them using the Send an Email option in the Activity component on the Service Resource page. Here’s an example email invitation from Ryan to one of his customers, Luke.

Book Appointments as an Authenticated Customer
Kiara books an appointment using an invitation URL. Here’s how she does it.
- Open the URL.
- Log in to the Experience Cloud site.
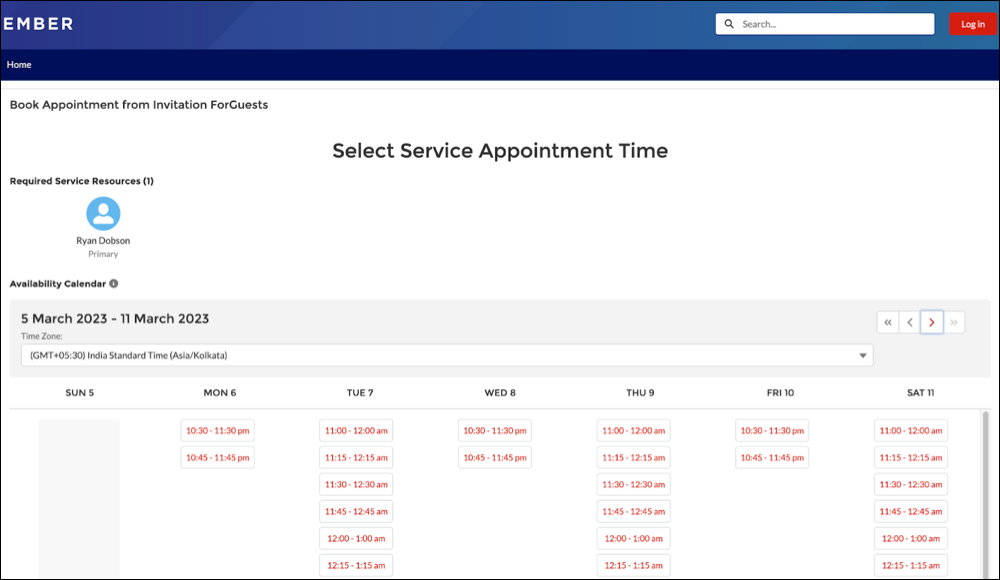
- Select a time slot, and then click Next.
- Review the appointment information, enter a subject and description, and then click Next.
- Click Finish.
Kiara is amazed at how easy it’s to book appointments using the invitation URL. It’s as if Ryan is just a couple of clicks away!
Enable Users to Share Availability with Prospects
The steps for sharing availability with prospects are similar to the steps for sharing availability with authenticated customers. Keep these minor differences in mind.
- You can add the flow created using the Book Appointment Invitation flow template to Experience Cloud sites used by prospects. You can also add the flow to your company websites using Lightning Out (Beta) or APIs.
- You must ensure that the access of the site and flow page is set to Public.
- You must ensure that the guest user profile has the permissions required to book an appointment. See Grant Authenticated Users Required User and Object Permissions. Then provide the additional permissions and access required to book appointments using invitations to the guest user profile.
Here are some things to note when you provide permissions to the Guest user profile.
- The Default External Access settings in Organization-Wide Defaults aren’t applicable for guest users. See External Organization-Wide Defaults Overview.
- From Spring ’23, the Run Flows permission isn’t available for the Guest User profile. You must control access to specific flows for the Guest User profile from the guest user profile page. See Run Flows for Guest Users Is Being Deprecated and How Does Flow Security Work?.
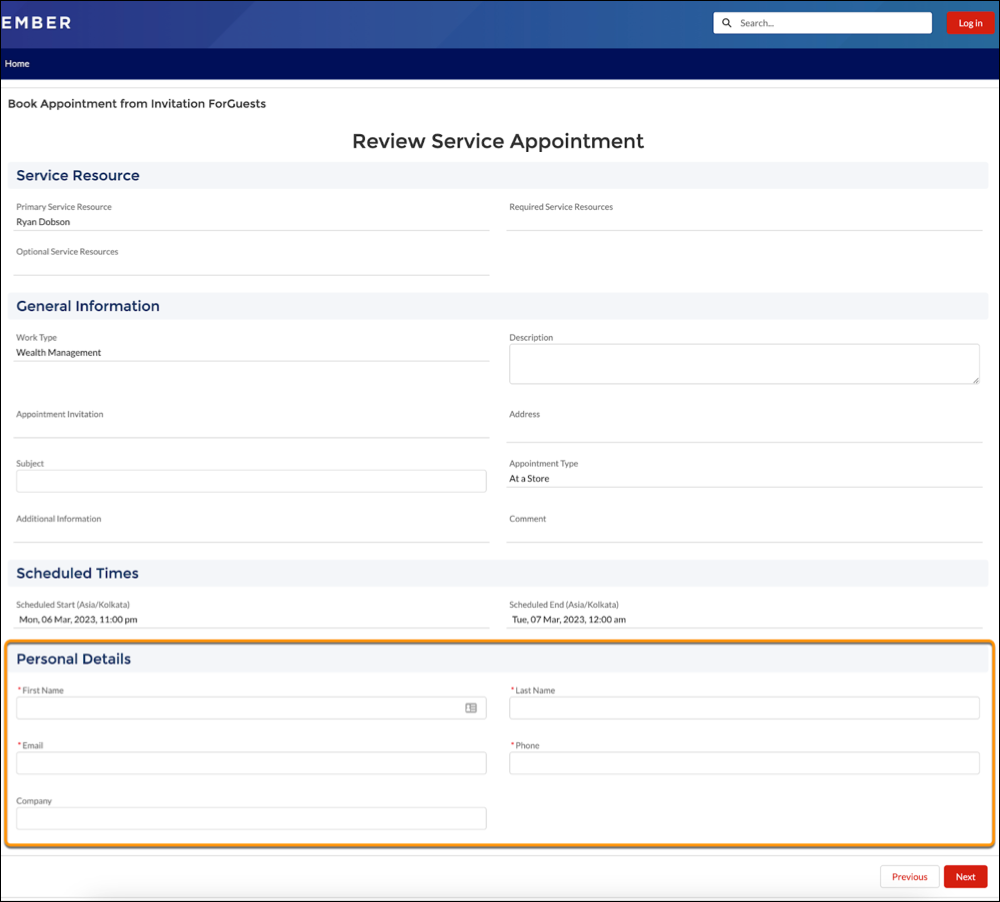
The steps for prospects to book appointments are similar to the steps for authenticated users, aside from these few minor differences.
- Prospects, of course, don’t need to log in to an Experienced Cloud site: They access the site directly without any credentials.

- Prospects must enter their first name, last name, email, and phone details. These details are used to create a lead record.

Matt completes the setup for prospects and informs Ryan and Tessa.
Manage Appointment Invitations
Ryan and Tessa are busy sending invitations to customers and prospects. Before winding up his day, Matt checks in with Ryan and Tessa. She asks if they can change invitation expiration dates in case customers want an extension. Tessa’s in luck.
Ryan shows her the Appointment Invitation tab, where she can view the list of invitations and modify these details if needed.
- Booking Start Date
- Booking End Date
- URL Expiration Date
- Active flag
Let’s Go!
The next day, Tessa monitors Ryan’s appointments and sees that customers are booking meetings directly with Ryan using the appointment invitation URLs. They’re both pumped up and looking forward to meeting customers and prospects in person.