Get to Know the AgentExchange Partner Console
Learning Objectives
After completing this unit, you’ll be able to:
- Understand how to access the AgentExchange Partner Console.
- List the key features of the AgentExchange Partner Console.
- Describe how to update your company info.
- Explain how to view your in-progress and published listings.
It’s Clear Skies for Cloudy Health
It’s a brand-new day for Leung Chan, marketing manager at Get Cloudy Consulting. Her Cloudy Health solution’s pricing strategy is complete and approved. This solution integrates seamlessly with the Salesforce Platform and will be distributed on AgentExchange as a managed package.
It’s ready to list!

To list her solution on AgentExchange, Leung learns about the AgentExchange publishing process and the Partner Console. She starts by double-checking the prerequisites.

Complete Prerequisites
This badge assumes that you’re hard at work on a solution that you want to share with the Salesforce community. But is your solution ready to list on AgentExchange? Here’s how to gauge its readiness:
- You’re familiar with the steps to Publish Your Solution on AgentExchange.
- Your solution’s AgentExchange business plan, also called your listing plan, is finished and approved. Always submit your listing plan to your account representative at Salesforce to gain business approval. The listing plan comprises the basic details of your listing plus your pricing model and pricing plans.
What Is AgentExchange Partner Console?
AgentExchange Partner Console is the one-stop shop to create, publish, manage your listings, and much more. The Partner Console is the complete business management site for ISV partners and consultants with AgentExchange listings. It includes: AgentExchange listings, technologies, analytics, and marketing.
Access the Partner Console
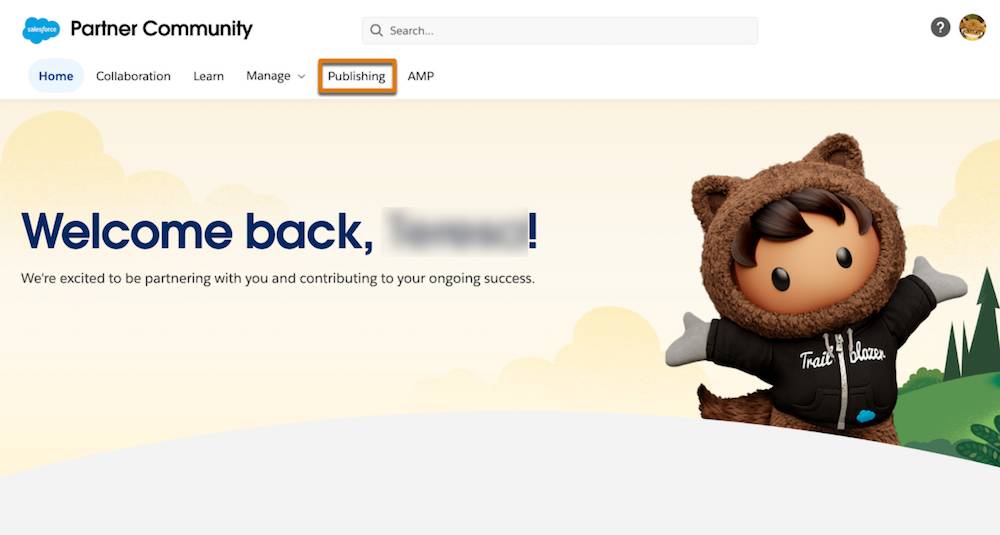
First, Leung logs into the Partner Community. Next, she clicks Publishing.
Leung is automatically authenticated into the AgentExchange Partner Console. How secure and fast!
Tour the AgentExchange Partner Console
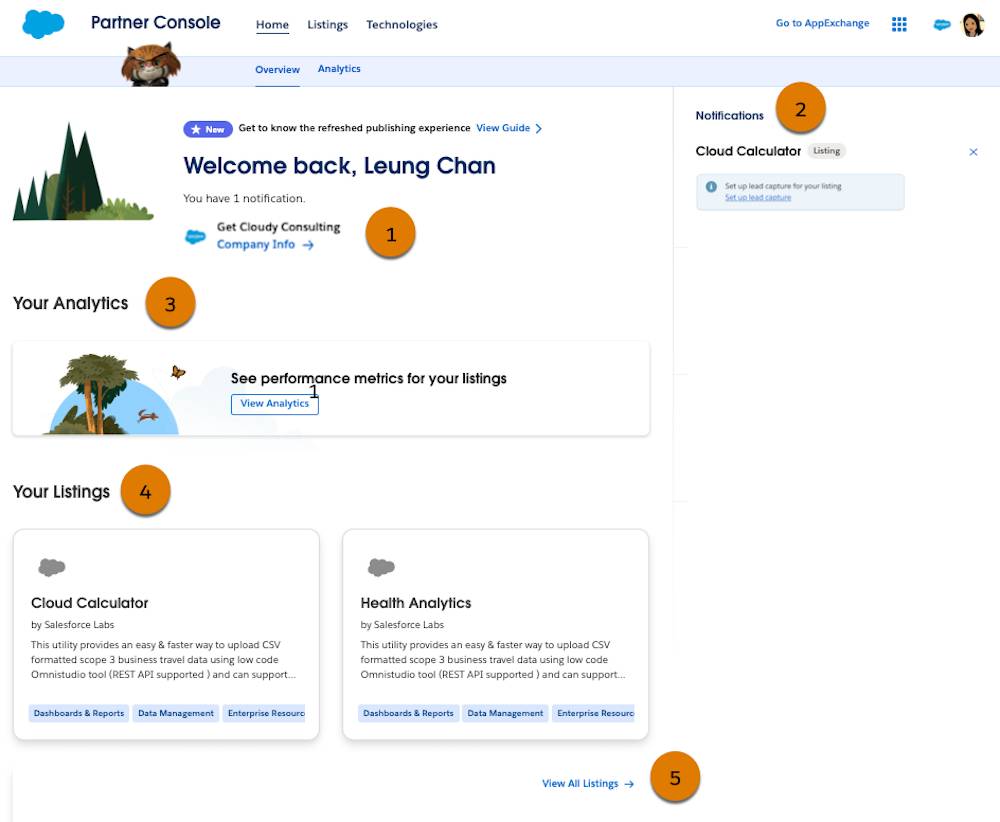
The Overview of the AgentExchange Partner Console home page is the default landing page. Leung sees Home, Listings, and Technologies tabs. She also sees an Analytics subtab, a welcome message, a Your Analytics section, two listings, and one notification.
Company Info
Any great AgentExchange listing starts with accurate company details, such as company name, description, and contact details. Logos help your company stand out, too. Leung uses Company Info(1) to review the Cloudy Health company info.
Notifications
Leung also sees one notification (2) on the Partner Console home page. Notification messages alert Leung and her Get Cloudy colleagues to things they must fix or review on their company’s in-progress listings. It looks like the Cloud Calculator listing needs to set up lead capture. Leung makes a note to talk to Chinua about this alert after she’s completed her new Cloudy Health listing.
Your Analytics
Your Analytics (3) provides you with your solution’s performance metrics, such as tile views, tile hovers, and lead events. Also accessible from the Analytics subtab, Leung can check on how many potential customers have viewed Cloudy Health listings and taken test drives. These data help Leung improve her listing and attract the right mix of customers.
Your Listings
On the home page, Your Listings (4) displays up to four in-progress or published listings. What you see is dependent on how your company or team is set up on AgentExchange as a publisher. Since Get Cloudy Consulting is set up as one AgentExchange publisher, all Get Cloudy employees see the same company info and listings in the Partner Console.
For example, Leung’s colleague and Salesforce admin, Chinua Toure, is working on listing two other Get Cloudy Consulting solutions, Health Analytics and Cloud Calculator. Leung learns more about new and in-progress listings in the next unit.
Your Listings is neat: Your published listing tiles show you a preview of exactly what your customers see on AgentExchange.
If you’ve more than four listings, click View All Listings (5) to view your whole library of listings.
So far Leung has access to great info. But wait, there’s more!
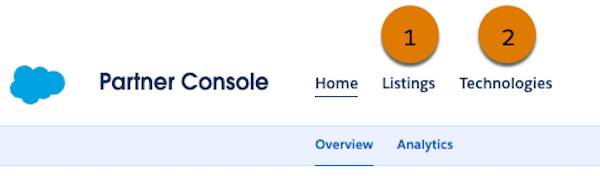
The Partner Console also contains two additional tabs with critical functionality: Listings and Technologies.
Listings
Listings (1) is where you access existing in-progress and published listings, and go to create new listings.
Technologies
Technologies (2) is an important component of the AgentExchange Partner Console. It houses everything dealing with:
AgentExchange
- Connecting technology to your solution, including your orgs, managed packages, and APIs
- Adding on items that differentiate your listing, like trial templates
- Registering your solution with your License Management Org (LMO) and updating the default license behavior.
- Starting and managing the AgentExchange security review of Salesforce Platform packages, Marketing Cloud Engagement API solutions, and Salesforce Platform API solutions. Other solution types don’t need security review. For more info on the security review process, read about the AgentExchange Security Review in the ISVforce Guide.
Update Your Company Info
Now that Leung has a complete overview of the Partner Console, she’s ready to get started on her listing. First, Leung wants her Cloudy Health listing—and Get Cloudy Consulting—to shine.

So on the Partner Console home page, Leung clicks Company Info.
Leung skims through the Get Cloudy company details that her colleague Chinua already created. The company description looks good, and her company contact details are correct. Way to go, Chinua!
But Leung notices that the company logo needs to be updated. AgentExchange company logos appear prominently on listings and are a good way for repeat customers to easily find and recognize Get Cloudy.
Leung happens to have the Get Cloudy logo on her desktop. She drags it into the Company Logo area. Leung scrolls to the bottom of Company Info, and clicks Save.
She sees two messages confirming her changes. Excellent! Leung clicks the X on the messages to dismiss them.
View Your In-Progress and Published Listings
Next, Leung clicks Listings, and she sees Get Cloudy’s two in-progress listings.
The New Listing+ button intrigues Leung. That’s where she goes to create listings. But first, she reviews the two in-progress listings.
-
Cloud Calculator. This listing is marked as Setup in Progress and it’s 20% complete. Leung remembers that there was a notification on Cloud Calculator. She makes a note to discuss this listing with her Salesforce admin, Chinua, who’s the Cloud Calculator point-of-contact.
-
Health Analytics. This listing is also marked as Setup In Progress but it’s further along at 80% complete.
Keep reading along with Leung in the next unit where she builds her new listing.
Resources