Examine an Integration Use Case
Learning Objectives
After completing this unit, you’ll be able to:
- Describe the challenge of keeping new or updated contacts in Salesforce in sync with customers in Square.
- Explain how to use MuleSoft Composer to sync new or updated contacts in Salesforce with customers in Square.
- Prepare to create a flow.
Before You Start
This module builds on MuleSoft Composer Installation and Configuration, so make sure to complete it before you continue. Recall from that module, you need to have the MuleSoft Composer User permission set if you want to build and run integration flows.
In this module, we assume you’re an authorized MuleSoft Composer user. If you’re not a MuleSoft Composer user, that’s OK. Read along to learn how they perform the steps. Don’t try to follow the steps in a Trailhead Playground, because MuleSoft Composer isn’t available in the Trailhead Playground.
Also, because you consume Square application programming interfaces (APIs) in your flow, we assume you’re familiar with key API concepts such as endpoints, Hypertext Transfer Protocol (HTTP) methods, and HTTP requests and responses. To learn about APIs, take API Basics. You should also be able to read JSON (JavaScript Object Notation) data, which is self-describing and easy to understand. But have no worries. True to the spirit of MuleSoft Composer, you learn how to consume Square APIs in your flow using clicks, not code.

In this unit, you step into the role of admin for Northern Trail Outfitters (NTO), an outdoor and recreational gear retailer. First, you examine an integration challenge faced by NTO, and then you learn about a MuleSoft Composer integration solution. Finally, you learn how to prepare to create your flow.
Integration Challenge
Let’s take a look at an integration challenge NTO is facing. For best customer relationship management, your sales team at NTO uses Sales Cloud to manage and maintain contacts. The team also uses Square to manage and maintain customers.
Currently, the sales team is performing these tasks manually. Every time there’s a new or updated contact, a sales rep first creates or updates the contact with relevant details in Sales Cloud. Next, the rep determines if a corresponding customer exists in Square.
- If the customer exists, the rep updates the customer with its associated contact details in Square. Then, the rep updates the contact with its associated customer ID in Sales Cloud.
- If the customer doesn’t exist, the rep creates a customer with relevant contact details, including its associated contact ID, in Square. Then, the rep updates the contact with its associated customer ID in Sales Cloud.
This process is time-consuming and highly error-prone, so the team wants to automate it.
Integration Solution
As a solution, you need to automate the integration between Sales Cloud and Square to achieve near real-time integration. To do this, you use MuleSoft Composer to create an integration flow that automatically syncs new or updated contacts in Salesforce with customers in Square. Specifically, the flow must perform the following tasks.
- Find any new or updated contact in Sales Cloud.
- Determine if a corresponding customer exists in Square.
- If the customer exists:
- Update the customer with relevant contact details, including its associated contact ID, in Square.
- Update the contact with its associated customer ID in Sales Cloud.
- If the customer doesn’t exist:
- Create a customer with relevant contact details, including its associated contact ID, in Square.
- Update the contact with its associated customer ID in Sales Cloud.
MuleSoft Composer provides the HTTP connector that enables you to connect to cloud applications using APIs. Square provides APIs that enable other systems to interact with its cloud applications. In this module, you build and run a flow to sync Salesforce contacts with Square customers, using the HTTP connector and Square APIs.
To implement the solution using MuleSoft Composer, you perform these flow creation tasks.
- Prepare to create a flow.
- Design and test a flow.
- Activate a flow.
- Monitor and troubleshoot a flow.
You learn how to perform these tasks in the rest of this module.
Prepare to Create a Flow
Ready to get started?
First, gather all required information about the systems and assets your flow is going to use. The following table describes the systems the flow needs to connect to and the information you need for those systems.
System |
Required Information |
|---|---|
NTO’s Sales Cloud |
|
Square |
|
As a best practice, use a test environment for these systems and data when you design and test your flows. After you complete testing, run the flows using your production systems and data.
Next, you learn about the prerequisites for your Salesforce and Square environments.
Prerequisites for the Salesforce Environment
First, we assume you have a sandbox org and a production org to build and run flows that sync with Salesforce.
Note: If you don’t have a sandbox org to design and test your flows, you can use a developer org.
Follow these steps to sign up for a free developer org.
- Go to https://developer.salesforce.com/signup.
- Enter your contact information.
- Enter a unique username.
- Click Sign me up, and wait for your welcome email.
- In the welcome email, click the link to set your password.
Next, when you create a connection to Salesforce using MuleSoft Composer, you’re prompted to grant MuleSoft Composer permissions. Ensure your Salesforce accounts for both your sandbox and production orgs are ready to grant MuleSoft Composer the following permissions.
- Access the identity URL service.
- Manage user data via APIs.
- Perform requests at any time.
Then, to capture a Square customer ID in a Salesforce contact, ensure a text custom field called Square Customer ID is created for the Contact object in the NTO org. Here’s an example of Square Customer ID for Contact in the NTO org.
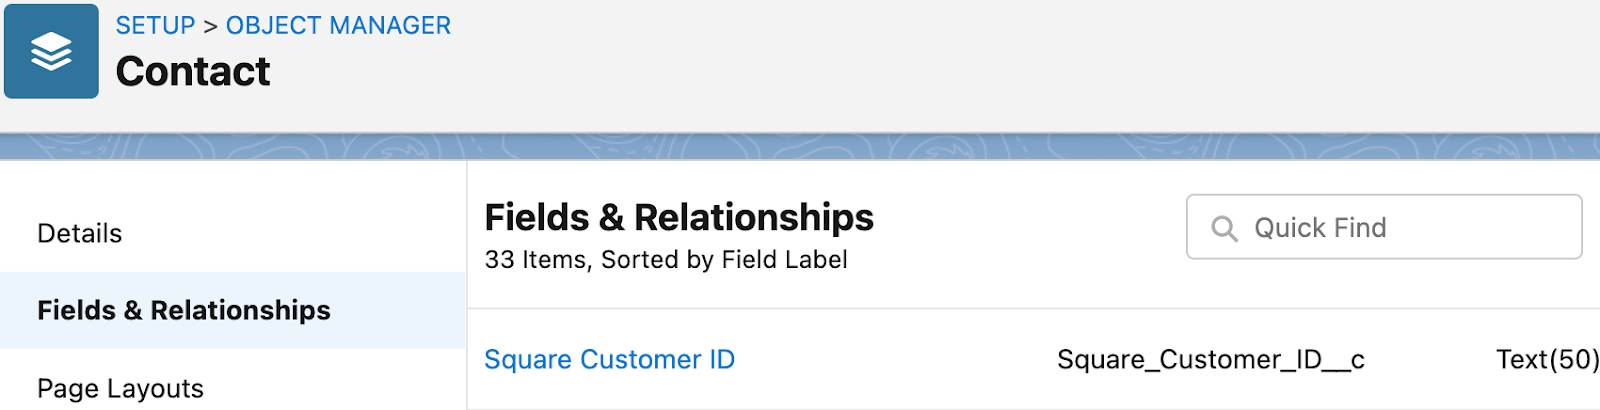
To learn how to create custom fields, see Customize a Salesforce Object.
Next, it’s critical that you use two different users for each NTO org, which is the source org of the integration.
- One user is used exclusively by the NTO org connection to perform the associated create or update steps in your flow. Let’s call this the Composer user from now on.
- The other user is an end user who creates or updates data in the NTO org at runtime.
With this separation of duties, you perform the first of two tasks to avoid the problem of infinite looping when running your flow. This problem occurs when you use an NTO user to perform the update steps on the NTO org in your flow, and then use that same user to update data in the NTO org at runtime.
To learn how to create users in Salesforce, see User Management.
The second task to avoid the problem of infinite looping is to ensure in your flow that the user performing the update in the NTO org at runtime isn’t the Composer user. To do this, identify the Salesforce ID of the Composer user to configure the relevant steps in your flow. Follow these steps.
- Log in to your NTO org using the username and password of the Composer user.
- From the App Launcher, enter
Peopleand select People.
- Click the name of the Composer user.
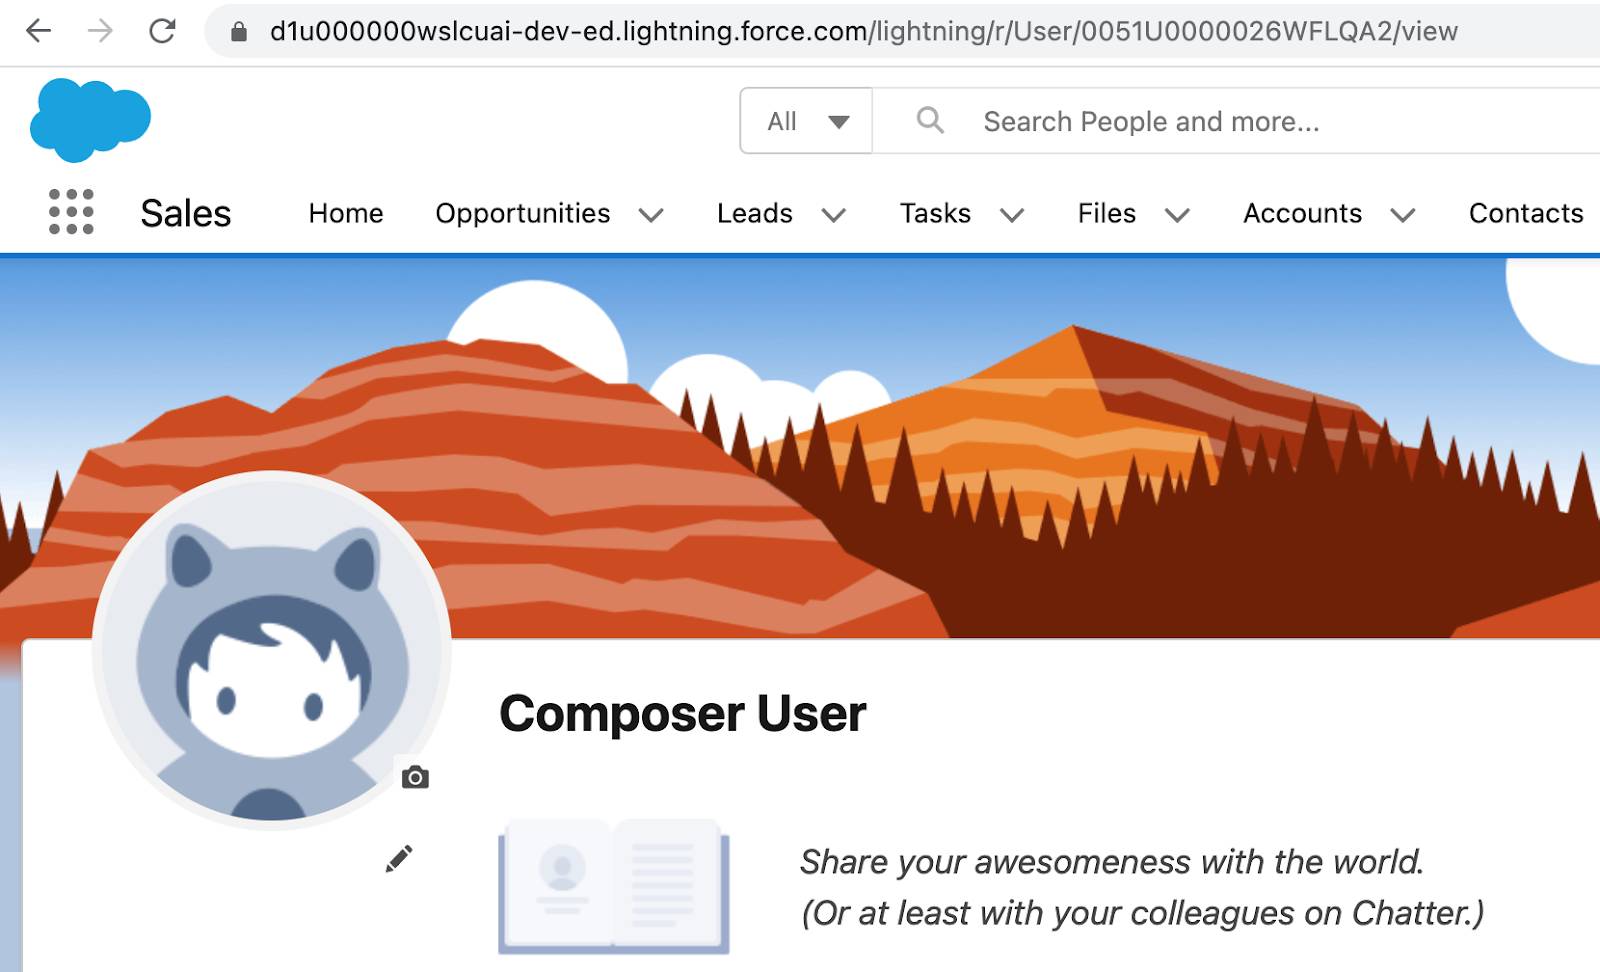
- Look at the URL. The Salesforce ID of the user appears near the end of the URL. In this example, it’s 0051U0000026WFLQA2. You use this Salesforce ID later in your flow.
Prerequisites for the Square Environment
First, to access and use Square APIs in your flow, sign up for a free Square Developer account using the fast track method. Follow these steps.
- Go to Square Developer Sign-up.
- Enter your email address, password, and country.
- Select the I agree to Square’s Terms checkbox, and then click Continue. Your account is created and the Developer Dashboard opens.
- On the Applications page, click the + (Plus) button, enter
Composer appas the application name, and then click Save. You now have a Square account that you can use to explore and test Square APIs.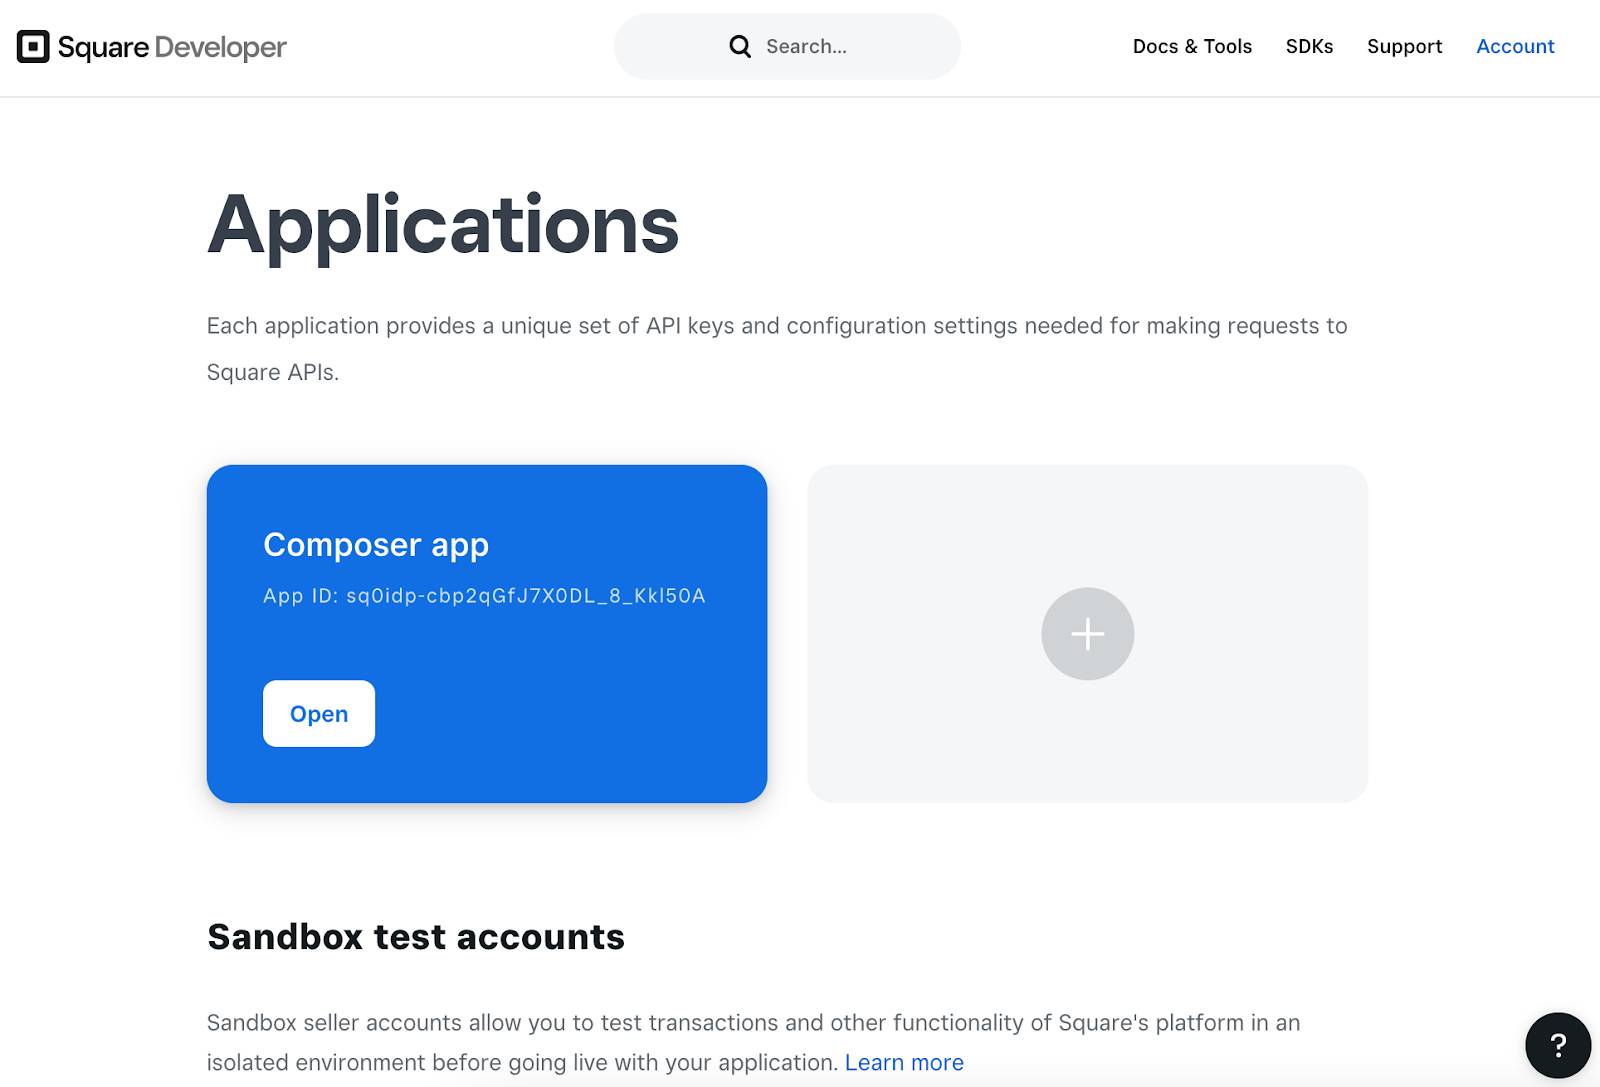
Next, because you use the bearer token authentication method to create a connection to the Square sandbox in your flow, obtain the access token and the base URL from your Composer app.
Follow these steps.
- Click Open on your Composer app. The Credentials page opens with the Sandbox highlighted.
- Scroll down to the Sandbox Access token field and click Show.
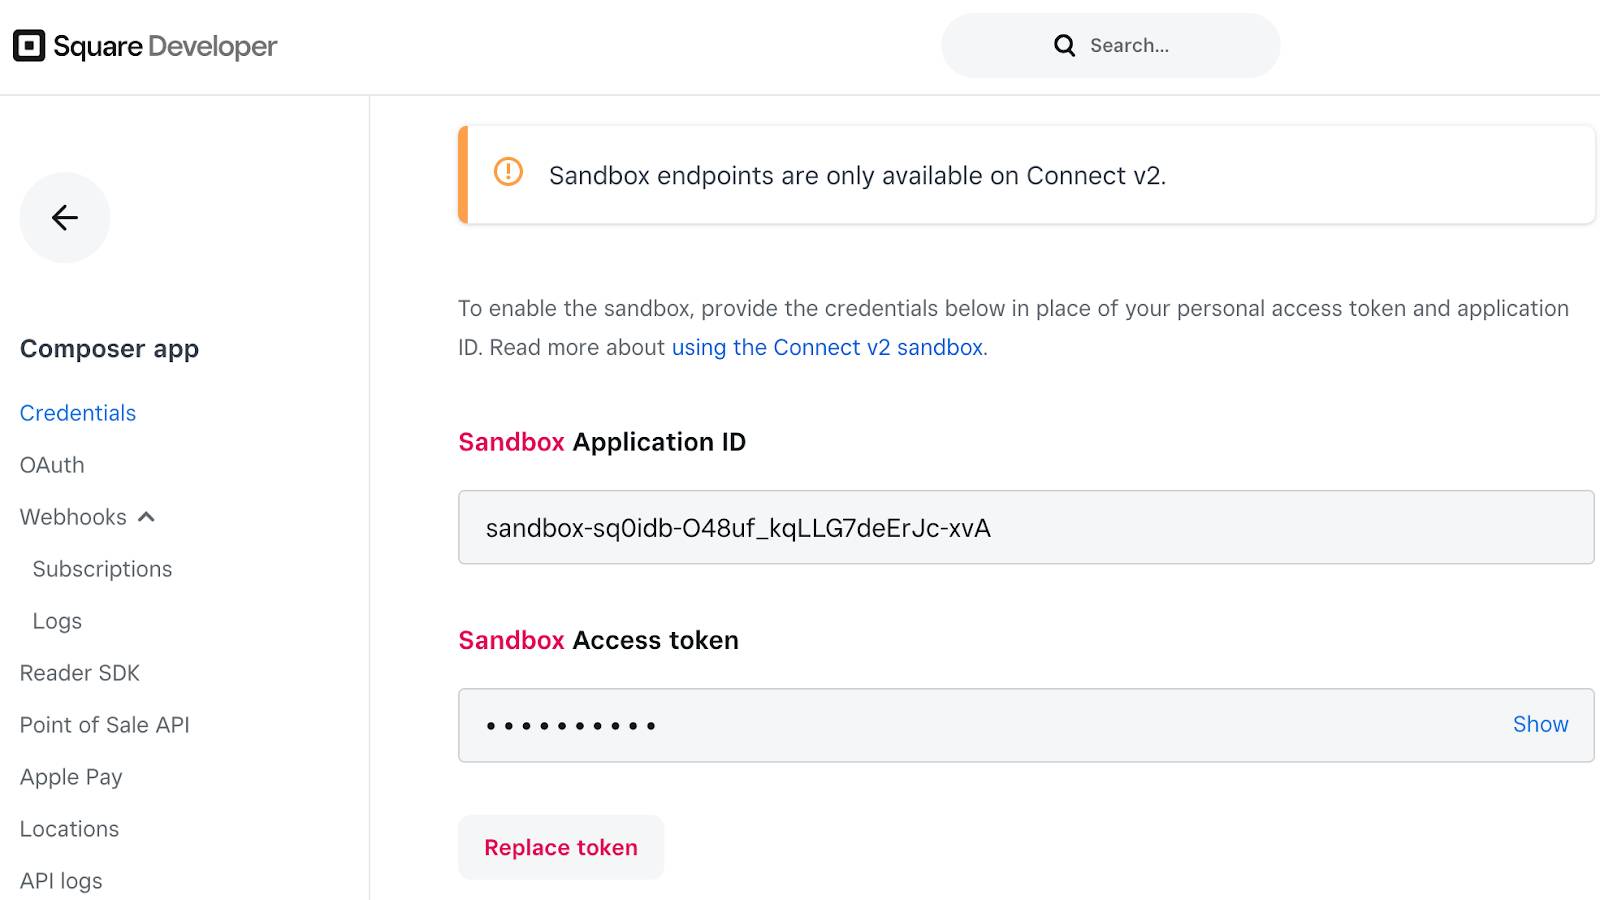
- Copy and paste the access token to a text file of your choice.
- Back on the Credentials page, click using the Connect v2 sandbox. The Square Sandbox page opens in a new tab.
- In the Overview section, copy and paste the base URL for calling Sandbox endpoints into the same text file. It’s
https://connect.squareupsandbox.com.
Finally, on the Square Sandbox page, click Docs & Tools | API Explorer. The API Explorer tool opens.
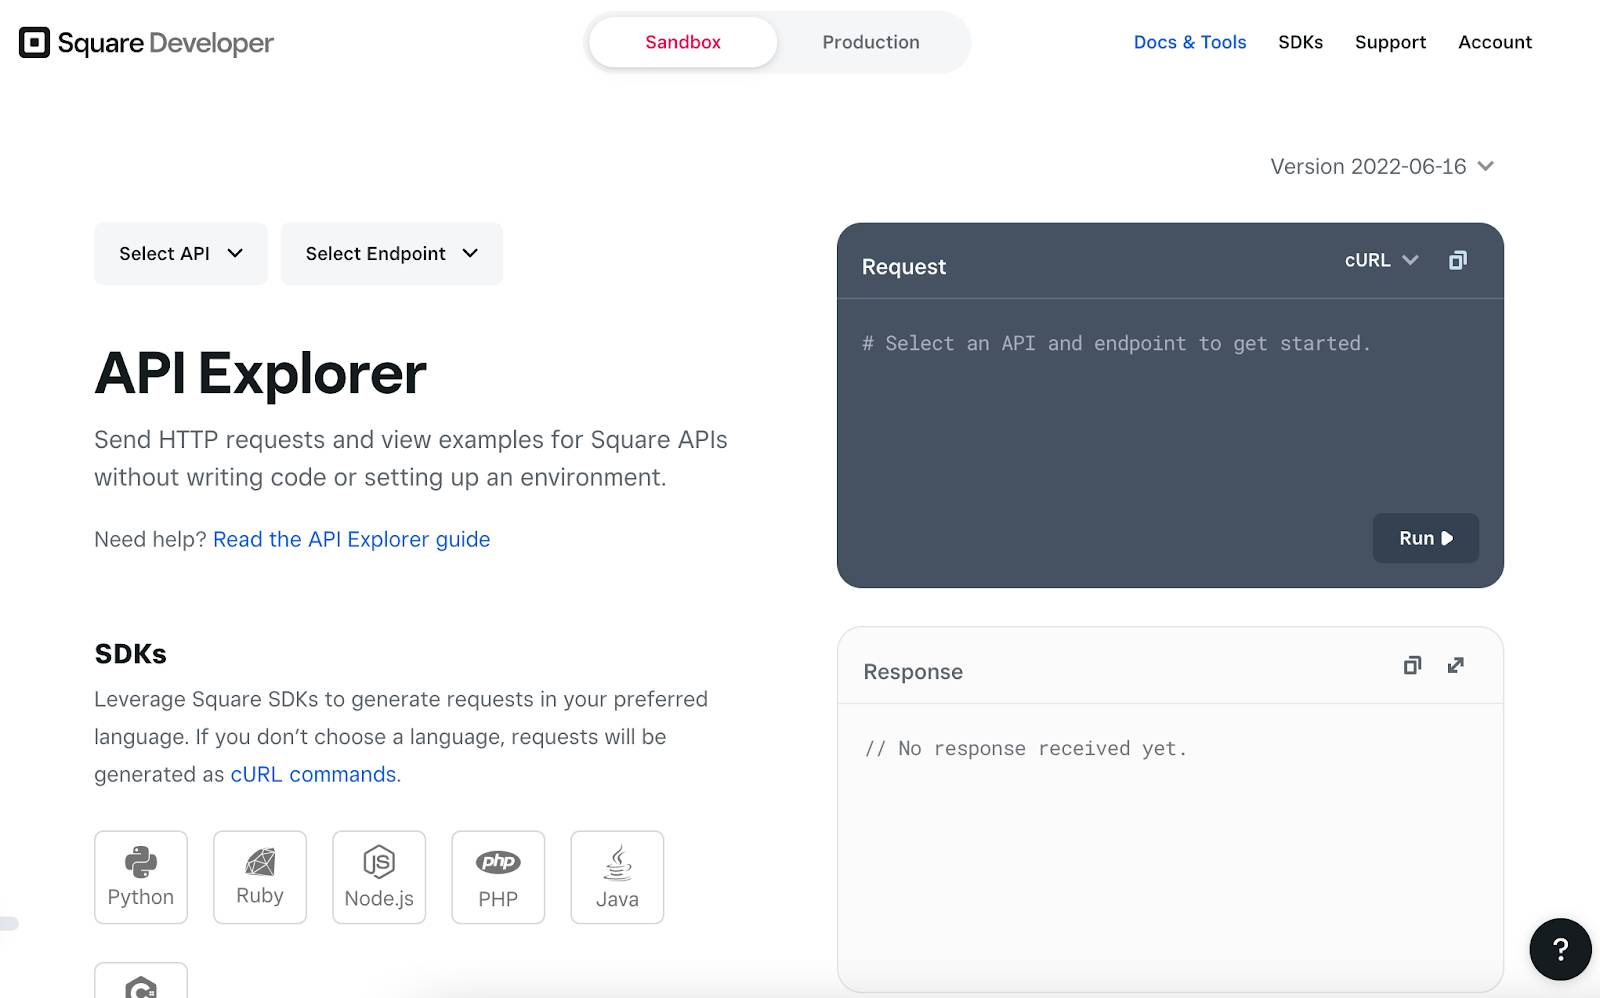
Try out various HTTP methods for the Customers API using the API Explorer tool. Pay close attention to the Request and Response sections, which display data in JSON format. You use similar request and response examples in your flow. For more information on how to use the API Explorer tool, see the API Explorer guide.
You’ve taken the first steps to prepare to create a flow with MuleSoft Composer. In the next unit, you learn how to design a flow.
Resources