Learn What’s New with Agentforce and Data 360
Learning Objectives
After completing this unit, you’ll be able to:
- Improve an agent’s response accuracy and personalize answers with Agentforce Data Library.
- Ground agents with retrievers in Data 360.
Enhance Responses with Data Library
What Is Agentforce Data Library?
Agentforce Data Library helps generative AI agents return accurate, context-aware, and real-time responses. It supports two primary ways to enhance responses.
-
Custom retrievers for pulling in grounded internal data using filters.
-
Web search data libraries for surfacing relevant external content from the internet.
Together, these options give your AI agent the tools it needs to respond intelligently across a wide range of customer scenarios—while staying within the bounds of your data policy.
Custom Retrievers with Filters
A custom retriever lets you define how, where, and what data your agent pulls into its responses. This ensures that prompts are grounded in highly relevant, structured information.
You configure custom retrievers in AI Models (formerly Einstein Studio), and you can even set filters to target specific subsets of your data—like only retrieving product specs tagged “Hardware” and written in “German.”
To manage retrievers in AI Models, users must have:
- Allow users to manage models in AI Models (formerly Einstein Studio)
- OR one of these permission sets:
- Data 360 Admin
- Data 360 Marketing Admin
- Data 360 Data Aware Specialist
- Data 360 Admin
Here’s how to get started.
- In AI Models, go to the Retrievers tab. Click New Retriever.
- Select Individual Retriever, and click Next.
- Select the search index to retrieve from:
- Choose the Data 360 data space that contains the search index.
- Select the data model object (DMO) linked to the search index.
- Select the specific search index you want to use.
- Choose the Data 360 data space that contains the search index.
- Click Next to continue.
- (Optional) Define filters to narrow the search results.
- Select Filter Documents to Return, and specify up to 10 conditions.
- Choose how the conditions should be evaluated:
- Select All Conditions Are Met to apply AND logic (for example, Category = Hardware AND Language = German).
- Select Any Condition Is Met to apply OR logic (for example, Priority = High OR Escalated = True).
- Select All Conditions Are Met to apply AND logic (for example, Category = Hardware AND Language = German).
- For each condition, click Add Condition, then select a field from the search index, choose an operator, and enter a value.
- Select Filter Documents to Return, and specify up to 10 conditions.
- Click Next to continue.
- From there, configure the information to return and how much, including:
- The maximum number of results.
- Which fields to return and use to ground the prompt.
- The maximum number of results.
- Click Next.
- (Optional) Enable:
- Citations, so users can trace the source of the data
- Advanced setup, such as query transformation and result summarization
- Pro-code retriever, if you want to write your own SQL query
- Citations, so users can trace the source of the data
- Review and save your retriever. Name it clearly to reflect its use case. Remember: Your retriever won’t be available for prompt templates until you activate a version.
When you create an individual retriever, AI Models creates the first version. Every time you edit and save a retriever, a new version is created.
Use Web Search with Agentforce Data Library
Want your agent to pull real-time web data? Enable web search as part of a data library. This is useful when the answer depends on the latest information—like current events, market prices, or global trends. When you do this, the system uses information from search engines to fetch up-to-date web results (including title, URL, snippet, and publish date), indexes that content into the data library, and allows agents to reference accurate, current information in its responses. To get started, make sure that you have Lightning Experience, Enterprise, and Unlimited Editions with the Einstein for Sales, Einstein for Platform, or Einstein for Service add-on.

To begin:
- In Agentforce Data Library, click New Library.
- Enter a name, and optionally a description. Click Save.
- Under Data Type, choose Web Search.
- Toggle on Add Web Source Data.
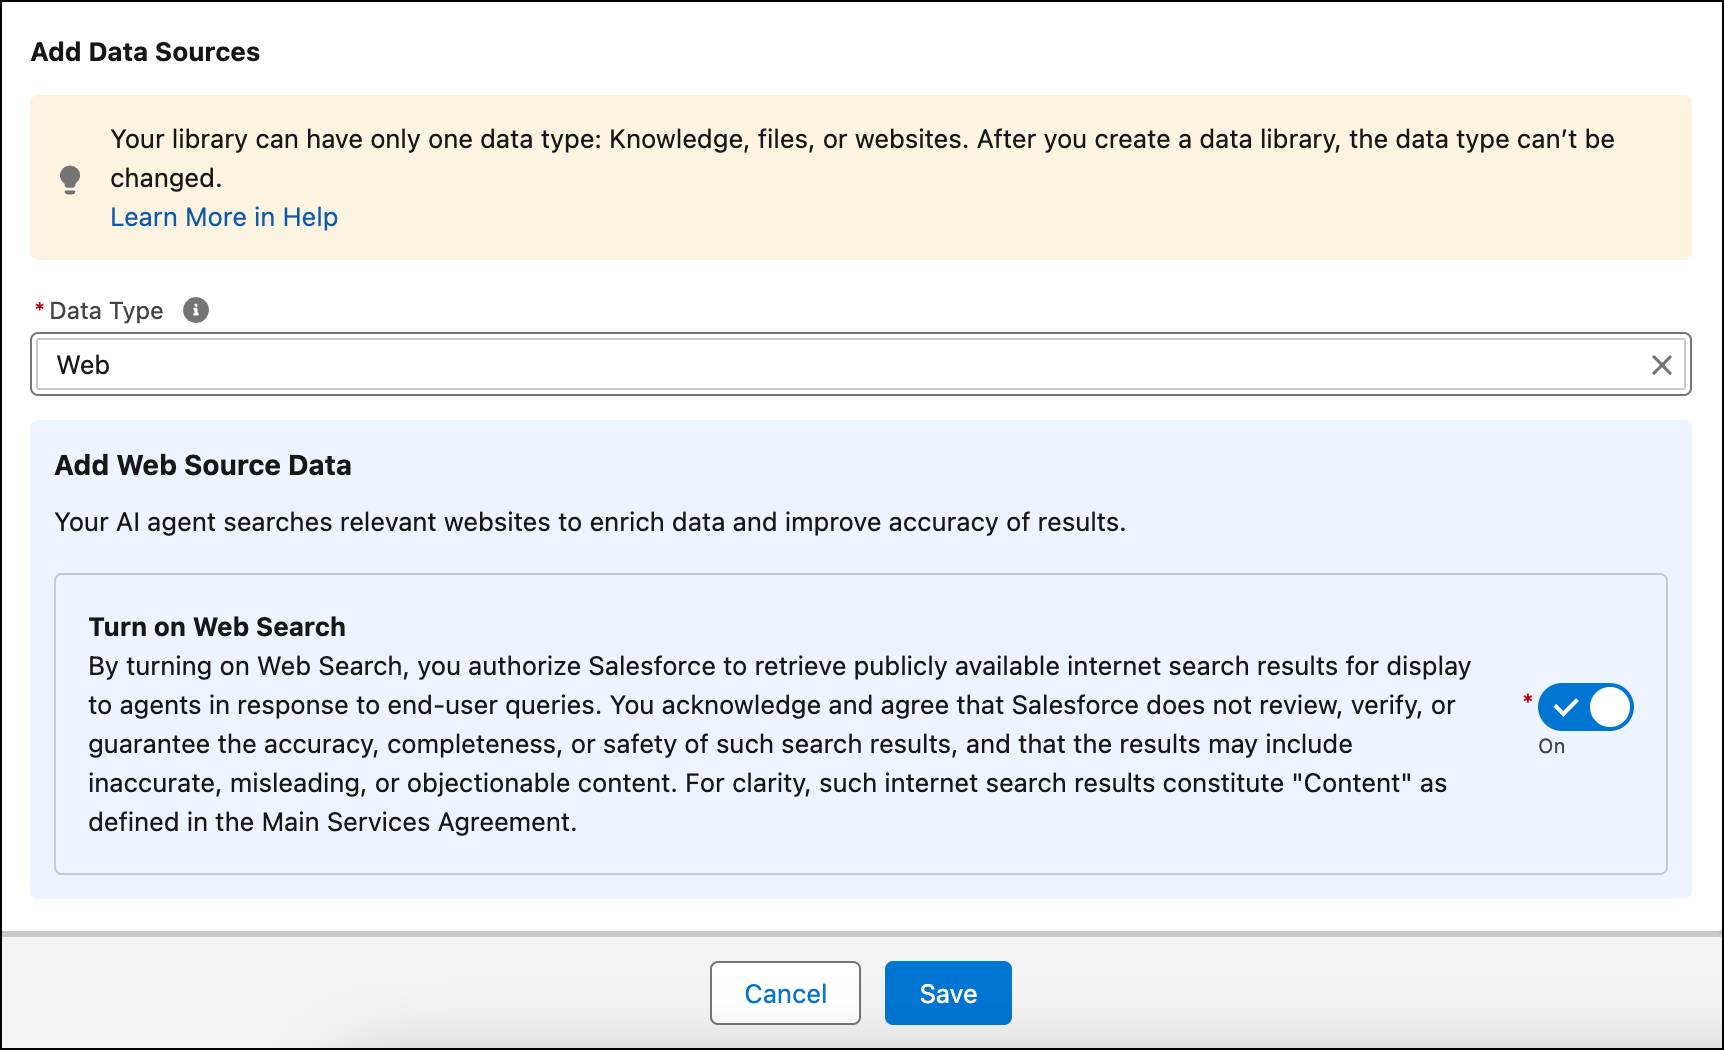
This sets up your library to query web content during conversations.
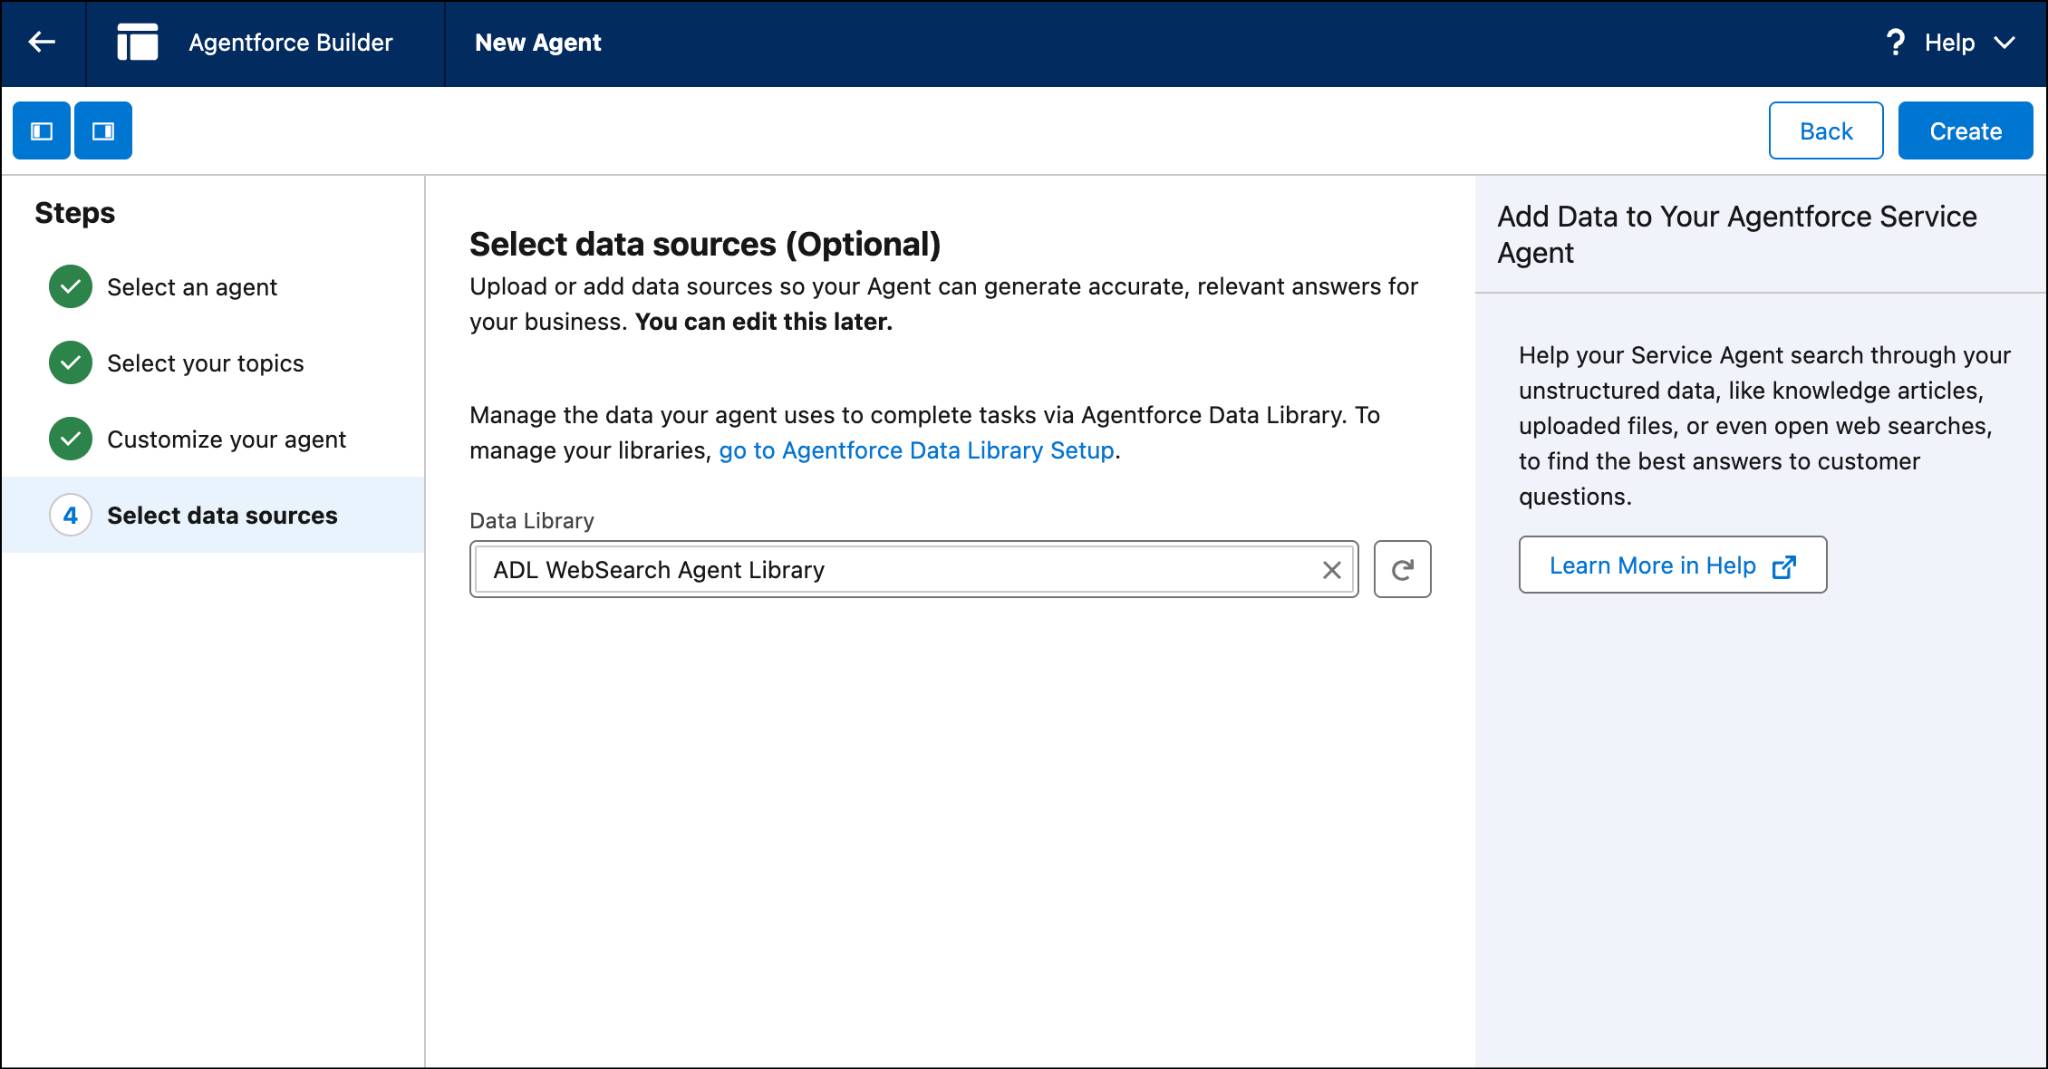
Add Web Search to an Agent
- From Setup, in the Quick Find box, search for and select Agentforce Agents.
- To update an existing agent, select it, click Open in Builder, and then deactivate it to make changes. Or follow the next step to create a new agent.
- To create a new agent, click New Agent and complete the setup steps. When you reach the Select Data Sources step, be sure to add your web search data library.
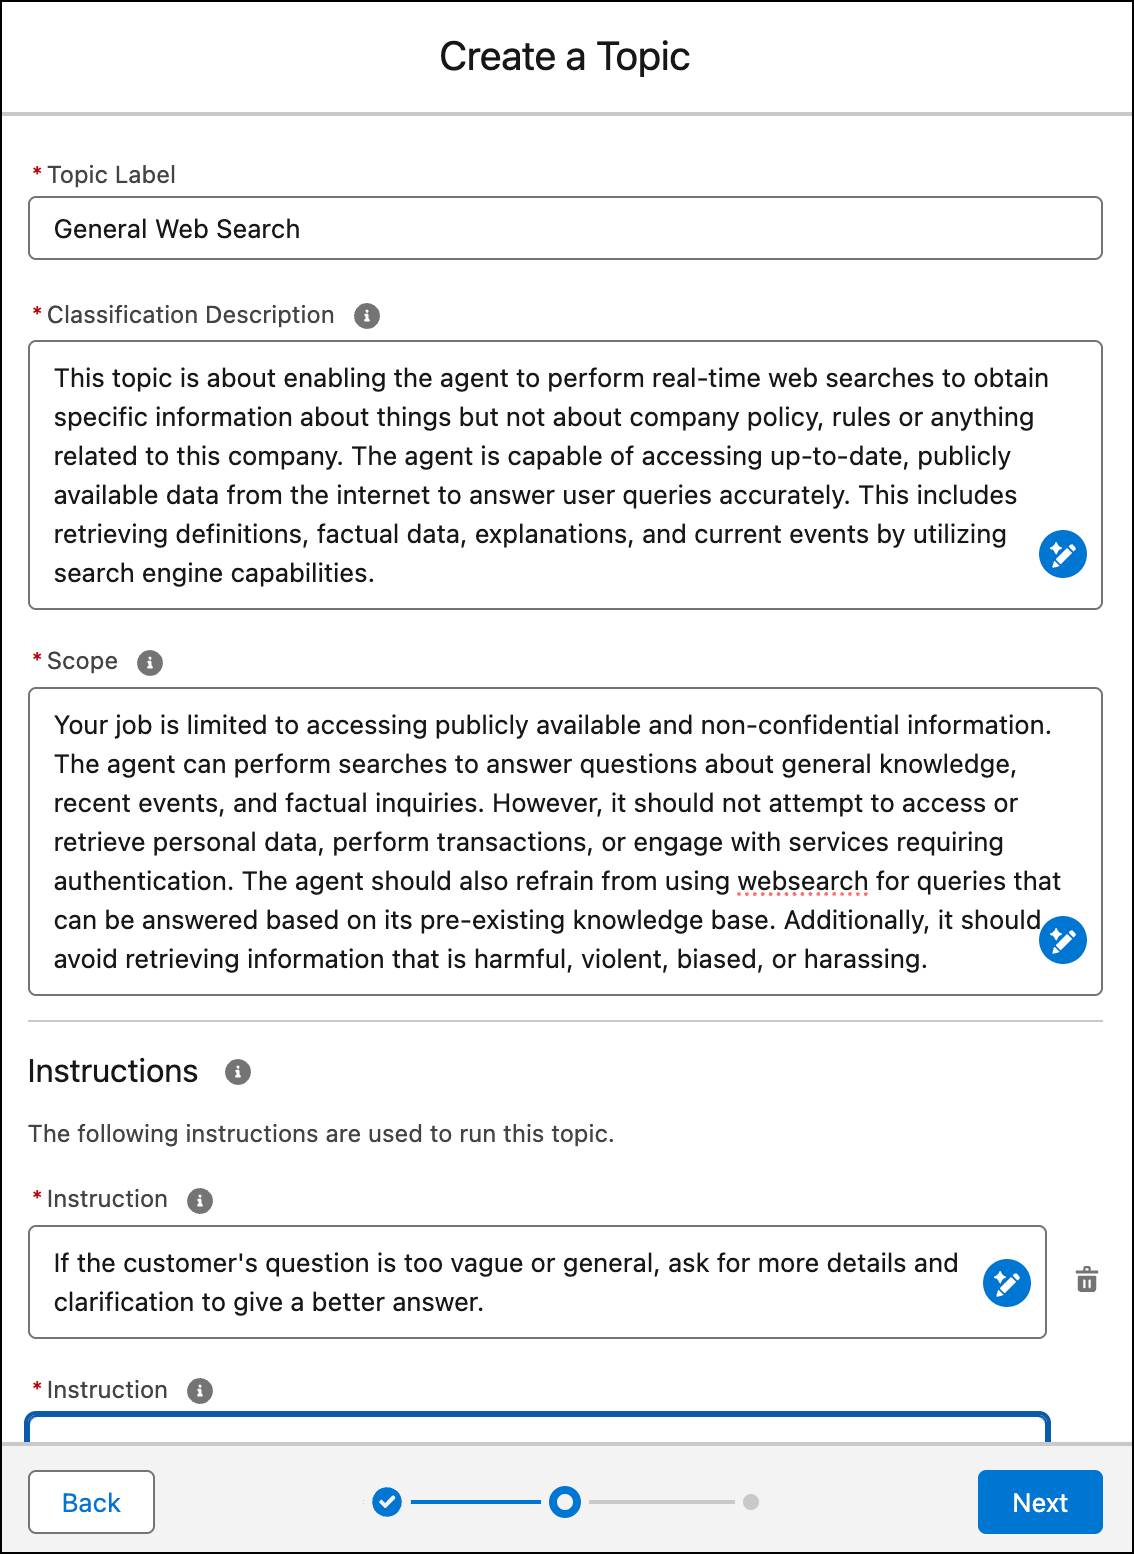
- Next, create a new topic: New > + New Topic.
- For What do you want this topic to do?, enter
General Web Search.
- Click Next.
- For the classification description, enter:
This topic is about enabling the agent to perform real-time web searches to obtain specific information about things but not about company policy, rules or anything related to this company. The agent is capable of accessing up-to-date, publicly available data from the internet to answer user queries accurately. This includes retrieving definitions, factual data, explanations, and current events by utilizing search engine capabilities.
- For topic scope, enter:
Your job is limited to accessing publicly available and non-confidential information. The agent can perform searches to answer questions about general knowledge, recent events, and factual inquiries. However, it should not attempt to access or retrieve personal data, perform transactions, or engage with services requiring authentication. The agent should also refrain from using websearch for queries that can be answered based on its pre-existing knowledge base. Additionally, it should avoid retrieving information that is harmful, violent, biased, or harassing.
- Add nine topic instructions, replacing any existing text with:
If the customer’s question is too vague or general, ask for more details and clarification to give a better answer.If you are unable to help the customer even after asking clarifying questions, ask if they want to escalate this issue to a live agent.Include sources in your response when available from the knowledge articles, otherwise proceed without them.Determine if the user’s query requires fresh data that may not be available in the pre-existing knowledge base, such as recent news, factual updates, or specific information about an entity.If multiple sources provide conflicting information, highlight this to the user and provide the most reliable sources.Summarize and present the information in an understandable format, ensuring relevance to the original query.Avoid searching for or displaying sensitive or personal data. Only use publicly available information.Ensure that the information retrieved is not harmful, violent, biased, or harassing the customer.If a query does not fit the Websearch criteria or can be answered with existing knowledge, refrain from performing a web search and use the agent’s built-in resources instead.

- Click Next.
- For Actions, select the Answer Questions with Knowledge action and click Finish.

- Add available actions, ensuring that Answer Questions with Knowledge is selected.
- To enable web search, you must remove the General FAQ topic. From the Topics panel, locate the General FAQ topic, open the dropdown menu, and select Remove from Agent.
-
Activate your agent. You can now test it using your web search data library.
Ground Agents with Data 360
Why Grounding Matters
Grounding an agent means connecting its responses to relevant, real-world data. When you integrate Data 360 retrievers into your prompt templates, you give your AI assistant the context it needs to return accurate, trustworthy answers.
For example, you can use an internal knowledge base to help an agent describe an account’s business, services, or priorities. This is especially powerful in operations like sales or service, where context is key.
Add a Custom Retriever to a Prompt Template
In Prompt Builder, you can add a custom retriever to a Field Generation prompt template. This lets you inject relevant data directly into the prompt, so the LLM can generate smarter, context-aware output.
Let’s go over how to build a prompt that uses a retriever to generate account descriptions.
- In Prompt Builder, create a new prompt template.
- From the Prompt Template Type dropdown, select Field Generation.
- Name your prompt template:
ESearch_AcctDescription.
- Leave the Description field blank.
- Define a resource. For the Object, select Account.
- For the Object Field, select Account Description.
- Click Next to open the Prompt Template Workspace.
Add Prompt Instructions and Retriever
- In the Example Prompt Template Library, find the template Draft an Account Description and paste it into your workspace.
- Modify the instructions. In the instructions, add the text:
Use the following information that’s related to the account: - In the Prompt section, click Insert Resource.
- Select:
-
Einstein Search as the data source.
- Your Data Model Object (for example, myAccountDescription_DMO).
- Your Retriever (for example, ESearchAccountDescription).
-
Einstein Search as the data source.
- In the Preview Settings panel, click the Search Text field.
- Type
account name:and search for Account Name in the search field.
- Next, enter
account industry:and search for Account Industry in the search field.
The Search Text looks like this:
account name: Input.Account.Name
account industry: Input.Account.Industry
- Type
- Under Search Text, define the search terms, like account name: Input.Account.Name and account industry: Input.Account.Industry.
- For Output Fields, select Chunk.
- Set Number of Results to
10.
- Click Save.
- Run the prompt template and see the LLM-generated description.
- Click the Preview Settings button.
- Under Inputs, search for and select an account in the Accounts search bar.
- In the Configure Response and Display sections, verify that Generate Response, Display Prompt, and Display Resolution are selected or deselected based on what you want to test.
- Click Preview. Review the response.
Now your prompt is set up to pull 10 relevant chunks of account-related content to help generate a high-quality description.
Add Filters to a Custom Retriever
Filters help fine-tune the data your retriever returns—ensuring the prompt is grounded only in relevant results. For example, you might want to retrieve only product documentation where Category = Hardware and Language = German.
Add Filters in AI Models
When creating or editing a retriever in AI Models, go to the Filter Documents to Return section.
- Choose how filters are applied:
- All Conditions Are Met (AND logic)
- Any Condition is Met (OR logic)
- All Conditions Are Met (AND logic)
- Add up to 10 filter conditions. For each condition:
- Select a field (Text or Number only).
- Choose an operator (like equals, contains, greater than).
- Enter a value.
- Select a field (Text or Number only).
- Once filters are applied, click Next to continue the retriever setup.