Get Ready to Create an Apex Action
Learning Objectives
After completing this unit, you’ll be able to:
- Get your org ready to build Actions.
- Verify that your Apex is ready for Actions.
Forecast: Sunny Skies Ahead
As anyone who has been on a vacation knows, keeping an eye on the weather is essential to making the most of your travel plans. And at Coral Cloud Resorts, guests can expect it to be sunny and warm… until it’s not. To make sure guests are making the most of their stay–regardless of the weather–the Coral Cloud team wants to add the ability to gather weather information to its AI agents. To do this, they need to create an action that pulls in weather data from an Apex class using an external API.
Sign Up for a Developer Edition Org with Agentforce
To complete this module, you need a special Developer Edition org that contains Agentforce and our sample data. Sign up for this free, customized Developer Edition org with Agentforce by clicking the link and connect it to Trailhead now so you can complete the challenges in this module. Note that this org is designed to work with the challenges in this badge, and may not work for other badges. Always check that you’re using the Trailhead Playground or special Developer Edition org that we recommend.
- Sign up for a free Developer Edition org with Agentforce.
- Fill out the form:
- For Email, enter an active email address.
- For Username, enter a username that looks like an email address and is unique, but it doesn't need to be a valid email account (for example, yourname@example.com).
- For Email, enter an active email address.
- After you fill out the form, click Sign me up. A confirmation message appears.
- When you receive the activation email (this might take a few minutes), open it and click Verify Account.
- Complete your registration by setting your password and challenge question. Tip: Save your username, password, and login URL in a secure place—such as a password manager—for easy access later.
- You are logged in to your Developer Edition.
Now connect your new Developer Edition org to Trailhead.
- Make sure you’re logged in to your Trailhead account.
- In the Challenge section at the bottom of this page, click the org name and then click Connect Org.
- On the login screen, enter the username and password for the Developer Edition you just set up.
- On the Allow Access? screen, click Allow.
- On the Want to connect this org for hands-on challenges? screen, click Yes! Save it. You are redirected back to the challenge page and ready to use your new Developer Edition to earn this badge.
Get the Org Ready for Agents
Before you can start customizing the agents, enable all the required org features.
- Click Setup
 and select Setup.
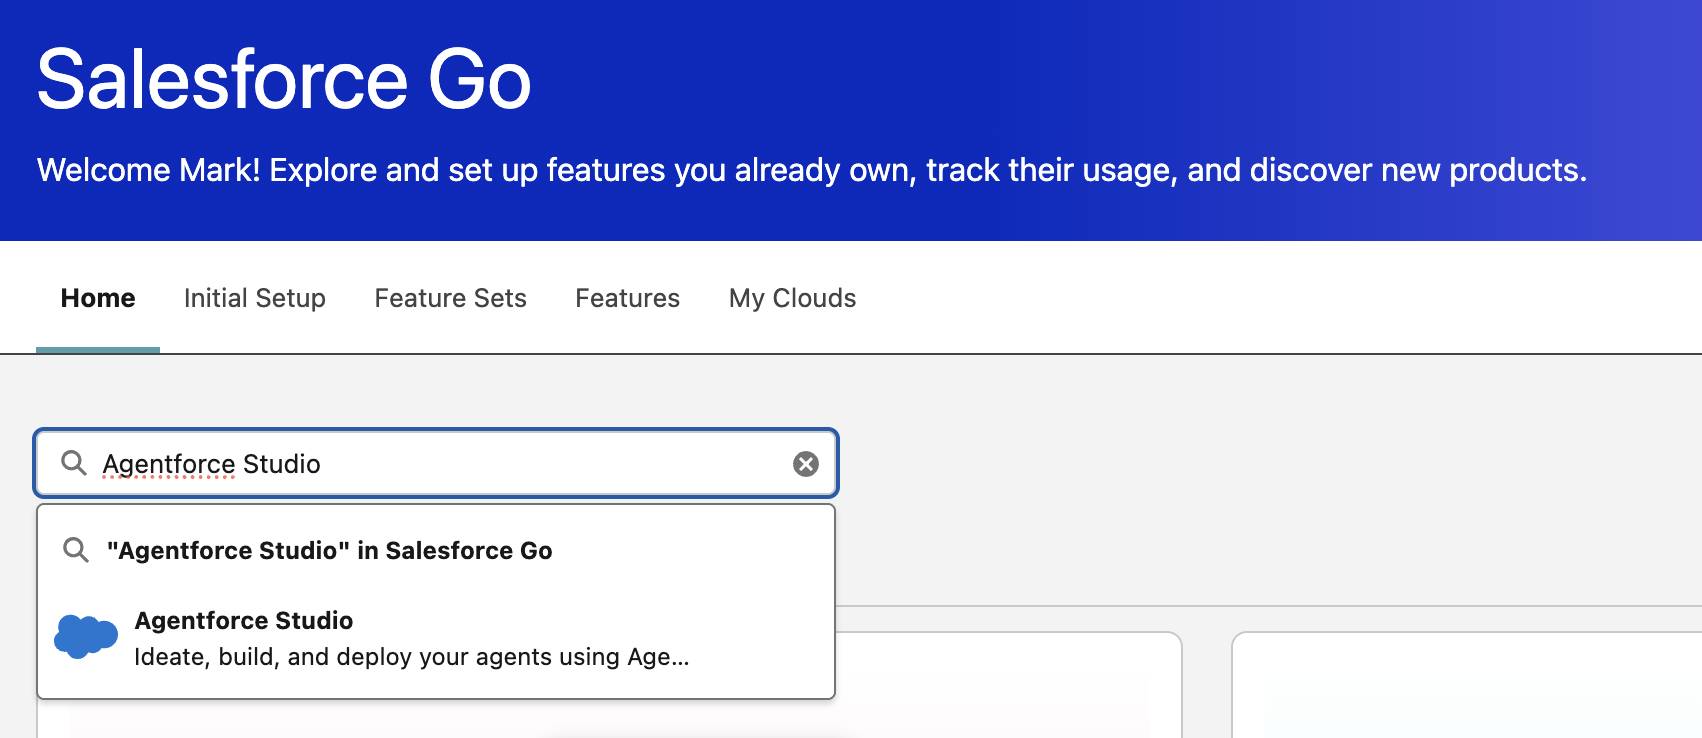
- In the Quick Find box, search for and select Salesforce Go.
- In the Search features... textbox, enter and select Agentforce Studio.
- Click Get Started.
- Click Turn On.
- Click Confirm.
Build Agent Actions with Functionality You Already Have
Alright, alright, alright! You’re almost ready to build out a custom action for your agent. One of the great reasons for building AI agents with Salesforce is that you can use the functionality that is already built into your org. In this case, you want to add the weather information for the Coral Cloud Resort to an AI agent. Coral Cloud already has a WeatherService Apex class for getting the weather for the Coral Cloud Resort location from an external API. Let’s see how it applies to an action.
public with sharing class WeatherService {
    /**
     * Gets the weather at Coral Cloud Resorts for the provided date
     */
    public static Weather getResortWeather(Datetime dateToCheck) {
        Integer currentYear = Date.today().year();
        Integer yearDelta = currentYear - dateToCheck.year();
        dateToCheck = dateToCheck.addYears(yearDelta);
        String isoDate = dateToCheck.format('yyyy-MM-dd');
        String dateString = dateToCheck.format('MMMM d');
        // Prepare API request
        HttpRequest req = new HttpRequest();
        req.setEndpoint(
            'callout:Weather_Endpoint/weather?lat=37.789782764570425&lon=-122.39723702244089&date=' +
            isoDate
        );
        req.setMethod('GET');
        // Make callout
        Http http = new Http();
        HttpResponse res = http.send(req);
        if (res.getStatusCode() != 200) {
            throw new CalloutException('Bad response: ' + res);
        }
        // The response contains a list of temperatures for different times of the day
        // We parse the response and find the min and max temperatures
        String body = res.getBody();
        WeatherApiResponse weatherResponse = (WeatherApiResponse) JSON.deserialize(
            body,
            WeatherAPIResponse.class
        );
        List<Decimal> temperatures = new List<Decimal>();
        for (TemperatureWrapper item : weatherResponse.weather) {
            if (item.temperature != null) {
                temperatures.add(item.temperature);
            }
        }
        temperatures.sort();
        // Prepare temperatures and description
        Decimal minTempC = temperatures[0];
        Decimal maxTempC = temperatures[temperatures.size() - 1];
        Decimal minTempF = toFahrenheit(minTempC);
        Decimal maxTempF = toFahrenheit(maxTempC);
        String description =
            'On ' +
            dateString +
            ', temperature should be between ' +
            minTempC +
            '°C (' +
            minTempF +
            '°F) and ' +
            maxTempC +
            '°C (' +
            maxTempF +
            '°F) at Coral Cloud Resorts.';
        // Return weather info
        Weather weather = new Weather();
        weather.minTemperatureC = minTempC;
        weather.minTemperatureF = minTempF;
        weather.maxTemperatureC = maxTempC;
        weather.maxTemperatureF = maxTempF;
        weather.description = description;
        return weather;
    }
    private static Decimal toFahrenheit(Decimal celsius) {
        return (celsius * 9 / 5 + 32).setScale(1);
    }
    private class WeatherApiResponse {
        public List<TemperatureWrapper> weather;
    }
    private class TemperatureWrapper {
        public Decimal temperature;
    }
    public class Weather {
        public Decimal minTemperatureC;
        public Decimal minTemperatureF;
        public Decimal maxTemperatureC;
        public Decimal maxTemperatureF;
        public String description;
    }
}
This is a straightforward Apex class that makes an HTTP request to a weather service to get the weather for the day entered. The Apex class isn’t available for Agentforce Builder to use, though. You could update this class to make it an invocable method, but it’s best practice to create a new Apex class that’s set to InvocableMethod that calls the original WeatherService. The InvocableMethod annotation lets you call custom Apex code from declarative tools like Flows, external applications via REST, and Agentforce.
The good news is that the Coral Cloud team built an Apex class that is already making calls to WeatherService. Let’s take a look at the class and see how it implements the WeatherService.
public with sharing class CheckWeather {
    @InvocableMethod(
        label='Check Weather'
        description='Check weather at Coral Cloud Resorts at a specific date'
    )
    public static List<WeatherResponse> getWeather(
        List<WeatherRequest> requests
    ) {
        // Retrieve the date for which we want to check the weather
        Datetime dateToCheck = (Datetime) requests[0].dateToCheck;
        WeatherService.Weather weather = WeatherService.getResortWeather(
            dateToCheck
        );
        // Create the response for Copilot
        WeatherResponse response = new WeatherResponse();
        response.minTemperature = weather.minTemperatureC;
        response.maxTemperature = weather.maxTemperatureC;
        response.temperatureDescription =
            'Temperatures will be between ' +
            weather.minTemperatureC +
            '°C (' +
            weather.minTemperatureF +
            '°F) and ' +
            weather.maxTemperatureC +
            '°C (' +
            weather.maxTemperatureF +
            '°F) at Coral Cloud.';
        return new List<WeatherResponse>{ response };
    }
    public class WeatherRequest {
        @InvocableVariable(
            required=true
            description='Date for which we want to check the temperature. The variable needs to be an Apex Date type with format yyyy-MM-dd.'
        )
        public Date dateToCheck;
    }
    public class WeatherResponse {
        @InvocableVariable(
            description='Minimum temperature in Celsius at Coral Cloud Resorts location for the provided date'
        )
        public Decimal minTemperature;
        @InvocableVariable(
            description='Maximum temperature in Celsius at Coral Cloud Resorts location for the provided date'
        )
        public Decimal maxTemperature;
        @InvocableVariable(
            description='Description of temperatures at Coral Cloud Resorts location for the provided date'
        )
        public String temperatureDescription;
    }
}
The first thing to notice is the @InvocableMethod annotation for the getWeather method. The two parameters passed in are used in the Create an Agent Action process. The label parameter appears as the Agent Action Label. The description parameter appears as the Agent Action Instructions. Descriptions are important with AI agents and how the agent understands the method.
Then there are two public classes, WeatherRequest and WeatherResponse, that have @InvocableVariable annotations for the Create an Agent Action Input and Outputs respectively.
For WeatherRequest, the @InvocableVariable annotation for dateToCheck, has the required parameter set to true. This forces the Create an Agent Action Require Input configuration to be defaulted as checked. The description parameter will display as the Input Instructions. Also, setting the variable type to Date for dateToCheck sets the Input Data Type.
For WeatherResponse, there are three variables with @InvocableVariable annotation, minTemperature, maxTemperature, and temperatureDescription. Each of these has a description parameter set that gets displayed in the Create an Agent Action Outputs Instructions. Also the variable types, Decimal, Decimal, and String are displayed as Output Rendering. The String variable type will get set as Text for Output Rendering.
Set Up Permissions
Just like any Apex functionality, you need to have the correct access to the Apex file. This step is already done in the custom Dev org you’re using for this badge. The permissions have already been set up, giving the AI agent access to the Apex class containing the Invocable method via a permission set. If it wasn’t, the agent wouldn’t be able to consider it when building a plan even if you created an action and added it to an agent. Lack of proper permission is one of the main reasons why Apex actions don’t work as expected in Agentforce.
You now have a better idea of what is needed for Apex to be used for actions. It’s a bit to take in, but it will make more sense when you build out the action in the next unit.