Define Agent Settings
Learning Objectives
After completing this unit, you’ll be able to:
- Locate and customize agent settings.
- Assign languages to your agent.
- View conversation details in event logs.
- Customize greeting and error messages.
Trailcast
If you'd like to listen to an audio recording of this module, please use the player below. When you’re finished listening to this recording, remember to come back to each unit, check out the resources, and complete the associated assessments.
Customize Agent Settings
Ryan is happy with how his first agent is coming along and wants to learn about other ways he can customize its components and settings to better align the agent with the work Opal Media does, and their client’s expectations. He clicks through the buttons on the left side of the screen to see what he can do with each component.
Component |
Description |
|---|---|
|
Topics: Review topics, add or remove topics, view actions assigned to a topic, and edit topic details and instructions. |
|
Data: Upload documents or knowledge articles to personalize your agent’s interactions. Data 360 is required to use this feature. |
|
Connections: Add your agent to multiple channels and manage their settings. |
|
Context: View and edit variables and session context that power your agent. |
|
Language: Set the default language and other languages your agent can respond with. Change the tone of the conversation to match your business style. |
|
Events: View session data to test or troubleshoot your agent. When you create an agent and check the “Keep a record of conversations with Enhanced Event Logs to review agent behavior” setting, this button lets you see additional details, including the prompt the user entered and the agent’s response. |
|
Checklist: A step-by-step agent readiness checklist so you can make sure your agent is ready to deploy. |


Assign Languages and Tone
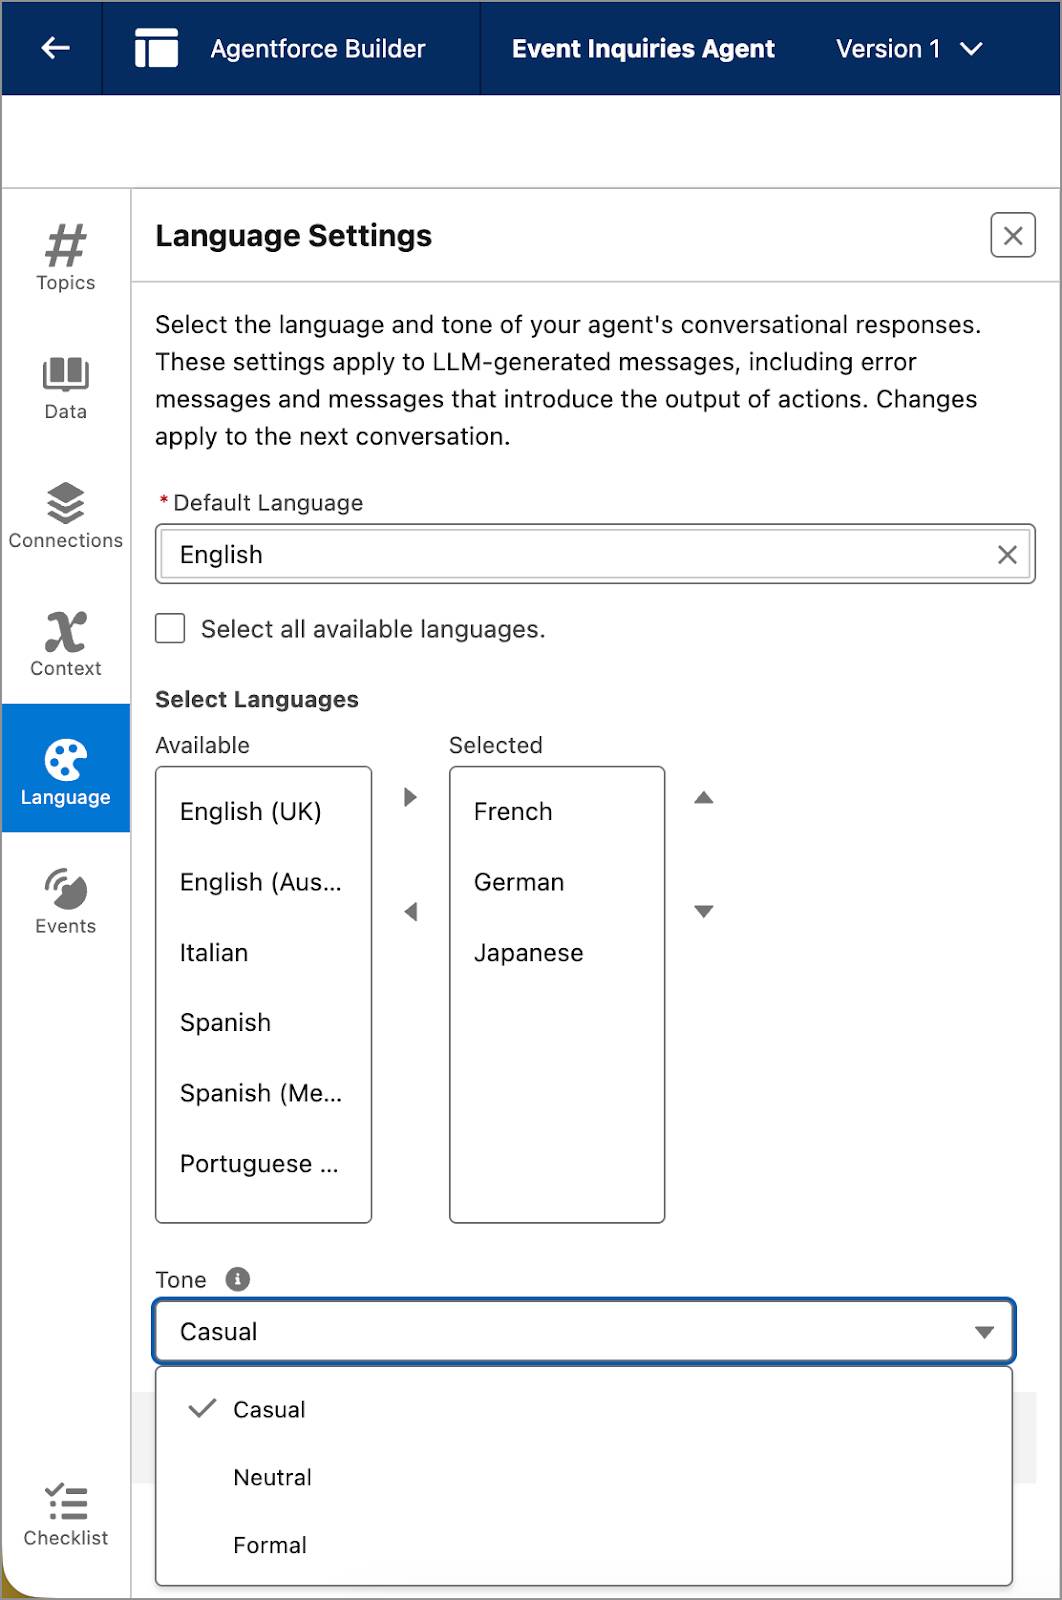
Opal Media regularly works with organizations that put on cultural events or food festivals that use themes from around the world. There are several event planners on the event staff who are bilingual and can converse in German, French, and Japanese. So Ryan wants to give his clients the ability to reach out to his agent using one of these languages.
- Ryan clicks
 to open Language Settings.
- In the Default Language field, he selects English.
- In the Select Languages picker, he clicks French, then he clicks
 to move it to the Selected box.
- He does the same to select German and Japanese.
The team at Opal Media likes to project a relaxed and friendly vibe through its website, advertisements, and social media posts. So Ryan is happily surprised to see that he can change the tone of his agent’s conversation to better match the company's laid-back style.
- In the Tone menu, he selects Casual.
- In the Conversation Preview window on the right, he clicks the Refresh button to apply the changes to the language settings.

Ryan uses a language translation app to translate, “I’d like to plan an event” in each language he selected to check if the agent responds in that language. Since he doesn’t speak or read those languages himself, he’ll ask his colleagues to further test the language responses before he deploys the agent on Opal Media’s website.
View Events
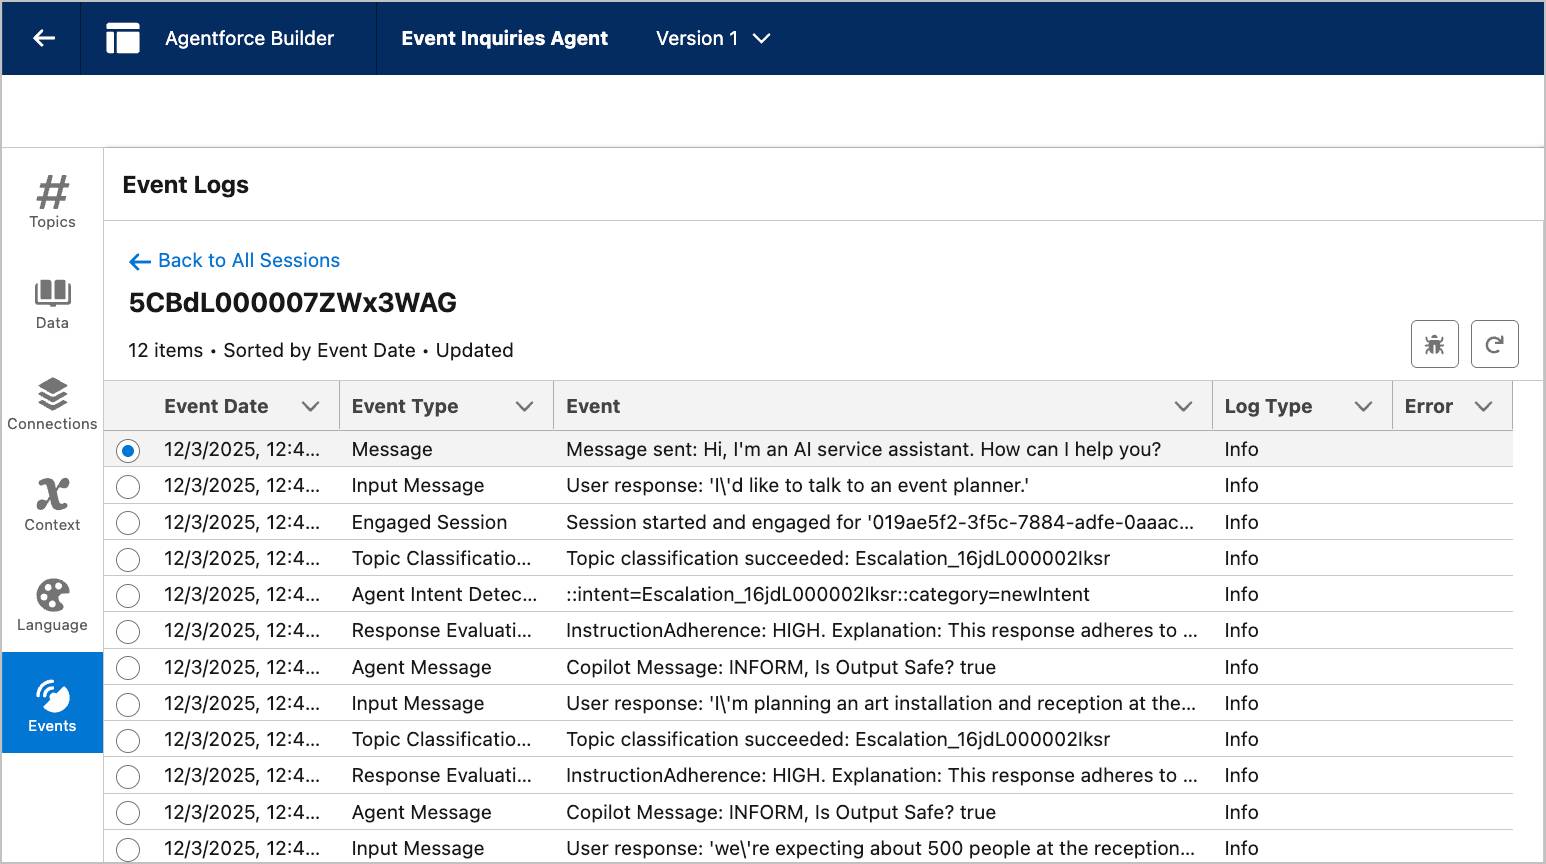
When agents and users converse using Agentforce, data from each conversation is stored in an event log. Event logs can be reviewed to test an agent or to troubleshoot when something didn’t work as expected in a conversation. When Ryan built his agent, he checked a box called “Keep a record of conversations with Enhanced Event Logs to review agent behavior”. By checking this box, he’s able to review session activity and the entire conversation transcript, including the prompts the user types and the agent’s response. Once his agent is deployed, Ryan reviews conversations in the event logs regularly to better understand the types of questions clients ask so he can further customize the agent to respond to more types of requests.
- He clicks
 to open the Events panel.
He clicks a session ID to review each step of the conversation including prompts, timestamps, agent responses, and grounding information.
Customize Greeting and Error Messages
When Ryan previewed his agent in the Conversation Preview window, he thought it sounded too impersonal for something coming from Opal Media. It says “Hi, I’m an AI service assistant. How can I help you?” This message is the standard greeting for all Agentforce Service Agents, which, you might remember, is the agent type Ryan chose for his Events Inquiries Agent. While it’s a friendly enough greeting, Ryan wants his agent to sound more familiar to Opal's clients, and to be more consistent with the casual tone he selected in Language Settings.
- Ryan clicks
 to close Agentforce Builder.
- In Agentforce Studio, at the bottom of the Agentforce Agents screen, he clicks Event Inquiries Agent to open Agent Details. Agent Details contains tabs for some of the details he included when he built his agent, details he just set up, like Language Settings, and a few other tabs that he hasn’t seen before.
- He clicks the System Messages tab.
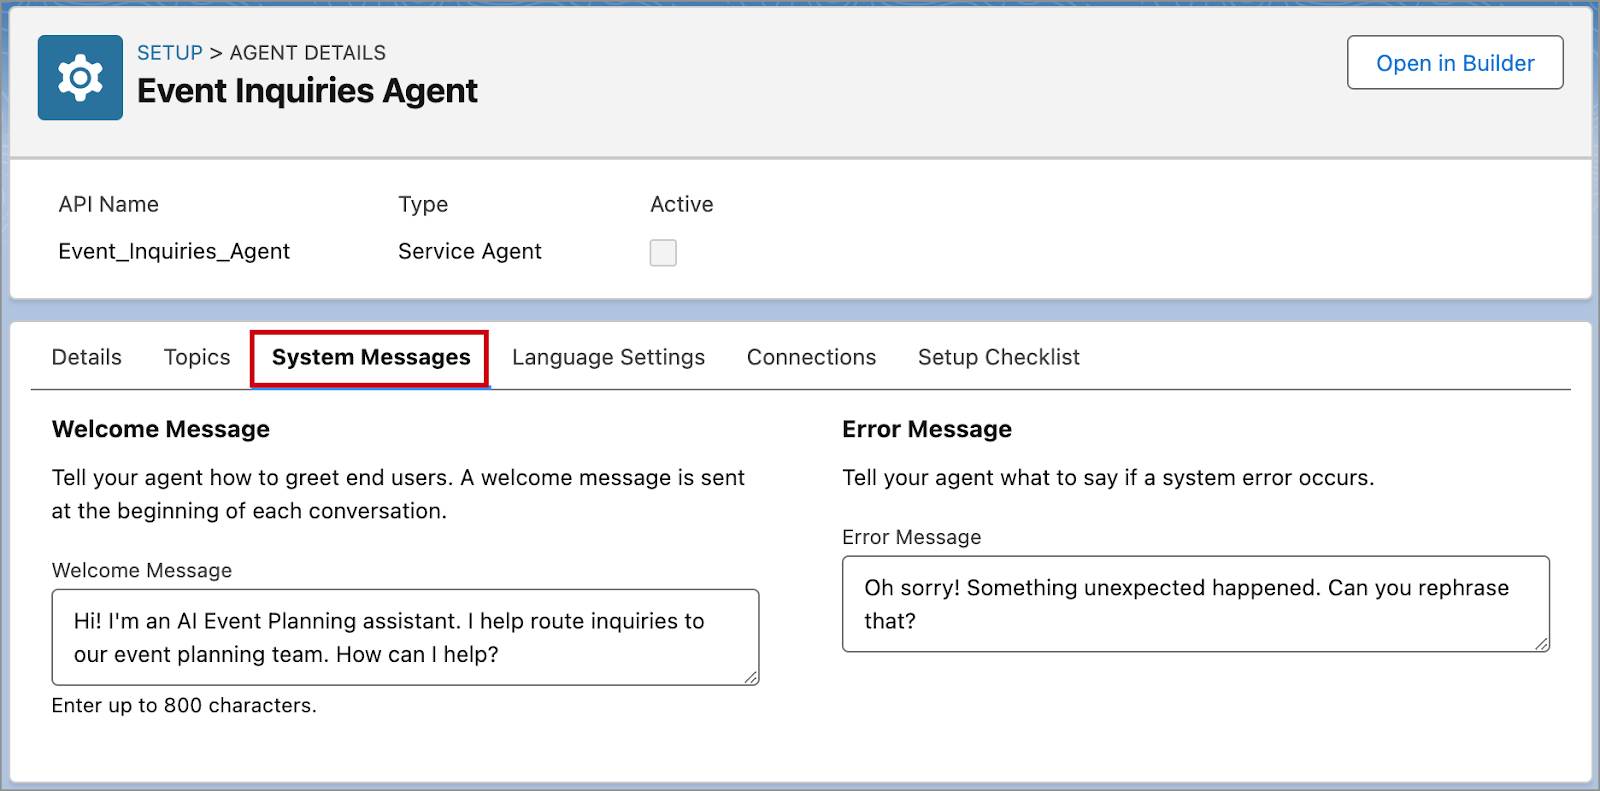
The Welcome Message field has an 800-character limit, and while Ryan doesn’t want to overwhelm his clients with text, he still wants to make sure they know they’re engaging with AI. He comes up with a few sentences that he feels are better aligned with Opal Media’s style.
- In the Welcome Message field, he enters:
Hi! I’m an AI Event Planning assistant. I help route inquiries to our event planning team. How can I help?
- In the Error Message field, he enters:
Oh sorry! Something unexpected happened. Can you rephrase that? - He clicks Save.
- At the top of the screen, he clicks Open in Builder to see the new greeting in the preview window.
Wrap Up
At this point, Ryan would have a bit more work to do to finish customizing his agent before deploying it to Opal Media’s website. Agent building is an iterative process and you can continue to fine-tune topics, instructions, or actions to respond to different types of inquiries or needs that arise over time. For more practice customizing agents, take the Quick Start: Agent Actions Trailhead project to customize an agent with an autolaunched flow action.