Create a Decision Matrix
Learning Objectives
After completing this unit, you’ll be able to:
- Define the subsidy criteria.
- Explain how to create decision matrices from requirements.
Design the Subsidy Criteria
To create a decision matrix, you first define the inputs and outputs.
With the requirements laid out in the previous unit, Jessica creates tables that contain information about how the insurance premium subsidies apply to various applicants.
Zercovana plans to provide subsidies on premiums based on applicant age. Jessica organizes this information in a table called Age Related Subsidy.
Age Related Subsidy | |
|---|---|
|
ApplicantAge
|
Subsidy
|
Below 21 |
0% |
21–35 |
5% |
36–50 |
10% |
Above 50 |
20% |
Create a Decision Matrix
It’s time for Jessica to create a decision matrix based on the information provided in the Age Related Subsidy table.
Access and use your Developer Edition org to complete the steps for hands-on practice.
- Click
 , then find and select Business Rules Engine.
- Click the app navigation menu, and then select Lookup Tables.

- Click New.
- Select Decision Matrix, and then click Next.
- Enter the following details.
- Name:
Age Related Subsidy - Type: Standard
- Click Save.
Add Column Headers to the Decision Matrix
Now, Jessica adds the specific input and output columns using the information in the Age Related Subsidy table. ApplicantAge is the input column that captures the age range, and Subsidy is the output column that captures the subsidy based on the age range.

- On the Age Related Subsidy decision matrix record page, click the Related tab. The decision matrix record automatically includes the first decision matrix version.
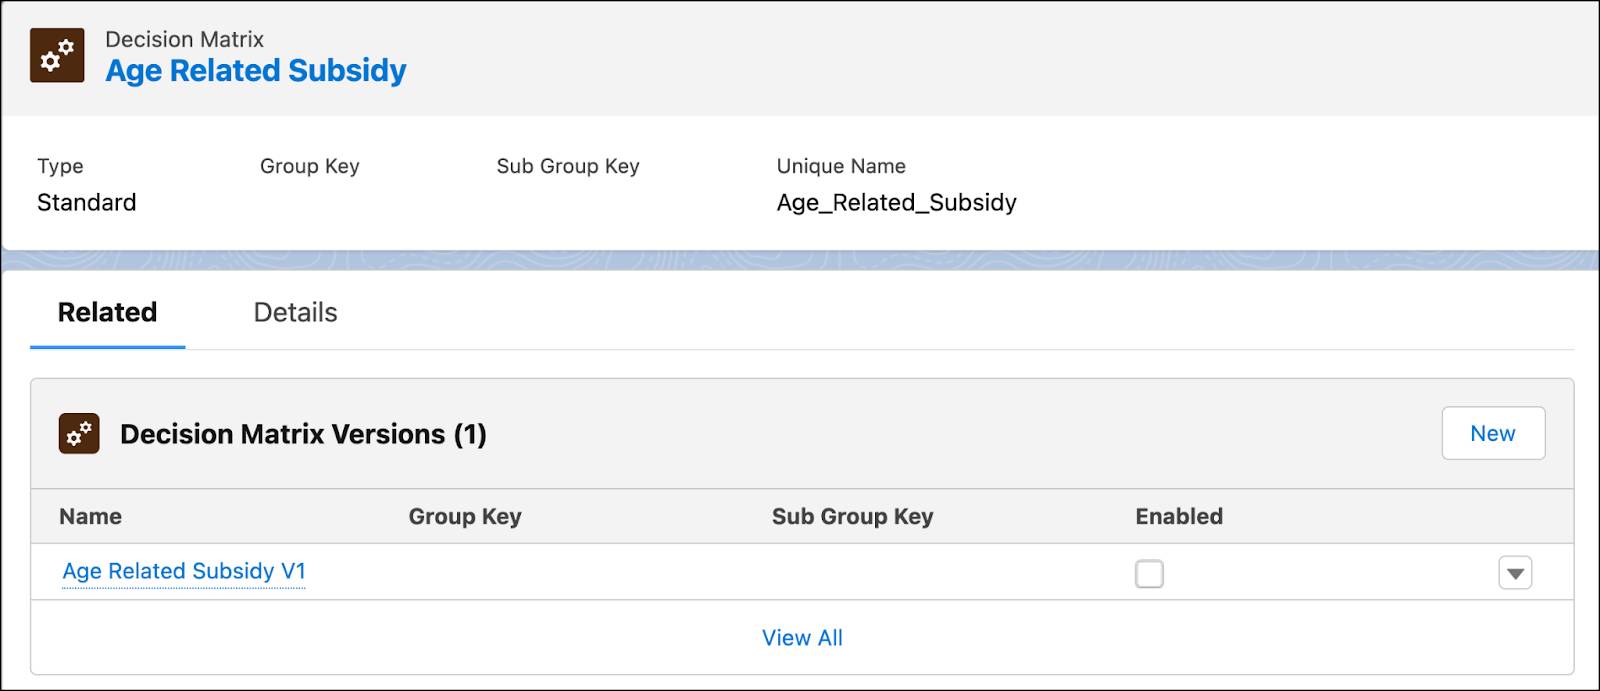
- On the Decision Matrix Versions related list, select Age Related Subsidy V1.
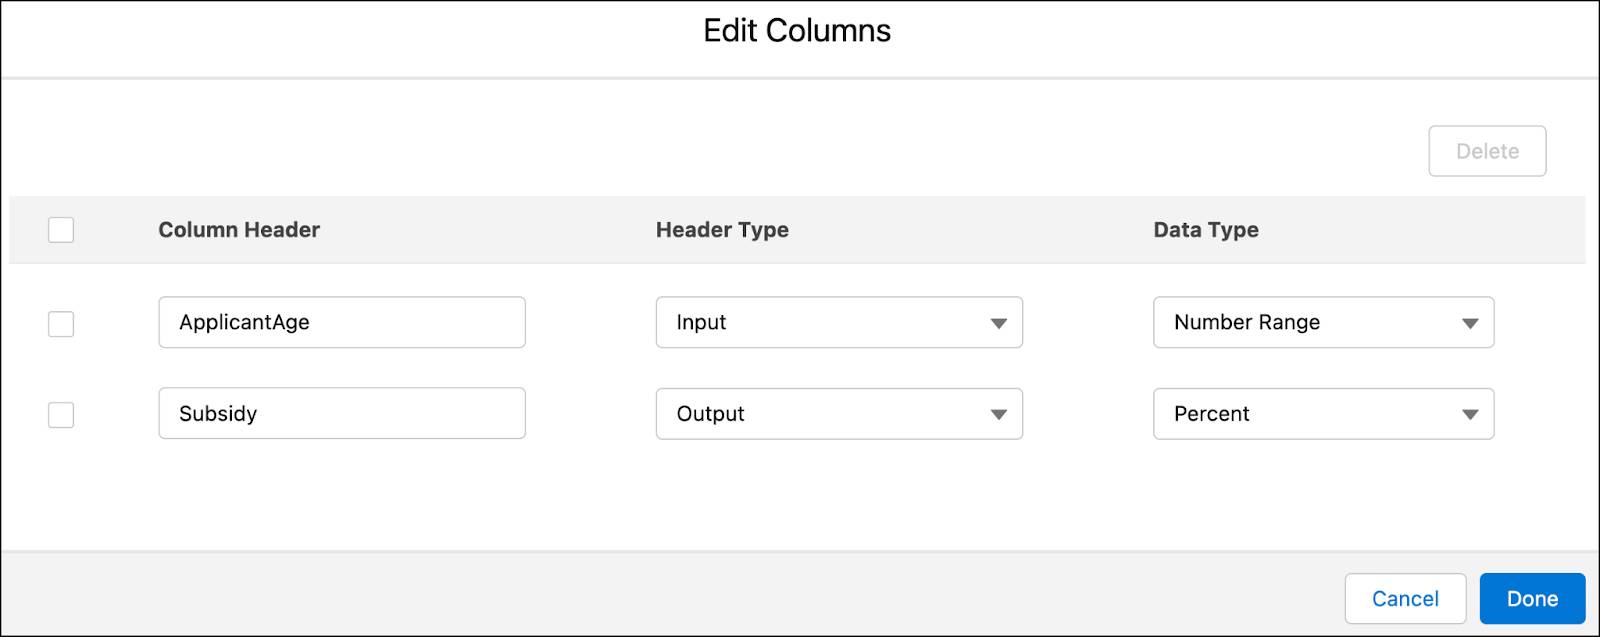
- On the Matrix tab, click Add Column.
- In the Add Column window, enter the following details.
- Column Header:
ApplicantAge - Header Type: Input
- Data Type: Number Range
- Column Header:
- Click Add Column.
- Enter the following details for the second column.
- Column Header:
Subsidy - Header Type: Output
- Data Type: Percent
- Column Header:
- Click Done.
Add Rows and Data to the Decision Matrix
To capture the required data in the Age Related Subsidy table, follow Jessica as she sets up these rows for the age ranges and associated subsidy percentages.
- Row 1: Age 0 to 20 is eligible for a 0% subsidy.
- Row 2: Age 21 to 35 is eligible for a 5% subsidy.
- Row 3: Age 36 to 50 is eligible for a 10% subsidy.
- Row 4: Age 51 and above is eligible for a 20% subsidy.
Complete the next set of steps in your Developer Edition org.
- Click Add Row.
- In the ApplicantAge column, hover over the first row, and click
 .
.
- For applicant age, enter
0.
- In the Subsidy column, hover over the first row, and click
 .
.
- For subsidy percentage, enter
0.
- Click Add Row and enter these details.
- ApplicantAge:
21 - Subsidy:
5
- ApplicantAge:
- Click Add Row and enter these details.
- ApplicantAge:
36 - Subsidy:
10
- ApplicantAge:
- Click Add Row and enter these details.
- ApplicantAge:
51 - Subsidy:
20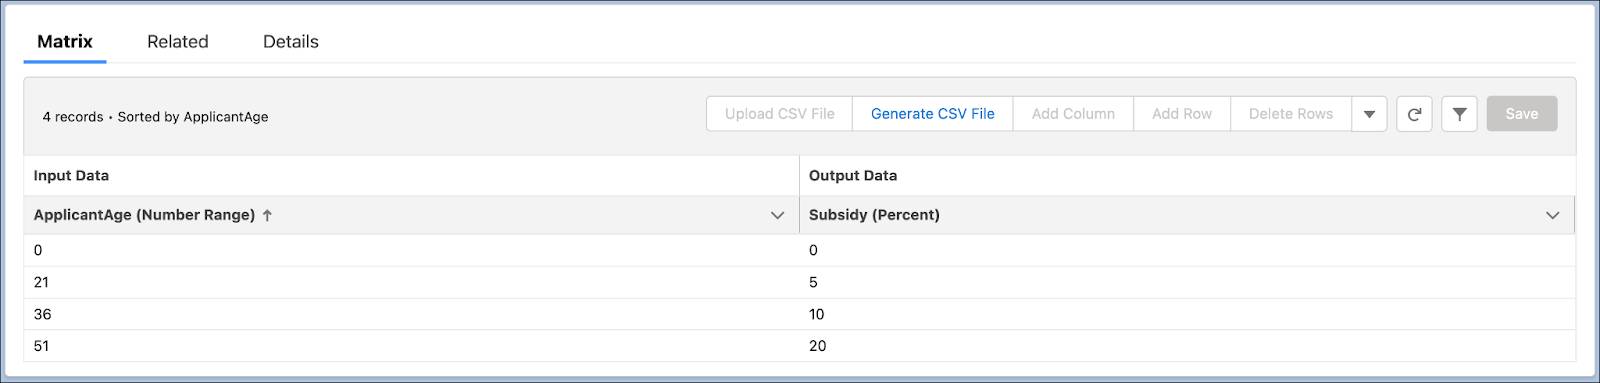
- ApplicantAge:
- Click Save.
- Click Activate.
The decision matrix is active and ready to use.
For more information on how to create number ranges, check out Numeric Ranges in Decision Matrices.
Disability Severity and Veteran Status Subsidy
Citizens with disabilities are eligible for subsidies, according to the proposed policy. The subsidy percentage depends on the severity of the disability as described in Zercovana’s Disability Eligibility Guidance Manual. Jessica remembers that veterans get an additional subsidy of 5%. She combines these two criteria into a single decision matrix.
Here’s the table with both the disability severity and veteran status subsidies included.
|
DisabilitySeverity
|
Veteran
|
Subsidy
|
|---|---|---|
No Disability |
Yes |
5% |
No Disability |
No |
No subsidy |
Mild |
Yes |
10% |
Mild |
No |
5% |
Moderate |
Yes |
15% |
Moderate |
No |
10% |
Severe |
Yes |
20% |
Severe |
No |
15% |
Jessica captures the combined details in a single decision matrix named Additional Subsidy.
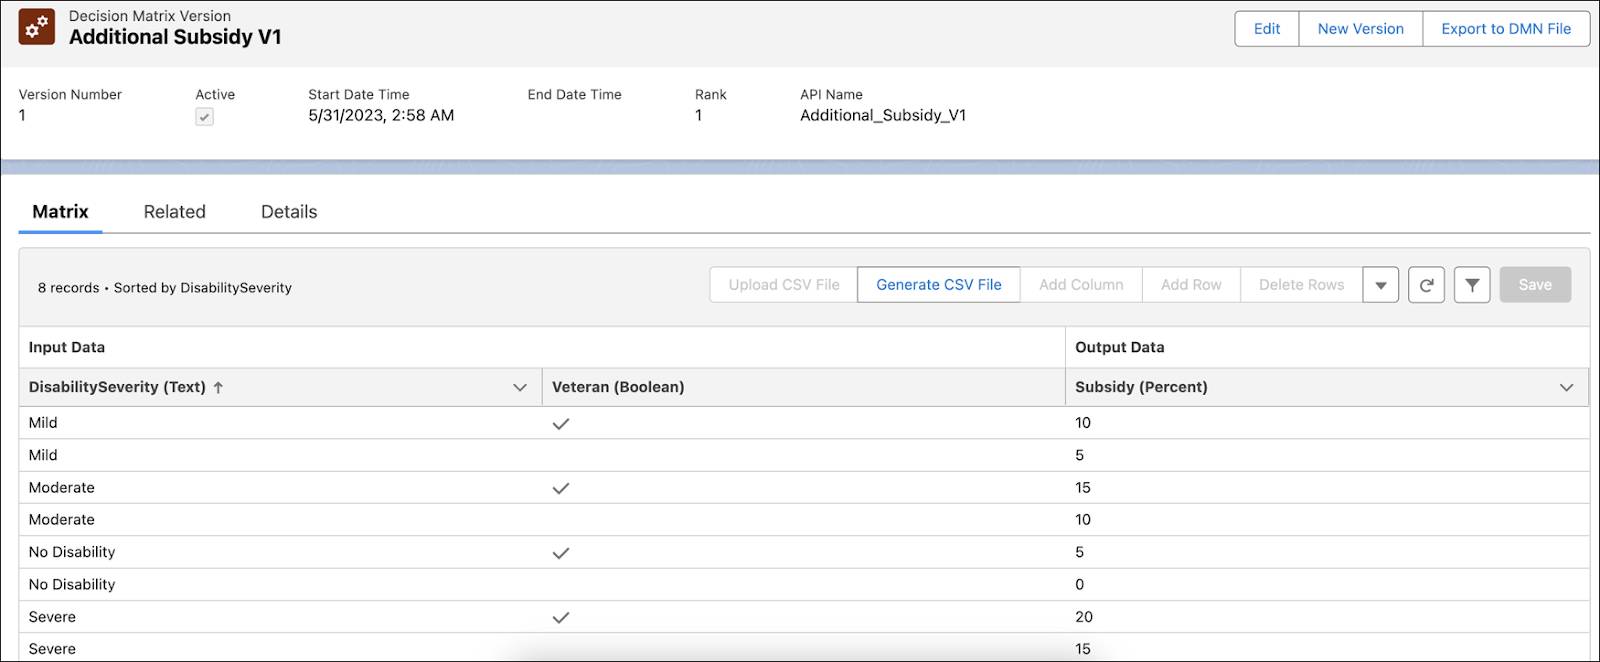
This decision matrix is already created for you in the hands-on org. Here’s how you can view it.
- Click
 and then select Lookup Tables.
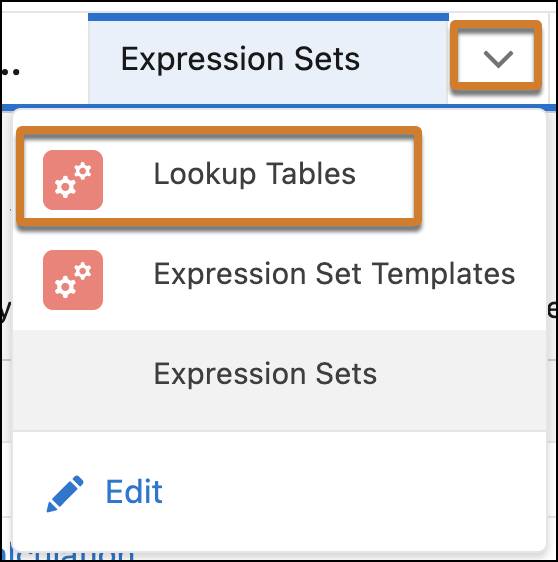
- In the Decision Matrices list view, select All Decision Matrices.
- Click Additional Subsidy.
- Click on the Related tab.
- Select Additional Subsidy V1.
Base Premium
Jessica knows that the yearly base insurance premium is $5,000 for each person and that Zercovana covers up to five dependents. She creates the Base Premium table to model her decision matrix.
|
Dependents
|
Family Premium
|
|---|---|
0 |
$5,000 |
1 |
$10,000 |
2 |
$15,000 |
3 |
$20,000 |
4 |
$25,000 |
5 |
$30,000 |
When customers use the public health portal to apply for health insurance, they specify the number of dependents, and the family insurance premium is referenced from the Base Premium decision matrix.

A decision matrix for this table named Base Premium is already created in the org so you can use it in the hands-on challenge.
What’s Next
In this unit, you saw how Jessica created decision matrices using inputs from the subsidy criteria. In the next unit, you build an expression set to process these inputs.
Resources