Create Your Public Portal
Learning Objectives
After completing this unit, you’ll be able to:
- Discuss the purpose of Experience Cloud sites in Agentforce Public Sector.
- Explain the steps to create the public portal.
- Review additional configuration steps for Public Sector apps and features.
Get to Know Public Sector Experience Cloud Sites
In Agentforce Public Sector, the public portal is a bridge between your agency and the constituents you serve. Through your agency website, constituents can quickly see important, up-to-date information about available services. They can also ask questions, file complaints, submit applications, review the status of requests, and much more.
When constituents submit information through the portal, the data maps to records in your org. This streamlined communication and single source of truth simplifies constituent engagement and accelerates follow-up actions by your agency, including reviews and responses to complaints.
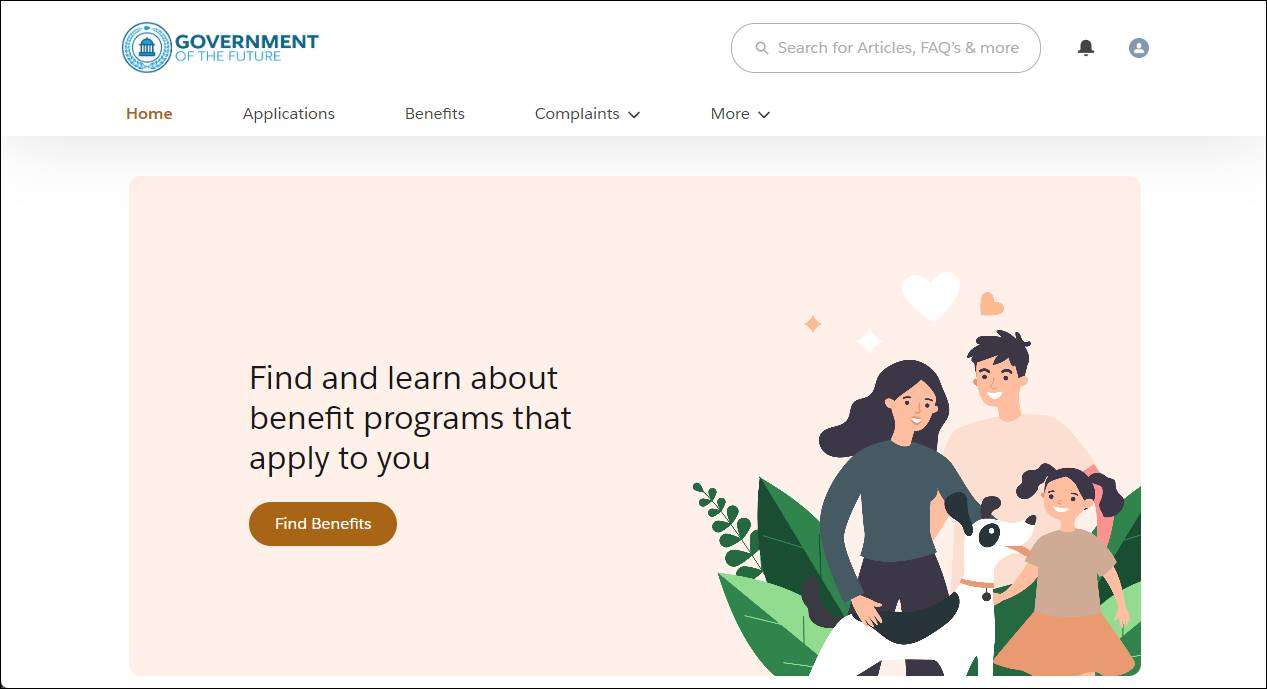
For example, here’s a screenshot of the Benefit Assistance portal, which constituents use to discover and request programs and benefits.
Public Sector includes Experience Cloud site templates to help you quickly set up your own agency portal. The templates support several features, and you can customize them for your agency.
Review the purpose of each Experience Cloud site template in Agentforce Public Sector.
To learn more about these templates and the setup tasks, read the Experience Cloud Sites for Agentforce Public Sector Help article.
Set Up Your Public Portal
Here’s a breakdown of the steps for setting up your public portal using Experience Cloud site templates.
This diagram shows the site-setup workflow.
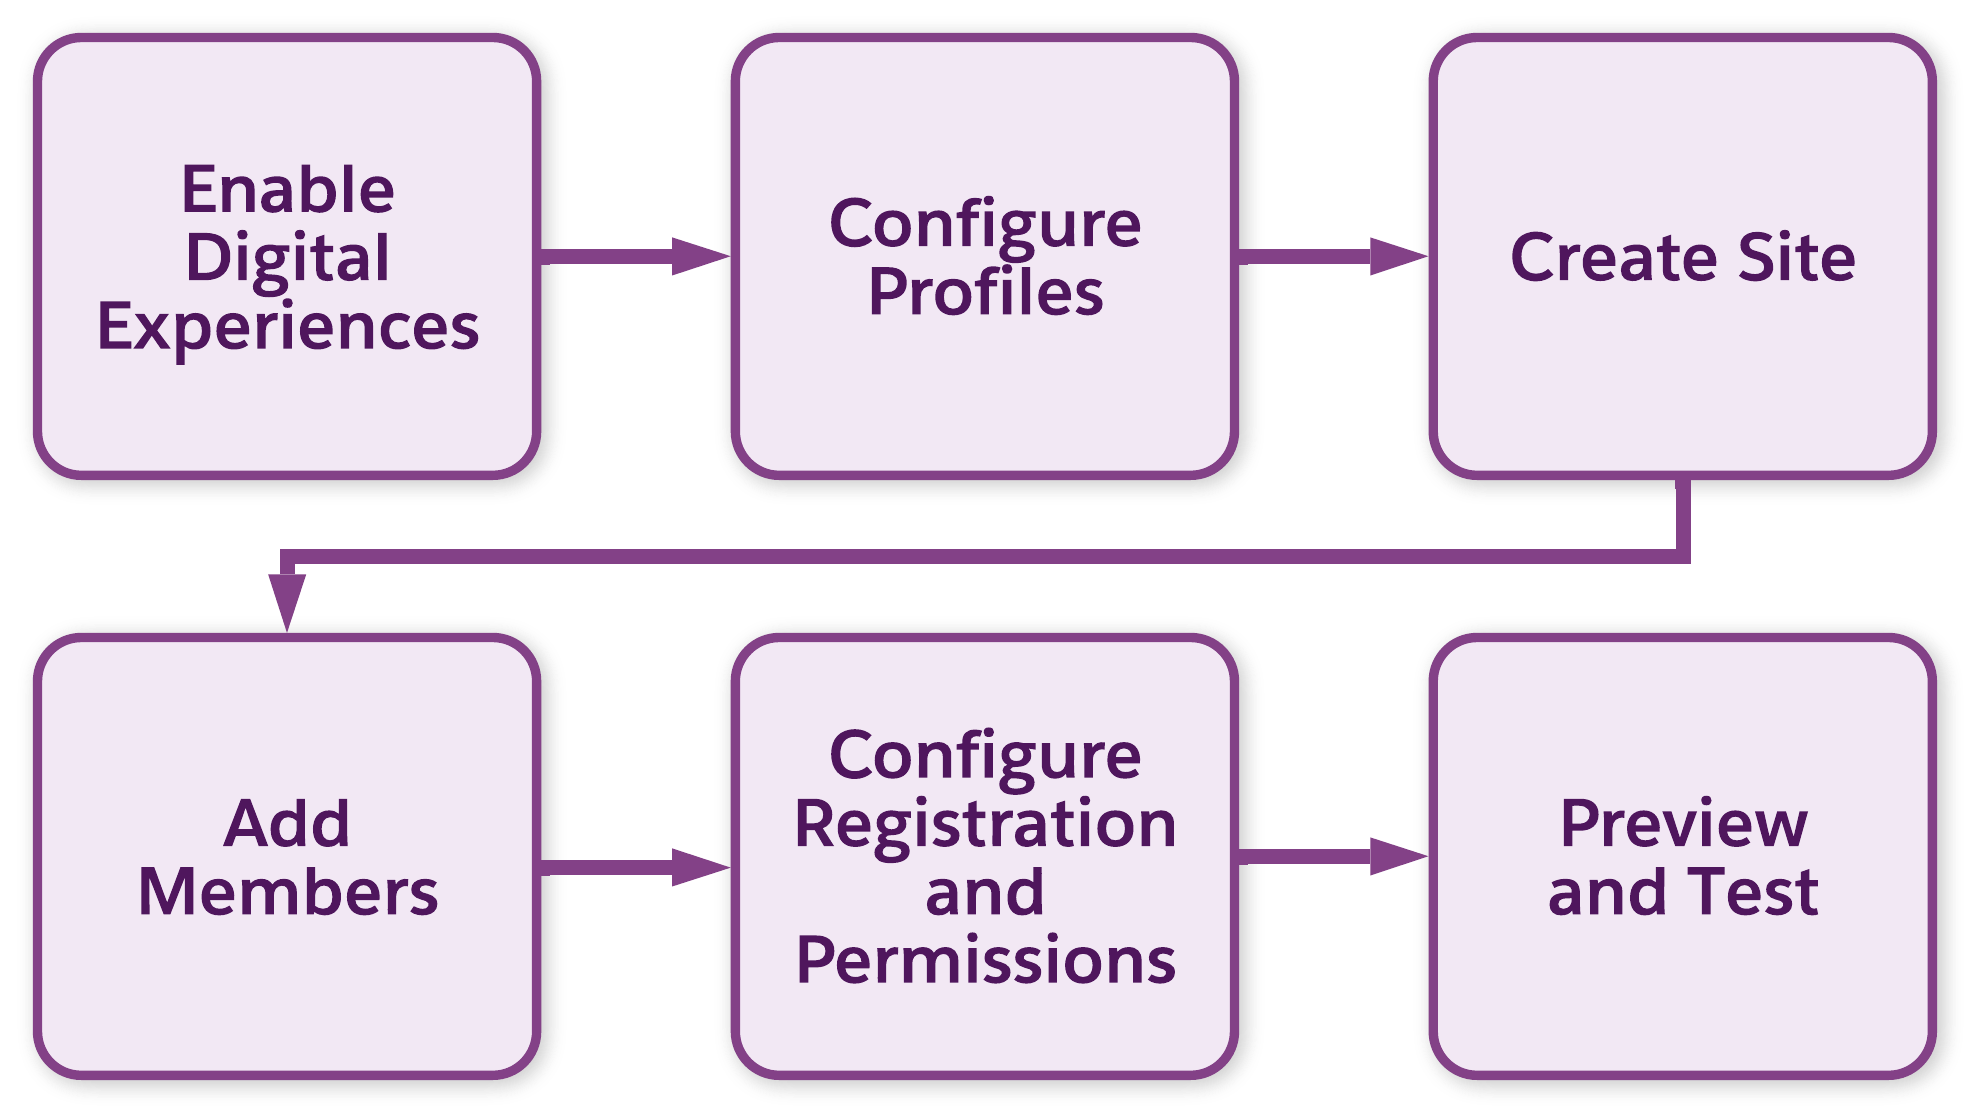
This process involves configuring profiles for users, adding site members, and setting up registration and site-related permissions.
In Cosville, Tishon starts building an online portal for licensing and permitting. Follow along as she sets up the site based on a template.
Enable Digital Experiences and Create a Custom Domain
The first step in creating your Experience Cloud site is to turn on Digital Experiences and configure related settings. You can also configure a custom domain for your agency site. To learn more about Digital Experiences and Experience Cloud, see the link in the Resources section.
Configure Profiles for Site Users
Every Public Sector org includes a Customer Community or Customer Community Plus license and a corresponding profile. Clone and customize the profiles to give site access to internal users and external users, including constituents or partners. For example, Tishon clones the Customer Community User profile and renames the profile to License and Permit Community User. She then configures the system permissions so that constituents can access the site and perform certain tasks, such as filling out application forms.
Create an Experience Cloud Site
Next, create the site from the applicable Experience Cloud template. Tishon uses the Licenses and Permits template to create the Cosville licensing and permitting portal. This template includes pages that constituents use to apply for different types of authorization, review their application statuses, file complaints, and more.
Add Members to Your Public Portal
Add site members based on the custom profile you created, and then activate the site. Members receive a welcome email with a username and a link to change their password.
Configure Self-Registration and Guest User Permissions
Turn on settings so constituents can self-register from the site. Also, configure permissions to control what guest users can see or interact with. In Tishon’s case, she gives her guest users access to licensing, permitting, and inspection features.
Preview and Test the Site
After you configure the site to your agency specifications, preview, test, and then activate the site using Experience Builder. For example, Tishon tests her new portal to see how it looks and functions on desktop and mobile. After making a few tweaks, she activates the site. Soon enough, constituents are using the portal to quickly learn about and apply for the licenses and permits they need to stay in compliance.

Configure Public Sector Apps and Features
After performing the initial org configuration steps you’ve learned in this module, you’re well on your way to creating a fully functional Public Sector org. All that’s left is to configure the specific apps and features that can help your agency streamline everyday processes, such as Licensing and Permitting, Benefit Management, Provider Management, or Investigative Case Management.
To get started setting up these tools, explore the different assistants in Guided Setup and review the Help articles in the Agentforce Public Sector Documentation. There, you can learn how to turn on app and feature settings, set up record types and related lists, configure automation, and perform other setup tasks to accelerate your daily operations.
Lastly, set up CRM Analytics to view important operational data to help guide decisions for your agency. To learn more, complete the CRM Analytics for Agentforce Public Sector Trailhead module.
Congratulations, admin! The first step on your Public Sector journey is now complete. As you begin to roll out this solution to users, discover just how quickly this combination of transformative tools drives success for your agency.
Resources
- Salesforce Help: Agentforce Public Sector Documentation
- Salesforce Help: Experience Cloud Sites for Agentforce Public Sector
- Salesforce Help: Set Up and Configure Your Org for Experience Cloud Sites
- Salesforce Help: Build an Employee Site for Talent Recruitment Management in Agentforce Public Sector
- Salesforce Help: Build a Career Site for Talent Recruitment Management in Agentforce Public Sector
- Trailhead: CRM Analytics for Agentforce Public Sector