Set Up Emissions Forecasting and Calculate Emissions Forecasts
Learning Objectives
After completing this unit, you’ll be able to:
- Set up permissions.
- Enable emissions forecasting related features.
- Create an account.
- Add business metric values.
- Run DPE jobs Initialize Emissions Forecasts and Calculate Emissions Forecasts.
Forecasting for the First Time
To set up forecasting in Net Zero Cloud and generate forecasts, Safiya must do the following.
- One-time setup tasks:
- Assign permission set licenses and permission sets to admin users.
- Enable Advanced Account Forecasting and Data Pipelines.
- Enable forecasting-related features.
- Activate DPE job templates.
- Create an account.
- Check availability of the annual emissions inventory and science-based target records.
- Forecast generation tasks:
- Run the Initialize Emissions Forecasts job.
- Add business metric values.
- Run the Calculate Emissions Forecasts job.
Safiya recalls configuring some of these settings when she set up Net Zero Cloud but she must still confirm if they’re set up. Let’s follow along as Safiya sets up forecasting and generates forecasts for the first time.
Assign Permission Set Licenses and Permission Sets
In this module, we assume you’re a Salesforce admin with the proper permissions to configure Net Zero Cloud. If you’re not a Salesforce admin, that’s OK. Read along to learn how your admin would take the steps in a production org. Don’t try to follow the steps in a Trailhead Playground. Net Zero Cloud isn't available in the Trailhead Playground.
Safiya first checks whether she has the permission set licenses and permission sets that are required for forecasting.
- From Setup, in the Quick Find box, search for and select Users.
- Click Rees, Safiya.
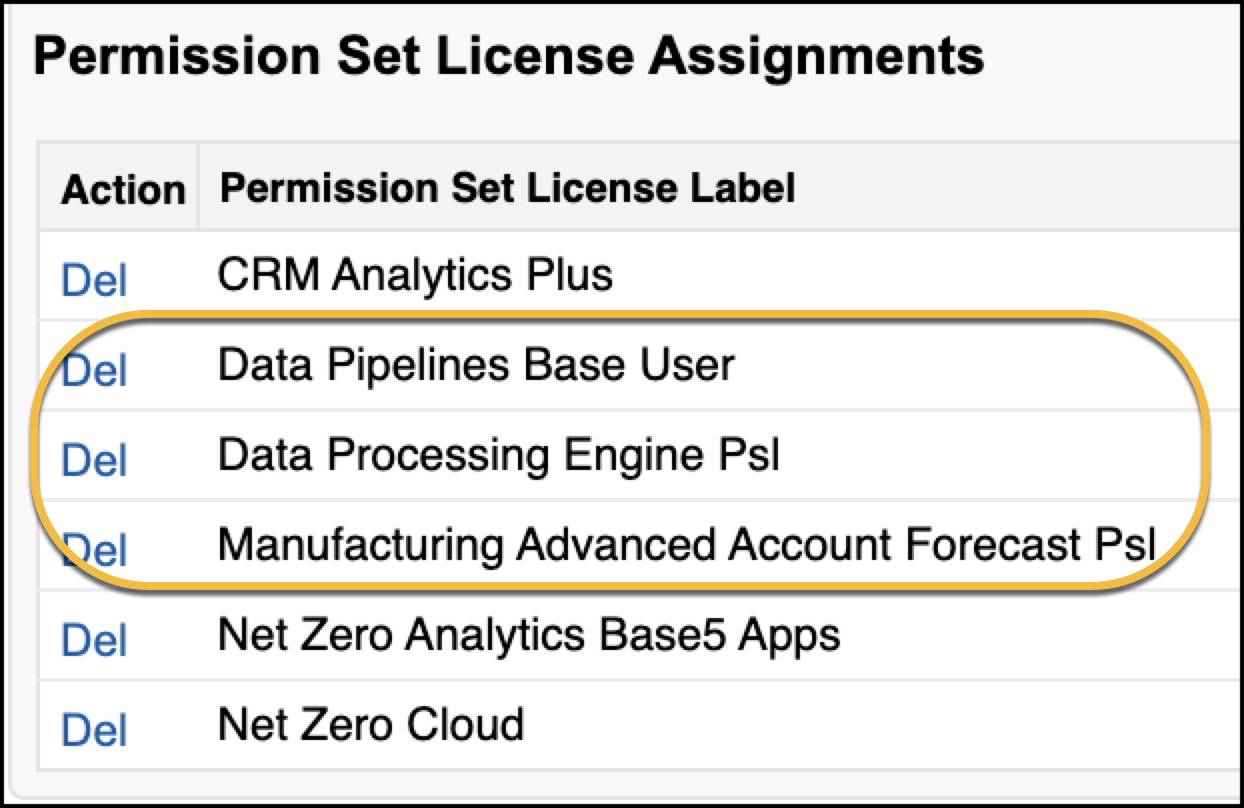
- Click Permission Set License Assignments and ensure that the following permission set licenses are listed. If not, click Edit Assignments, select the missing licenses, and click Save.
- Data Pipelines Base User
- Data Processing Engine Psl
- Manufacturing Advanced Account Forecast Psl
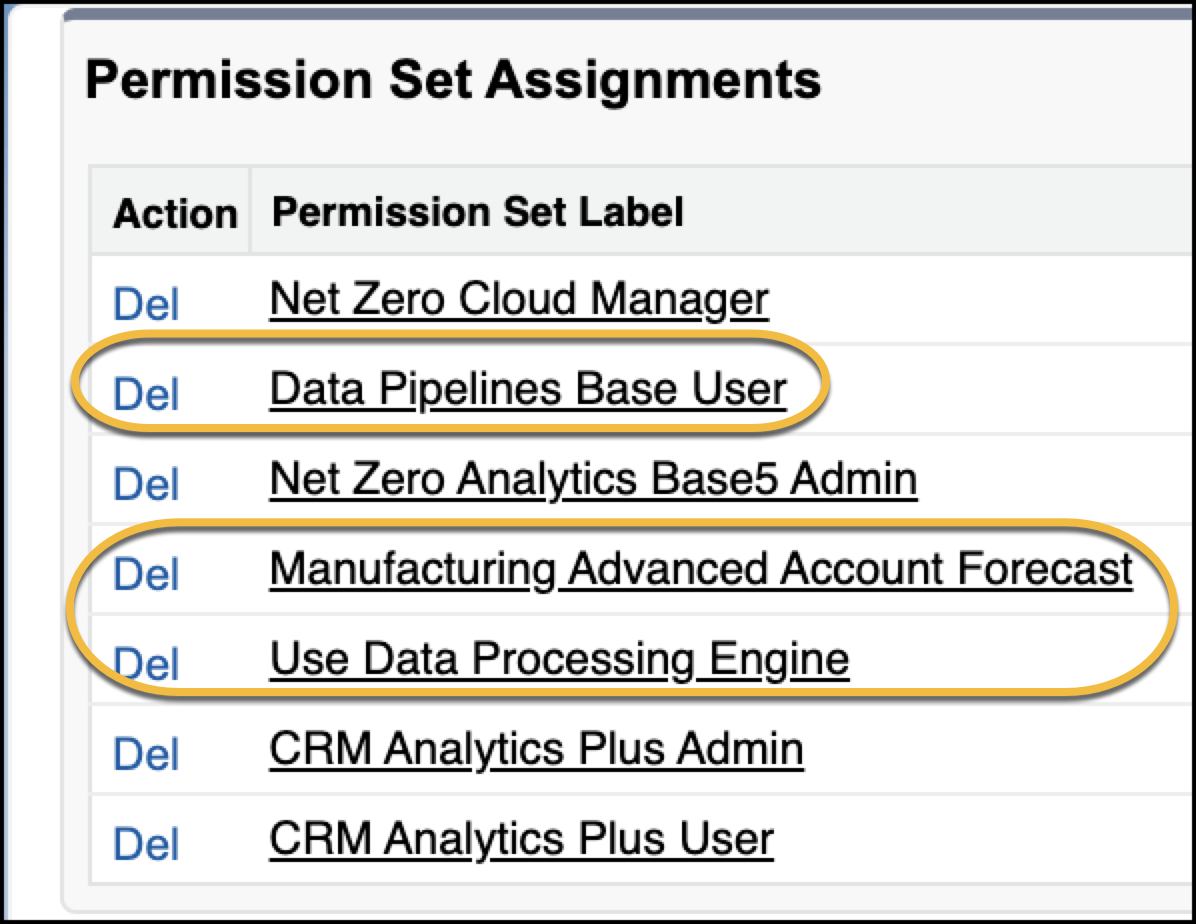
- Click Permission Set Assignments and ensure that the following permission sets are listed. If not, click Edit Assignments, and assign them.
- Data Pipelines Base User: Allows admin users to customize and use DPE definitions.
- Manufacturing Advanced Account Forecast: Enables users to track emissions forecasts for measures across multiple dimensions.
- Use Data Processing Engine: Allows users to to transform data using the Data Processing Engine.
For Sam to be able to access the forecasting grid, Safiya does the following.
- Clone the Net Zero Cloud Manager permission set and enable Modify All permission on the Emissions Forecast Facts object.
- Clone the Manufacturing Advanced Account Forecast permission set and enable View All permission on the Advanced Account Forecast Set Partner object.
- Assign the cloned permission sets to Sam.
For more information, see Set Object-Level Permissions for the Net Zero Objects.
Enable Advanced Account Forecasting
With the permissions in place, Safiya enables Advanced Account Forecasting and Data Pipelines.
- From Setup, in the Quick Find box, search for and select Advanced Account Forecasting.
- Enable Advanced Account Forecasting.
- Click Activate for Sample Emissions Forecast Set.

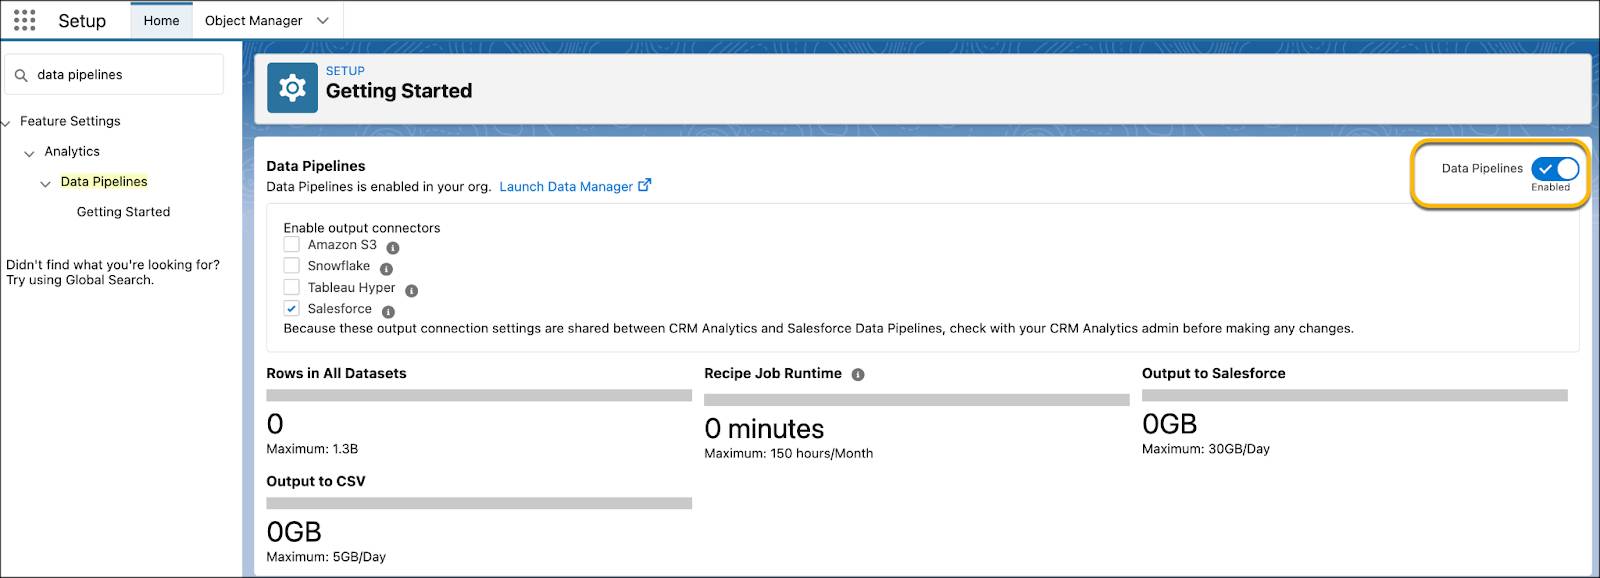
- In the Quick Find box, enter
data pipelinesand then under Data Pipelines, select Getting Started. - Enable Data Pipelines.
Enable Forecasting-Related Features and DPE Job Templates
Next, Safiya checks whether Manage Emissions Target and Manage Carbon Emissions Forecast are enabled in the org.
- From Setup, search for and select Net Zero Settings.
- Ensure Manage Emissions Target and Manage Carbon Emissions Forecast are enabled. The Manage Emissions Target feature allows Sam to create the annual emissions inventory, which is a prerequisite for forecasts.
Certain DPE job templates must be active and ready for use for forecasting. Safiya checks whether the org has an active copy of the templates.
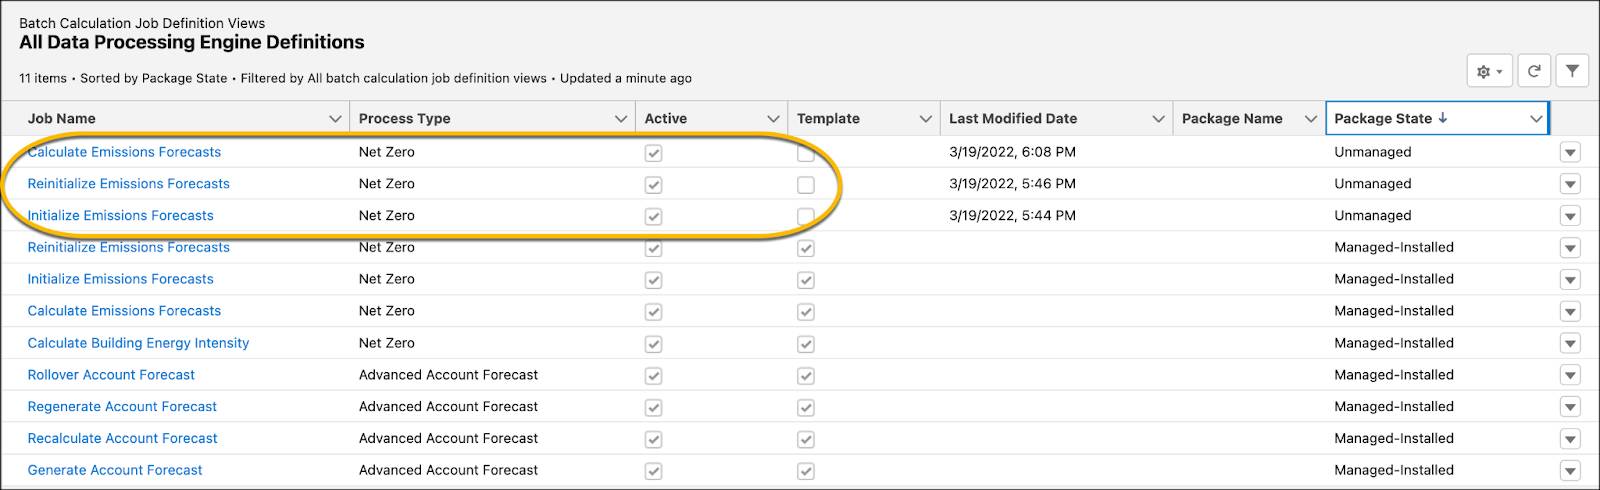
- From Setup, in the Quick Find box, search for and select Data Processing Engine.
- Ensure that for each of the following job templates, a corresponding active copy exists.
- Calculate Emissions Forecasts
- Initialize Emissions Forecasts
- Reinitialize Emissions Forecasts
- If an active copy doesn’t exist, do the following for each template.
- Click the job template to open it.
- Click Save As.
- Enter a different name.
- Click Save.
- Click Activate.
Create an Account
Safiya must create an account for NTO. While the account isn’t used in any calculations, all forecast records are associated with the account. Here’s what she does.
- From the App Launcher, search for and select Accounts.
- Click New.
- Enter an account name:
NTO. - Click Save.
Check Annual Emissions Inventory and Science-Based Target Records
Safiya proactively checks whether the annual emissions inventory record for the previous year exists.
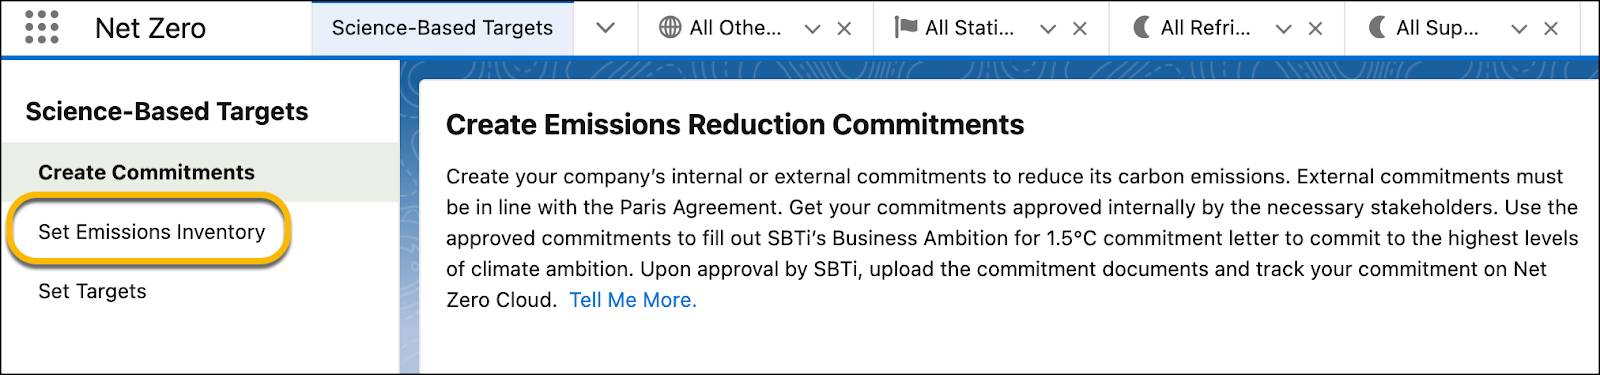
From the Lightning Console dropdown list on the Net Zero Cloud app, select Science-Based Targets, and navigate to Set Emissions Inventory.
Safiya confirms that an annual emissions inventory record for the previous year exists.
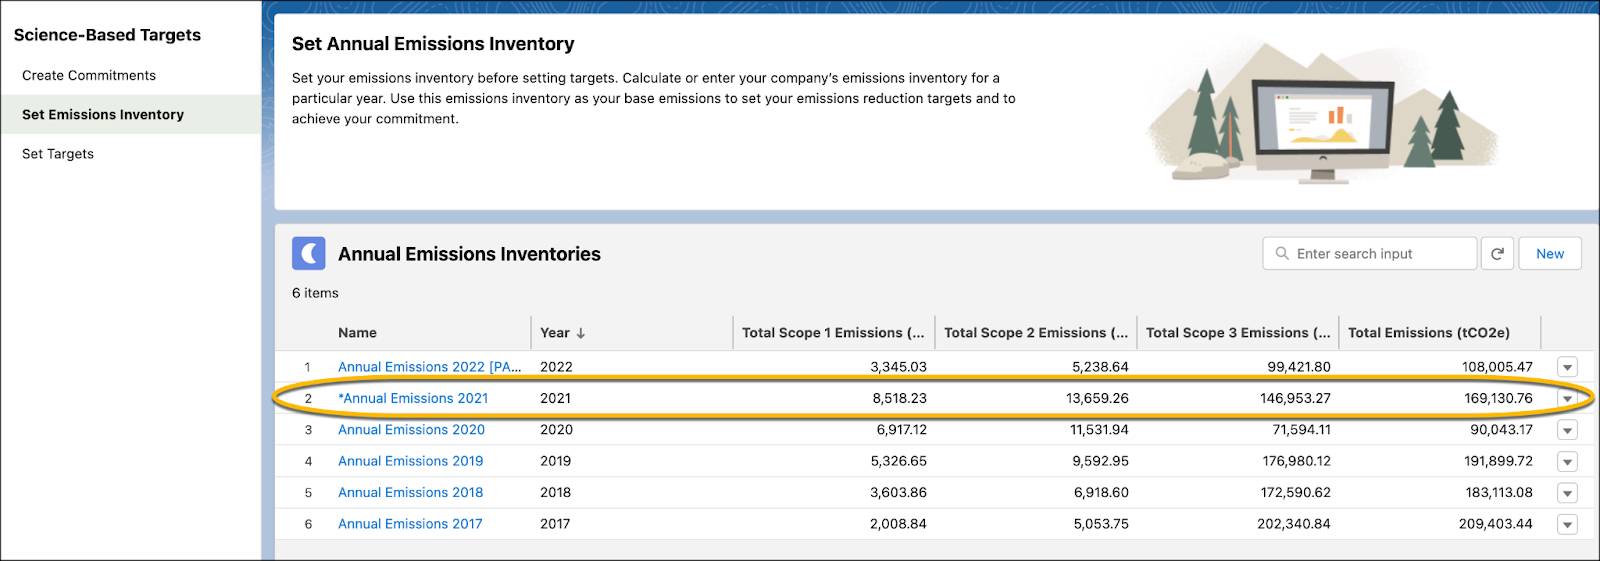
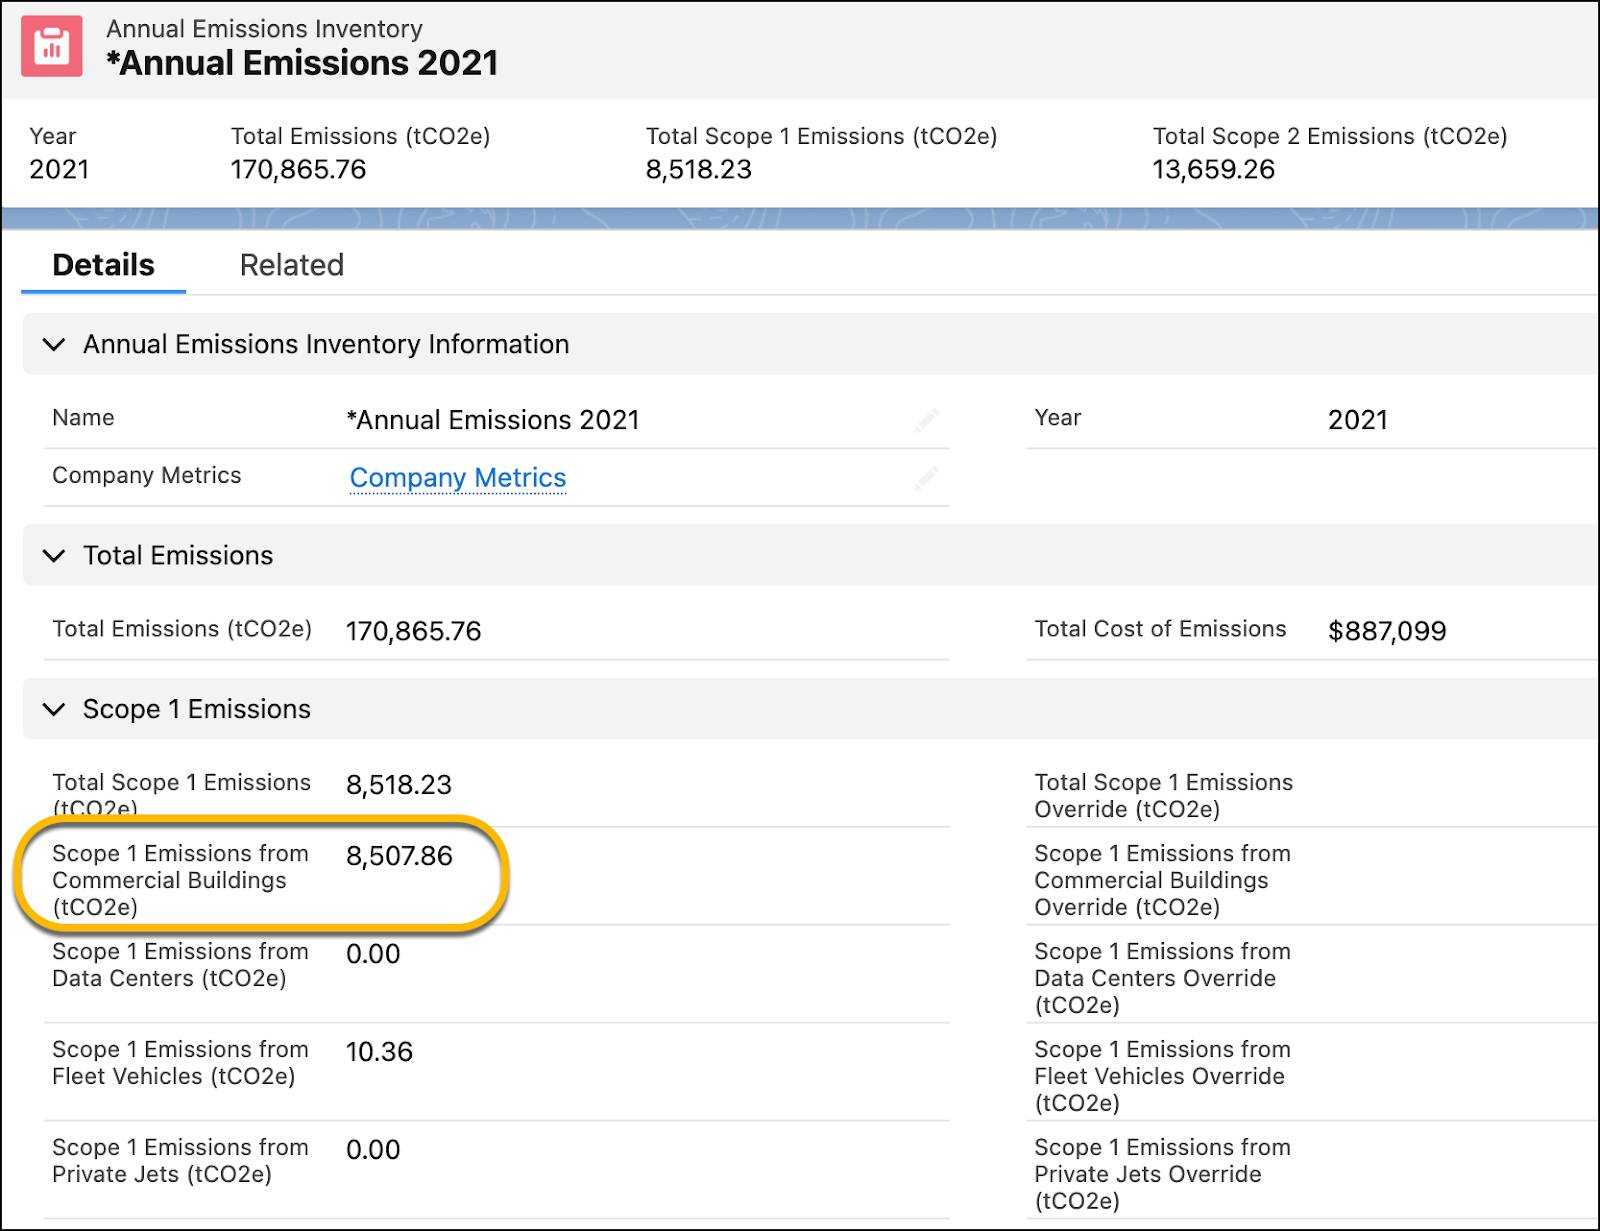
Actual emissions for each emissions activity are retrieved from specific fields within the annual emissions inventory record. For example, actual emissions for Scope 1 Stationary Asset - Commercial Building for the year 2021 is derived from the field named Scope 1 Emissions from Commercial Buildings.
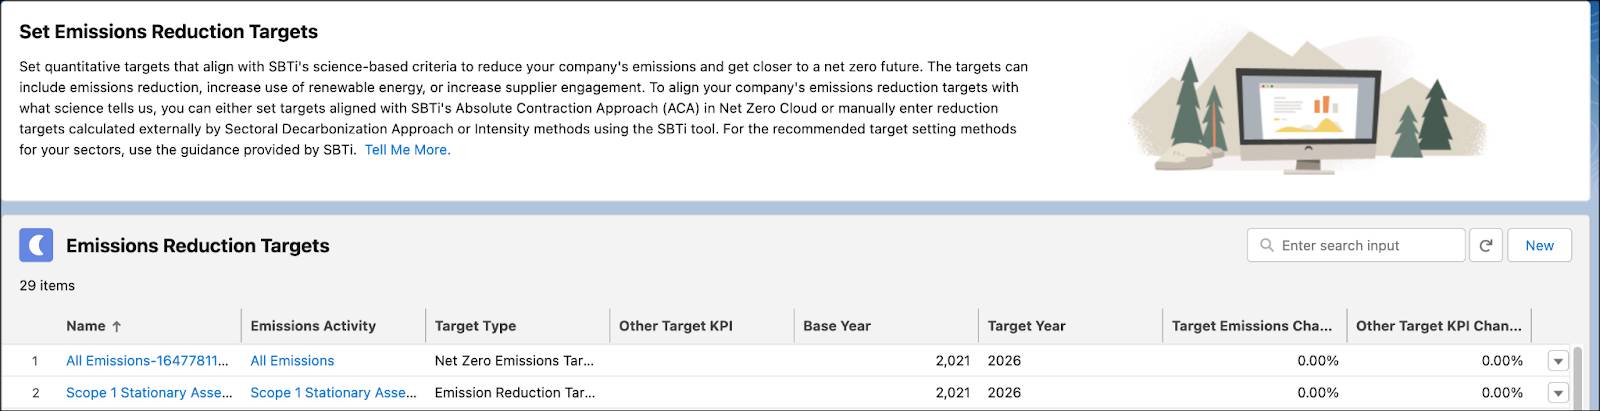
Then, Safiya clicks Set Targets to verify the following science-based target records.
- Because Sam wants to compare the forecasts with targets, Safiya checks whether an emissions reduction target record exists.
- To calculate carbon credit requirements, Safiya confirms a target for All Emissions and of Net Zero Emissions Target type.
For more information about setting inventory and science-based targets, see Science-Based Target Setting and Emissions Forecasting with Net Zero Cloud..
Run the Initialize Emissions Forecasts Job
To prepare emissions forecast fact records and create the forecasting grid, Safiya runs the Initialize Emissions Forecasts job.
- From Setup, in the Quick Find box, search for and select Data Processing Engine.
- Click the active copy of the Initialize Emissions Forecasts DPE job template.Tip: To identify the template copy, check the Package Status. It should be Unmanaged.
- Click Run Definition.
- Provide the account and forecast set name, and click Run Definition.
The job takes some time to complete. Safiya reviews the status of the job from the Monitor Workflow Services page in Setup.
After the job completes, an Advanced Account Forecast Set partner record is created, which is the entry point into the forecasting grid.
Add Business Metric Values
Safiya proceeds to add business metric values manually.
- From the Lightning Console dropdown list on the Net Zero Cloud app, select Advanced Account Forecast Set Partners.
- Click the latest and active Advanced Account Forecast Set partner record that was automatically created when the Initialize Emissions Forecast job was run. The Advanced Forecast page is displayed.
- Per emissions activity, edit the business metric for a year, and enter the value.

- Similarly, enter values for business metrics across the years in the forecasting period, and click Save.

You can also upload business metric values using a CSV file that contains the values. Use the standard Salesforce REST or Bulk API to import this CSV file data into the forecasting grid. For more information, see the Platform API Basics module.
Run the Calculate Emissions Forecasts Job
Finally, Safiya runs the active copy of the Calculate Emissions Forecasts job to generate emissions forecasts and populate the forecasting grid with the results.
To automate the run of this job, Safiya can create a flow. For detailed instructions, see Use Flows to Calculate Emissions Forecasts.
Safiya has completed the setup and generated the forecasts. But Sam has one more request.
Create a Measure Group
While the out-of-the-box measure groups are good enough, Sam wants to view only user-editable measures together. So Safiya creates a measure group to meet his needs.
- From Setup, in the Quick Find box, search for and select Advanced Account Forecasting.
- For the Sample Emissions Forecast Set, click Edit.
- Click Deactivate.
- Scroll down to expand Forecast Measure Groups.
- Click New.
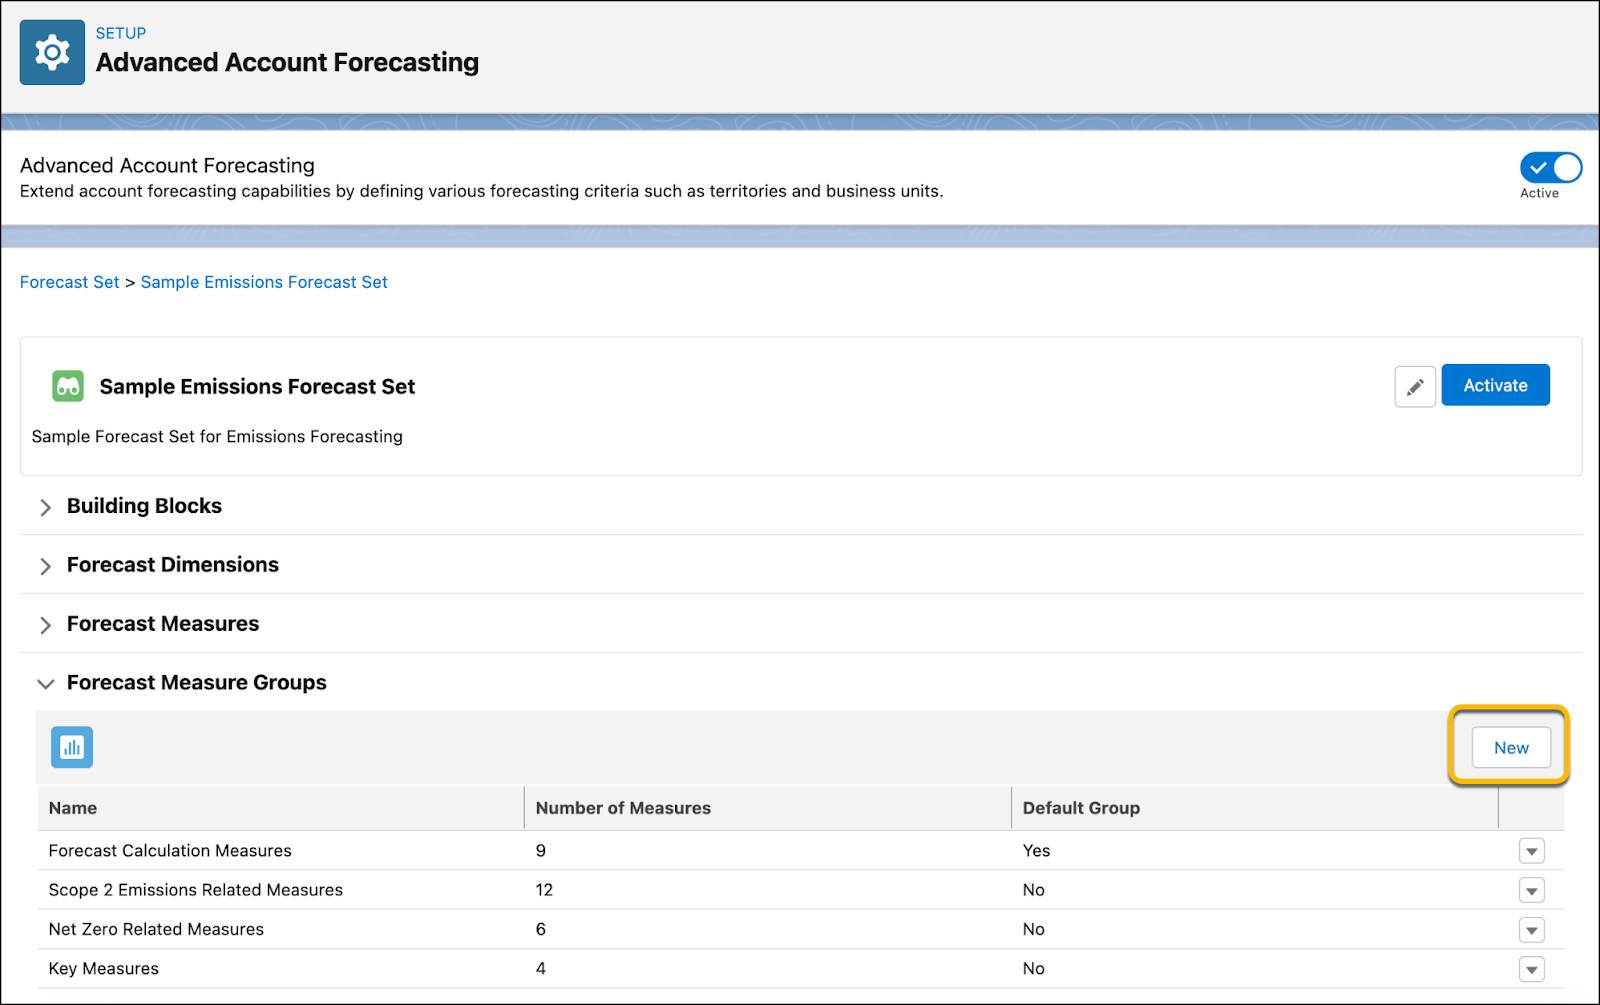
- Enter a name:
Forecast Adjustment Measures. - Select the measures to be added to the measure group and click Save. The Forecast Measure Groups list shows the newly added measure group.
- Click Activate.
In this unit, we saw how Safiya set up and started emissions forecasting. Let’s follow along as Sam reviews the results in the next unit.